Workflow Example 1
Create workflow definition
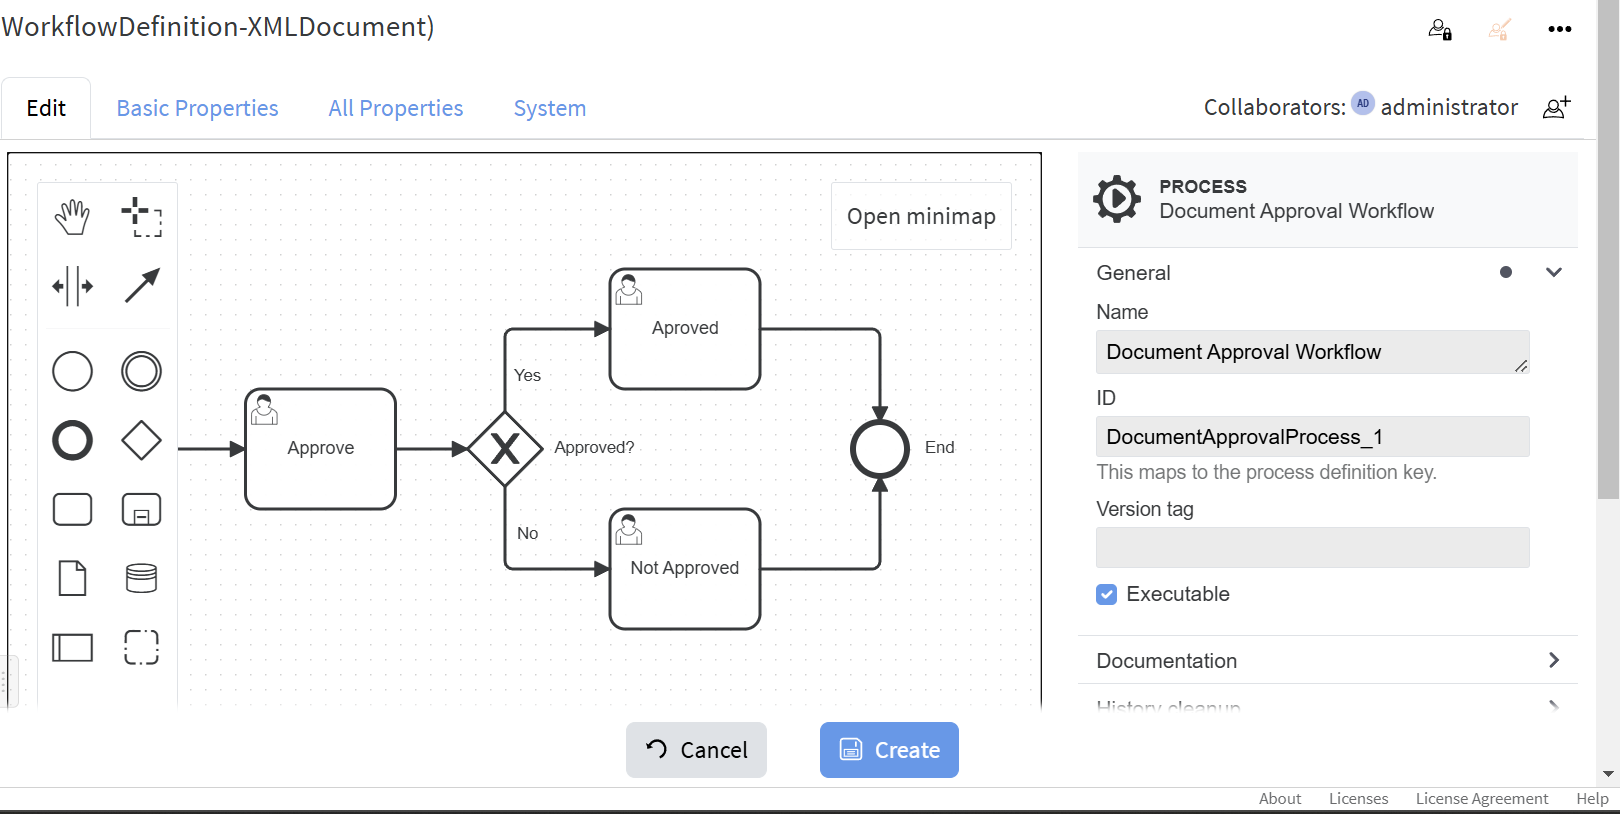
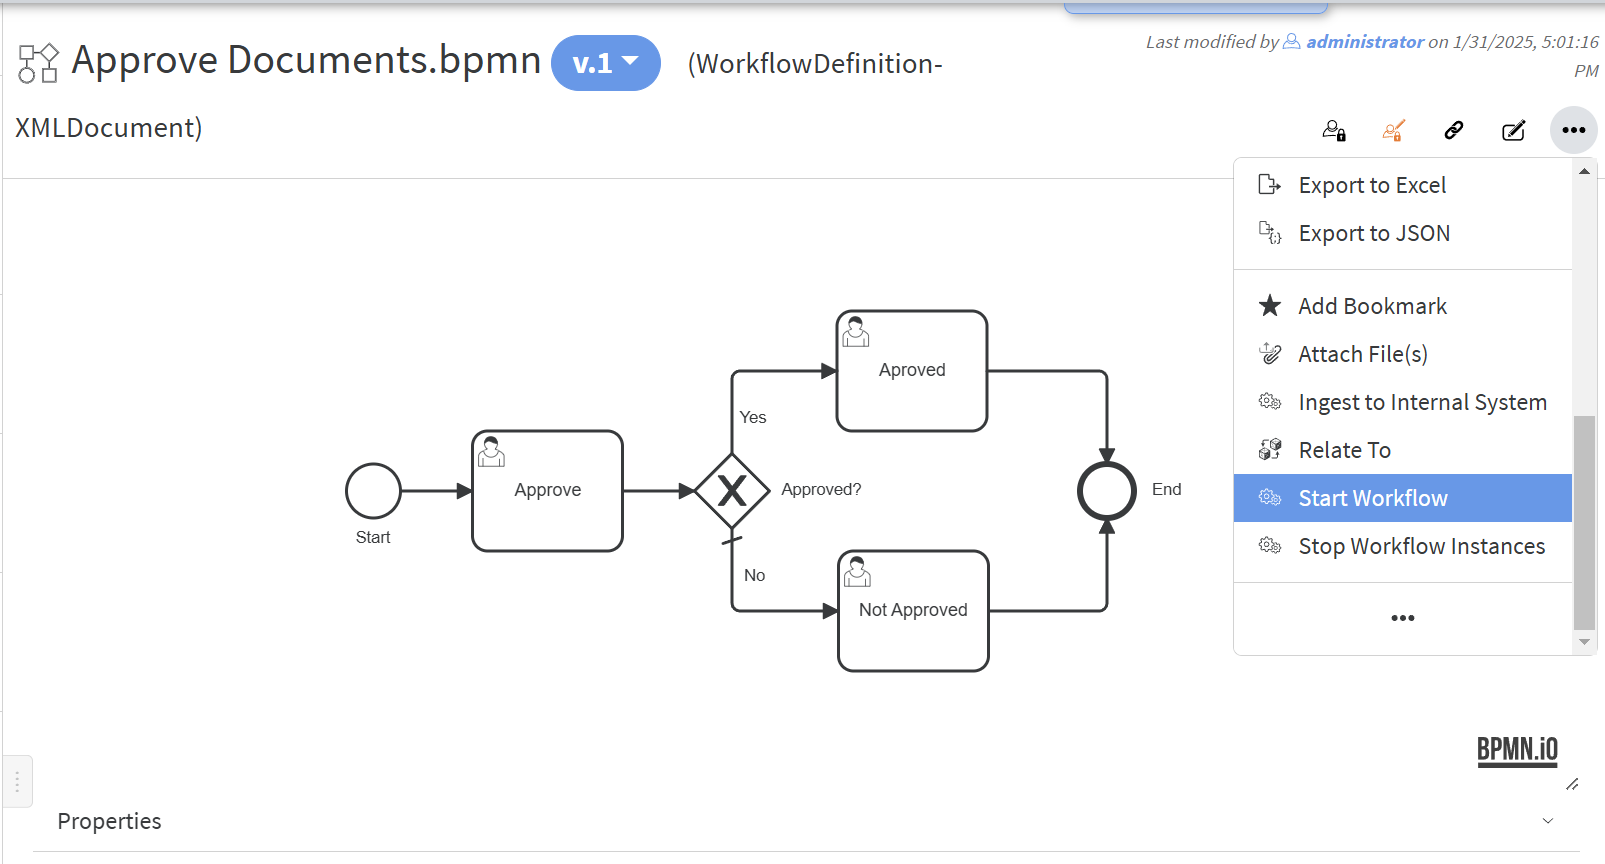
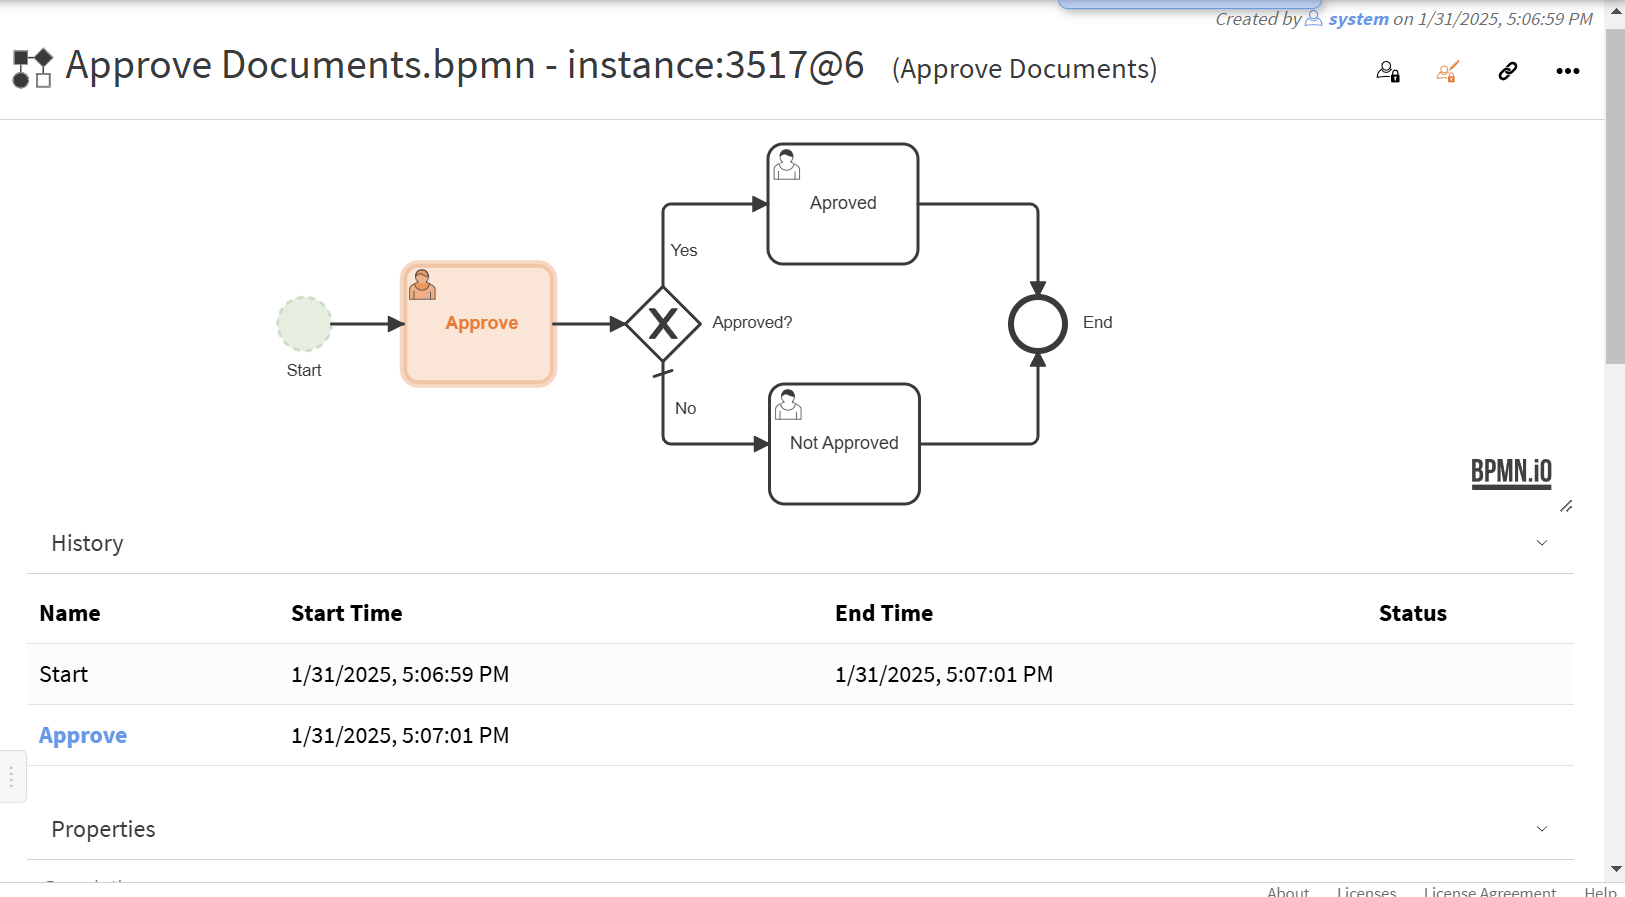
Let create a simple workflow for document approval. Its process will look linelike this:
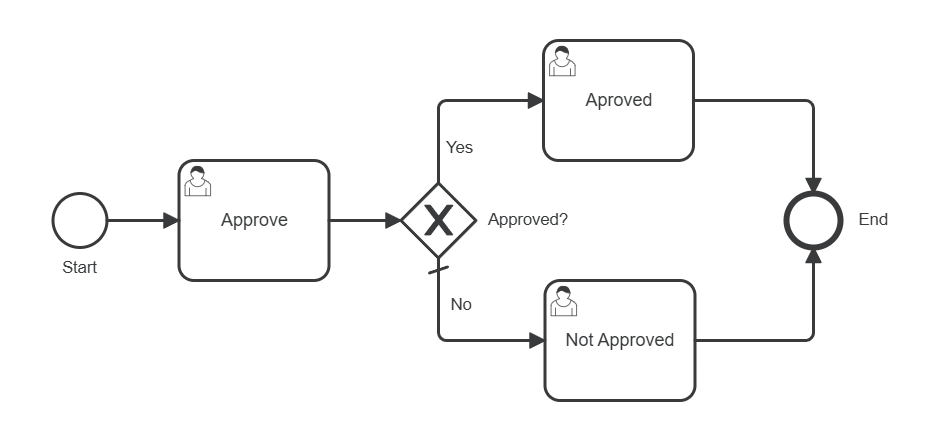
It will be started manually with either some provided documents for approval or it will prompt for the documents to be used for approval. The next stemstep goes to a user responsible for the selected documentsdocuments' approvals. The next step after that is a decision gateway - it checks if the documents are approved or not. If they are approved the flow goes to the Approved user task step, which are assigned to the approval requested user. In not, it goes to the "Not Approved" user task. After the corresponding last step is completed the process end.ends.
Follow these steps to create this workflow:
- We will need a custom workflow instance type and two types of workflow tasks: Workflow Approve Task and Workflow Approval Done Task.
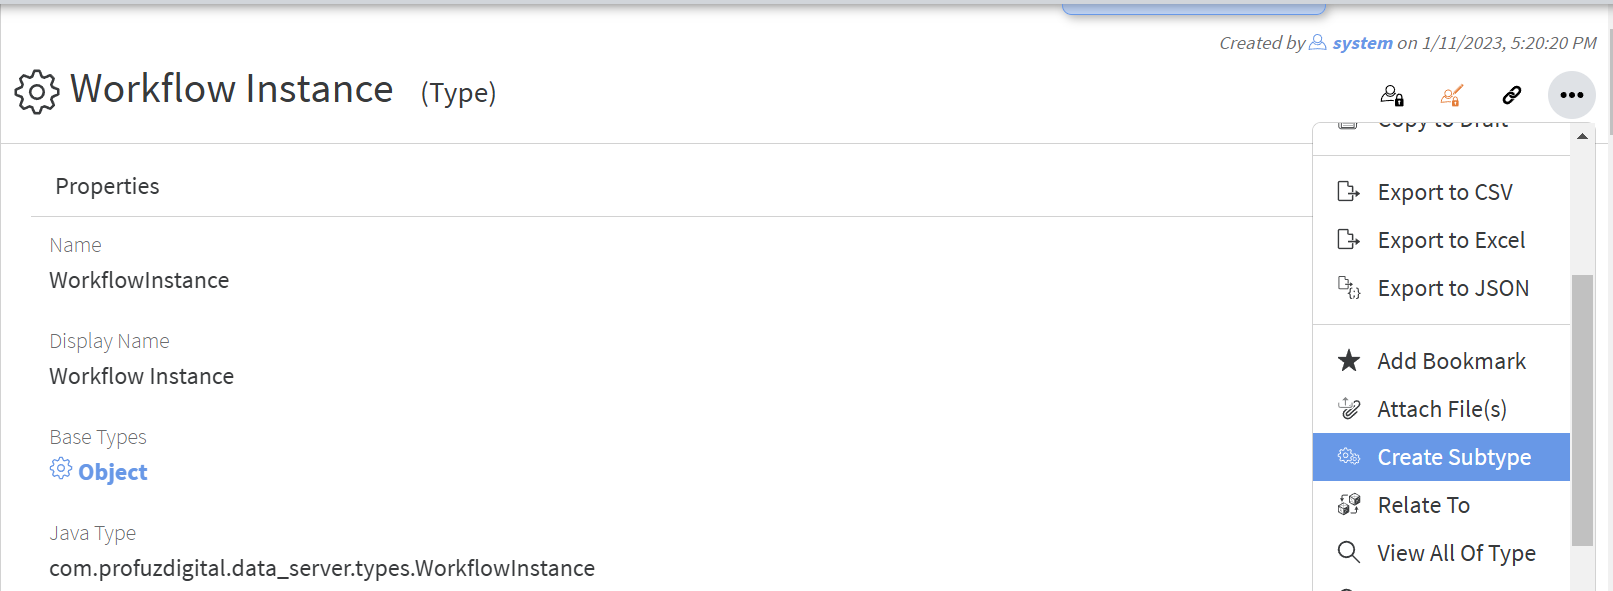
- For this go to Administration/Types and search for workflow instance:
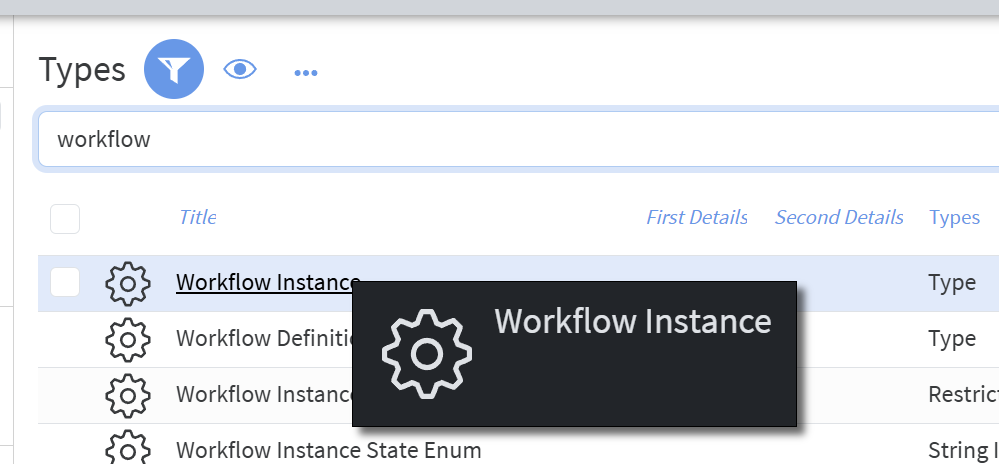
- Click on it and from there execute "Create Subtype":

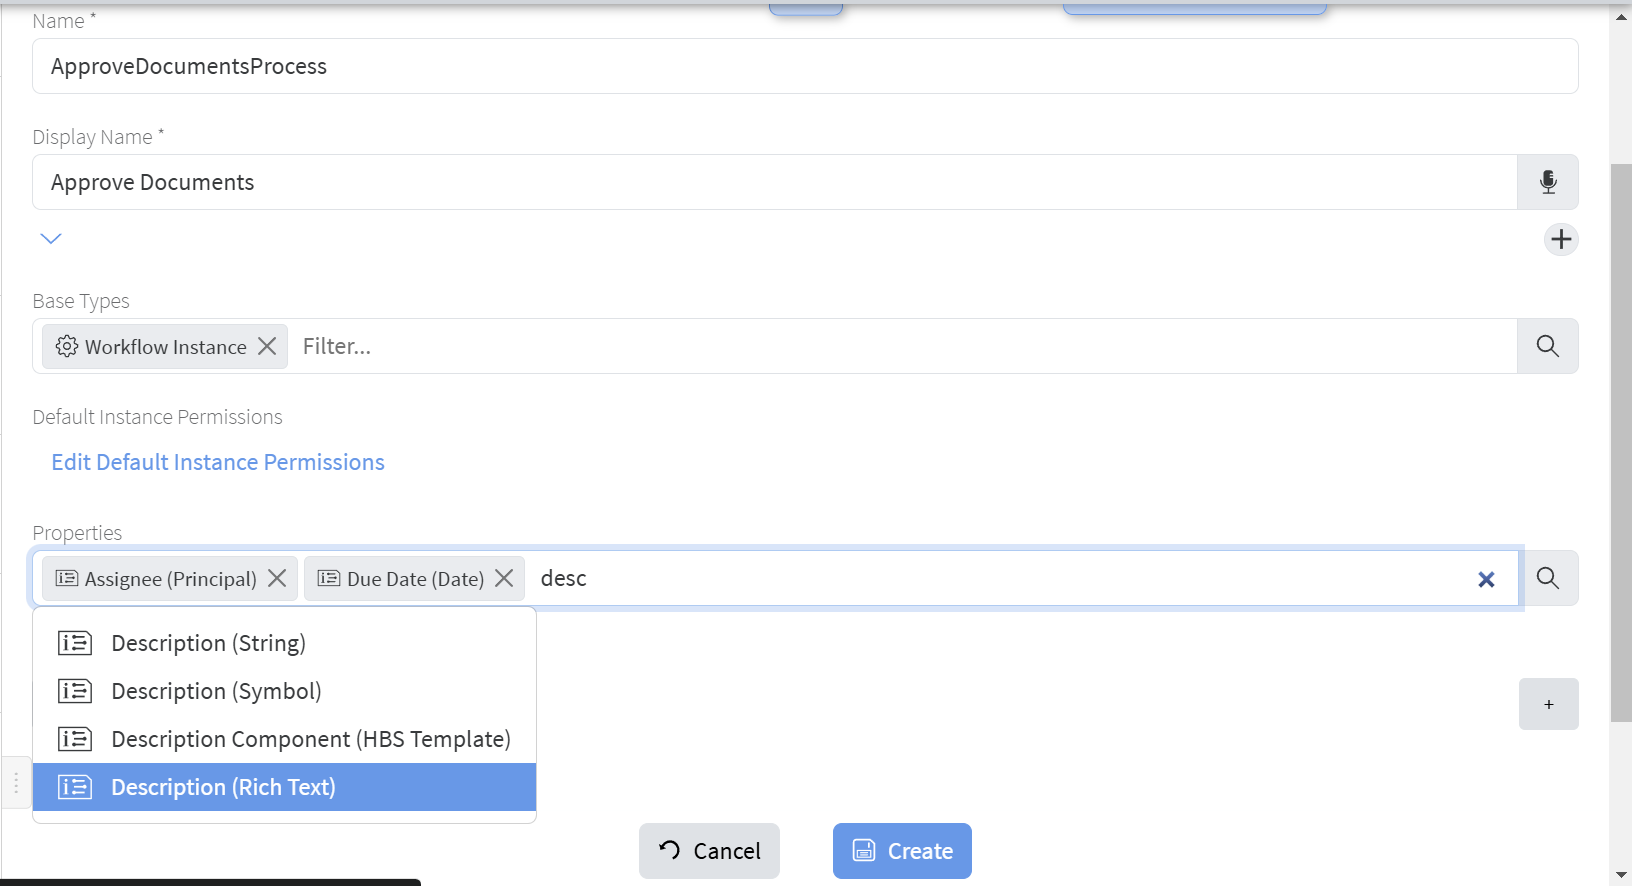
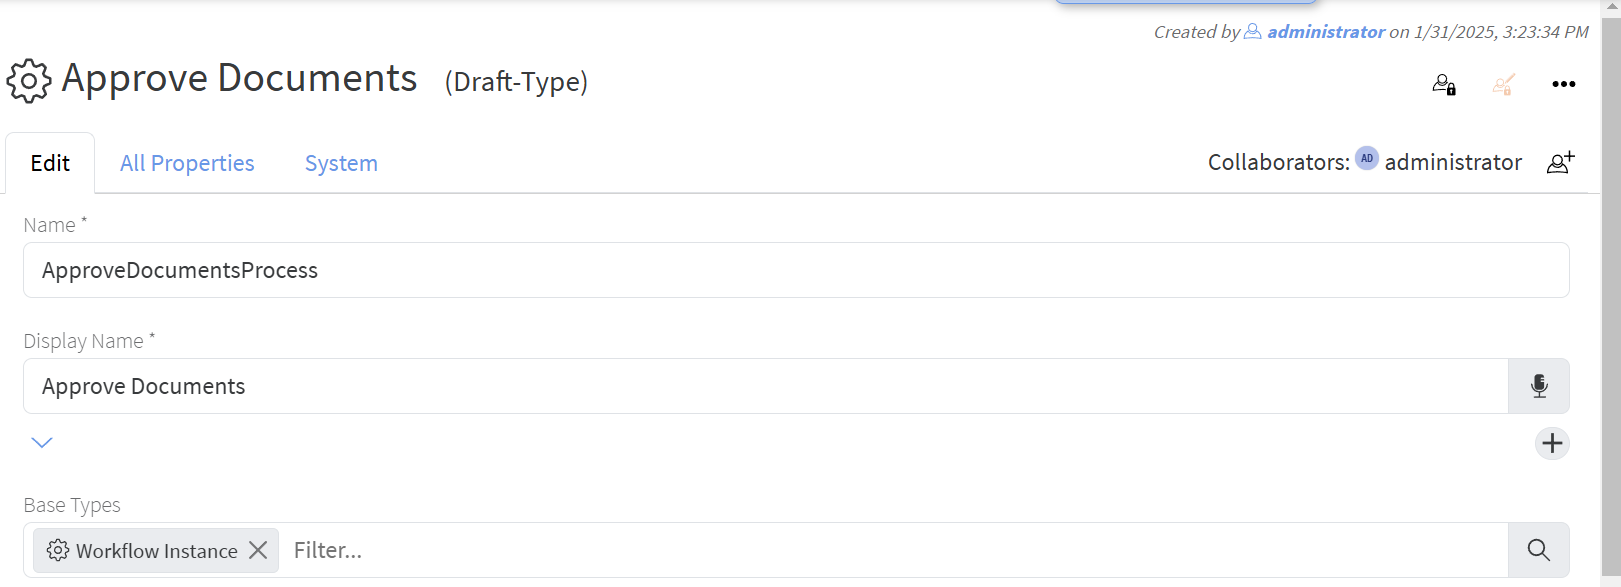
- Name it "
ApproveDocumentProcess"ApproveDocumentsProcess" with display name "Approve Documents":

- In the properties add existing properties Assignee, Due Date and Description:
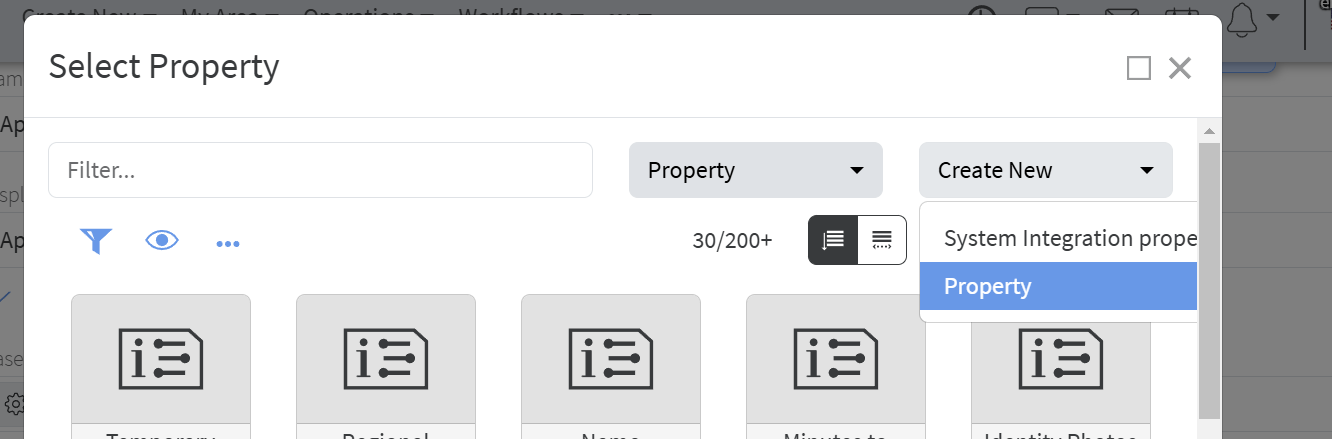
- Click the "
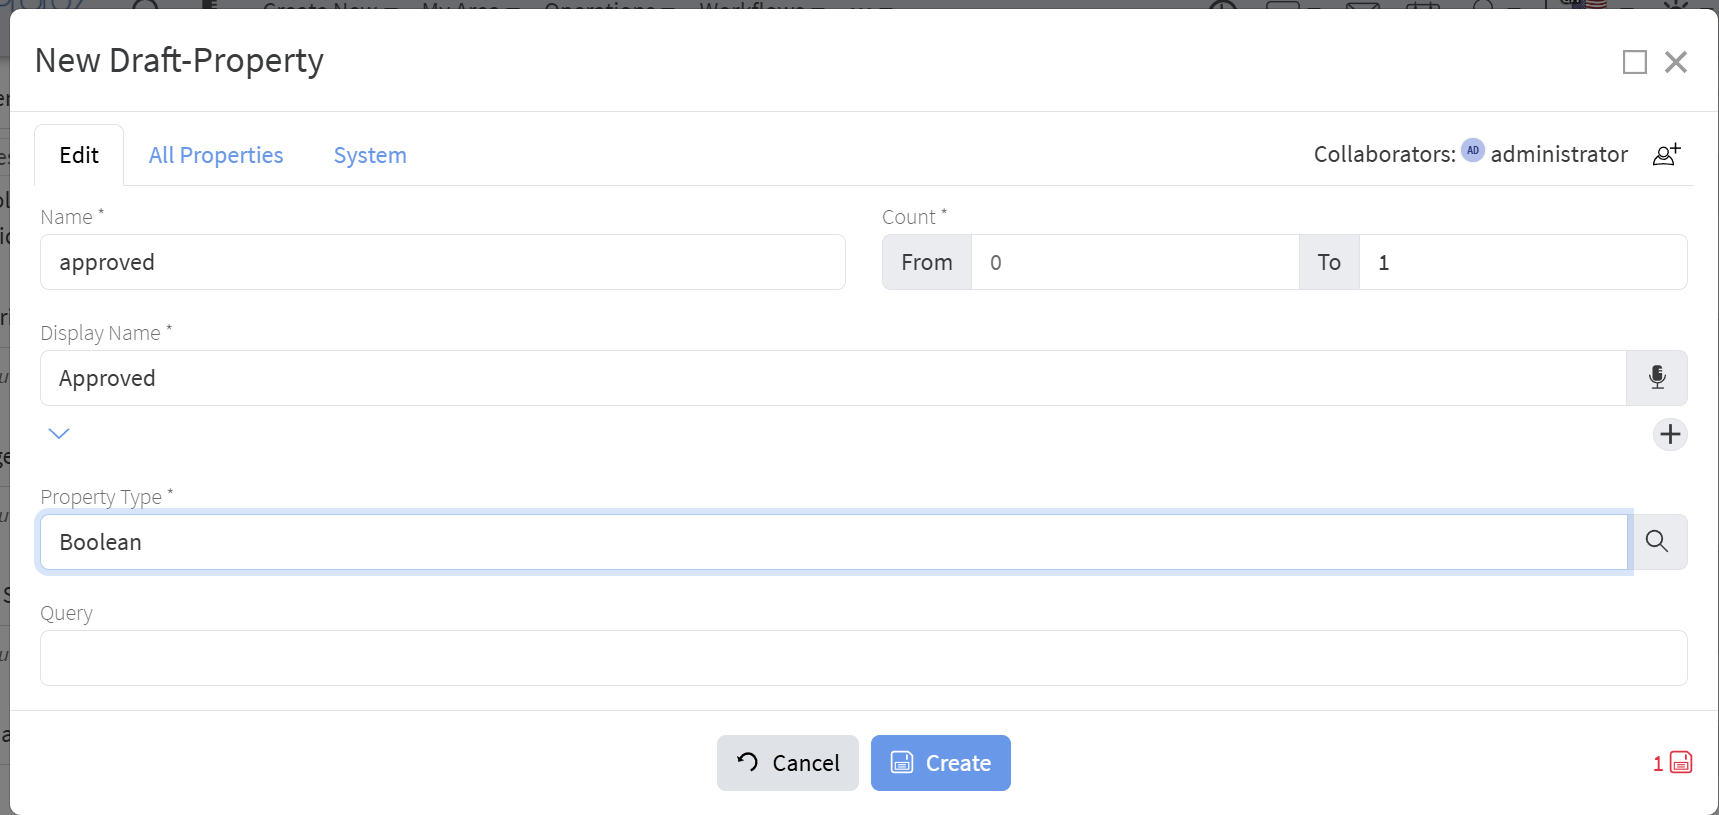
Lens "Lens" button next to the Properties field and click "Create New" -> "Property":

- Fill the following details (name: documents,
countcount: 1 or more, property type: Document):
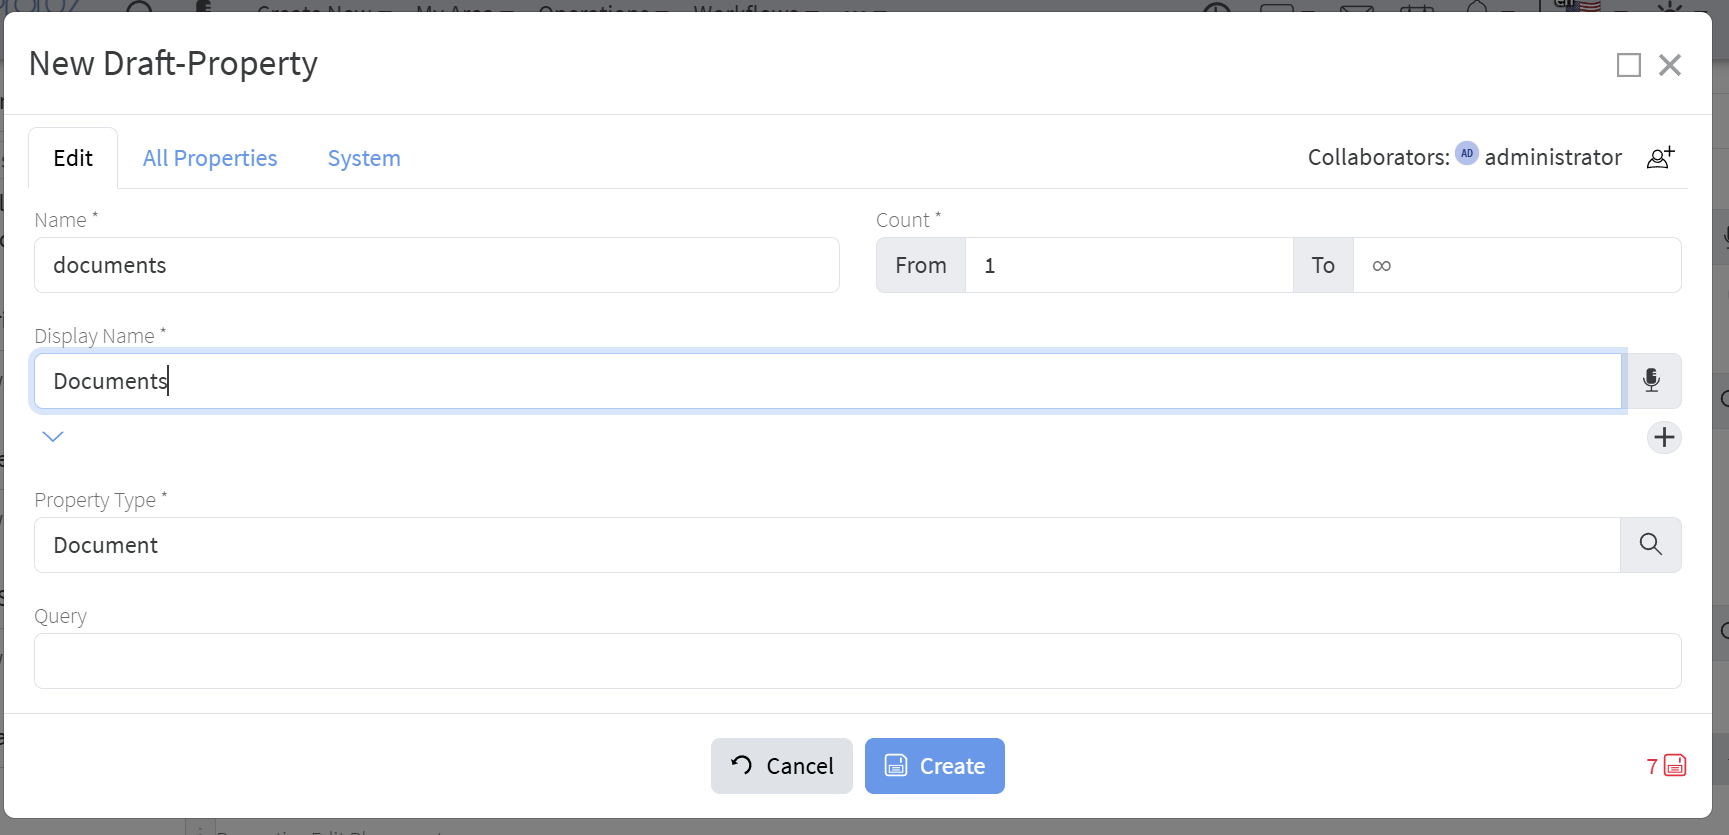
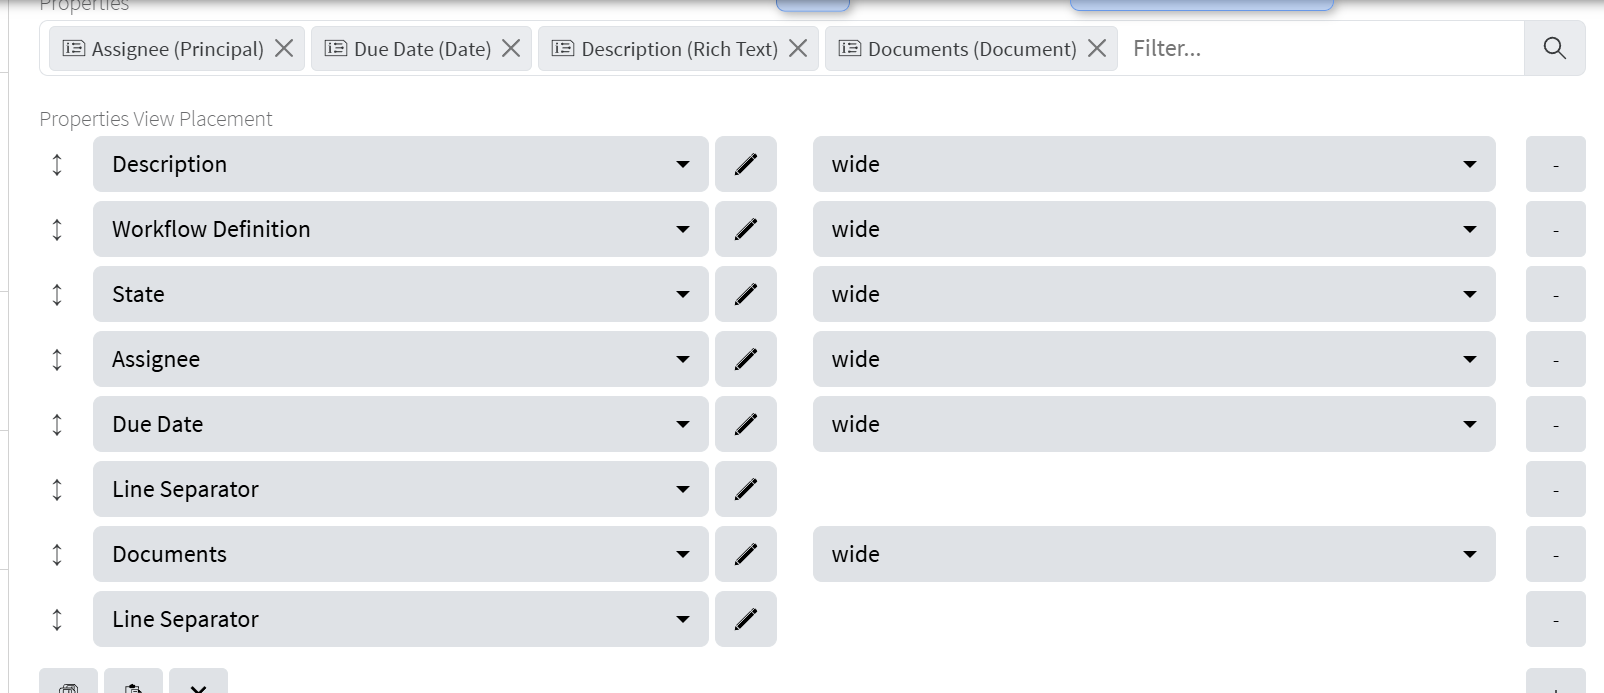
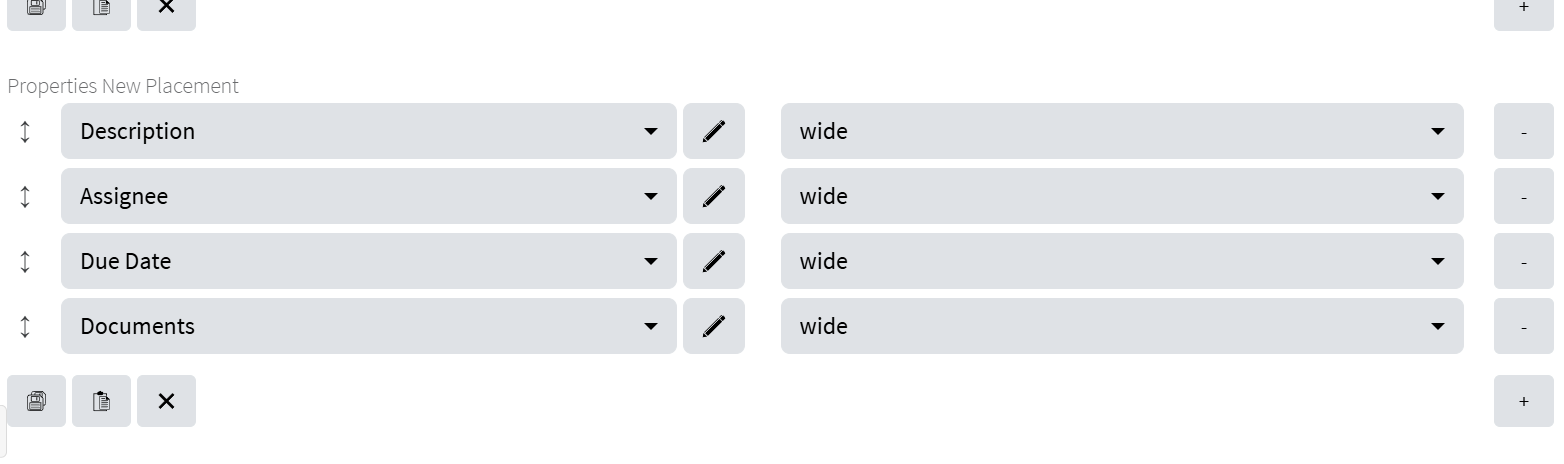
- Edit property placements to your likeness:

- Click the "Create" button.
- For this go to Administration/Types and search for workflow instance:
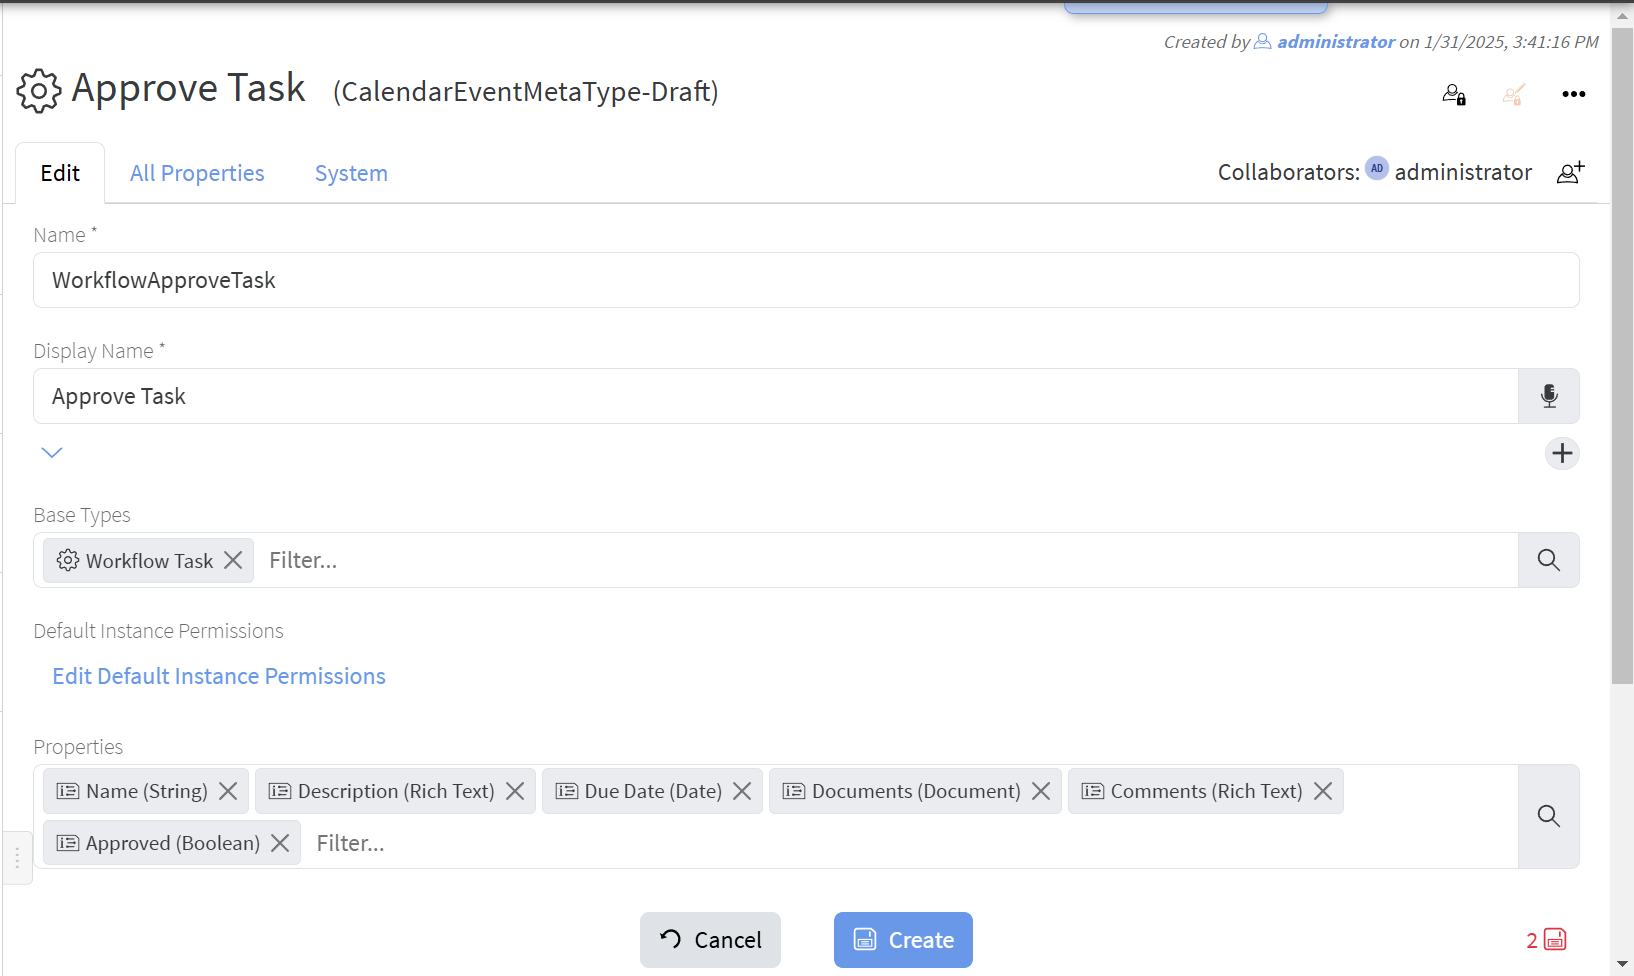
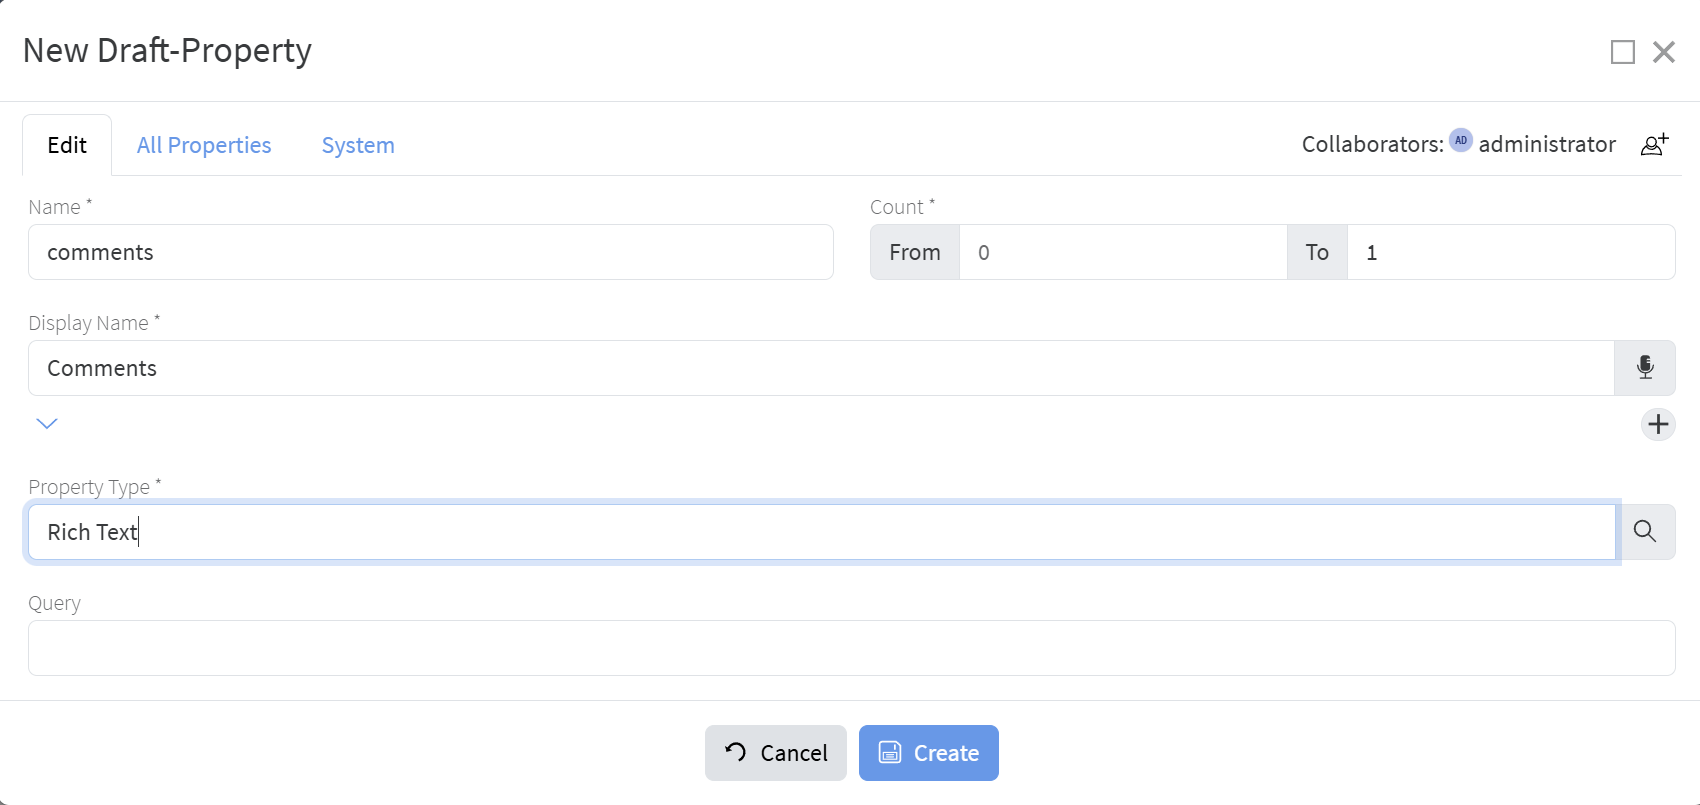
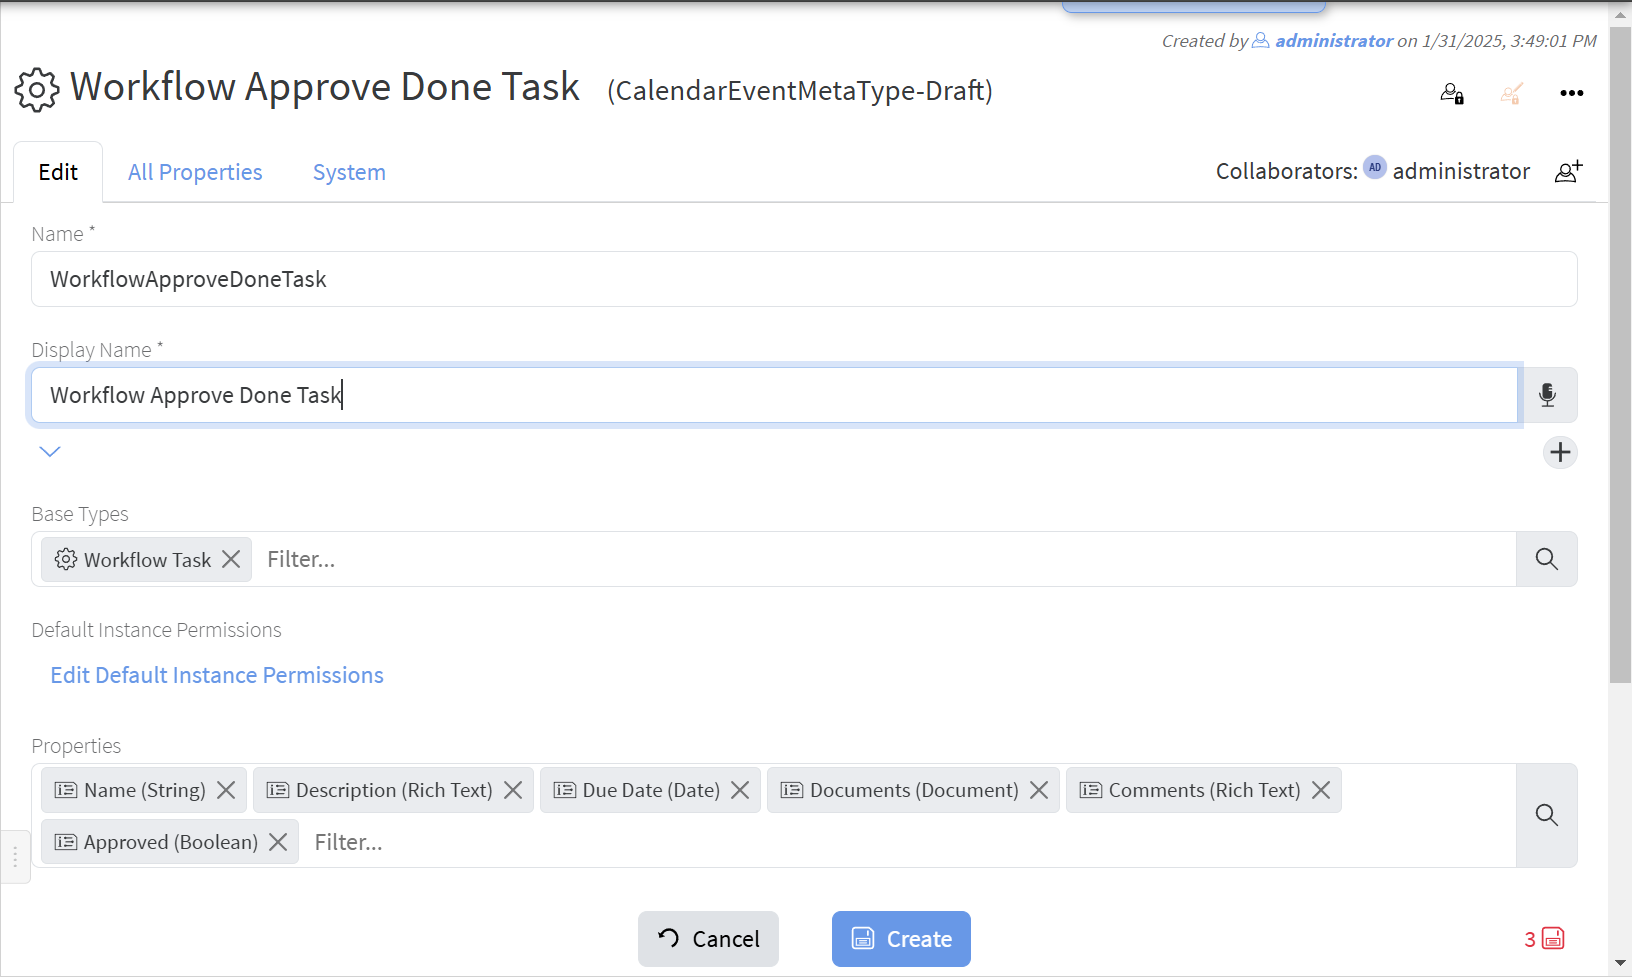
- Similarly create types for the two approval tasks:
- You will need
netwo new properties - Comments and Approved:


- The Workflow Approve Task:
- Workflow Approve Done Task:

- You will need


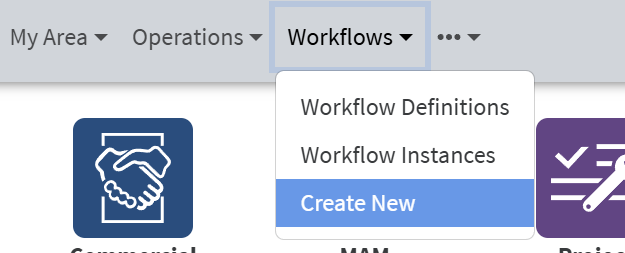
Now we are ready to create the workflow definition:
- From the
WorkflowWorkflows dropdown menu select "Create New":
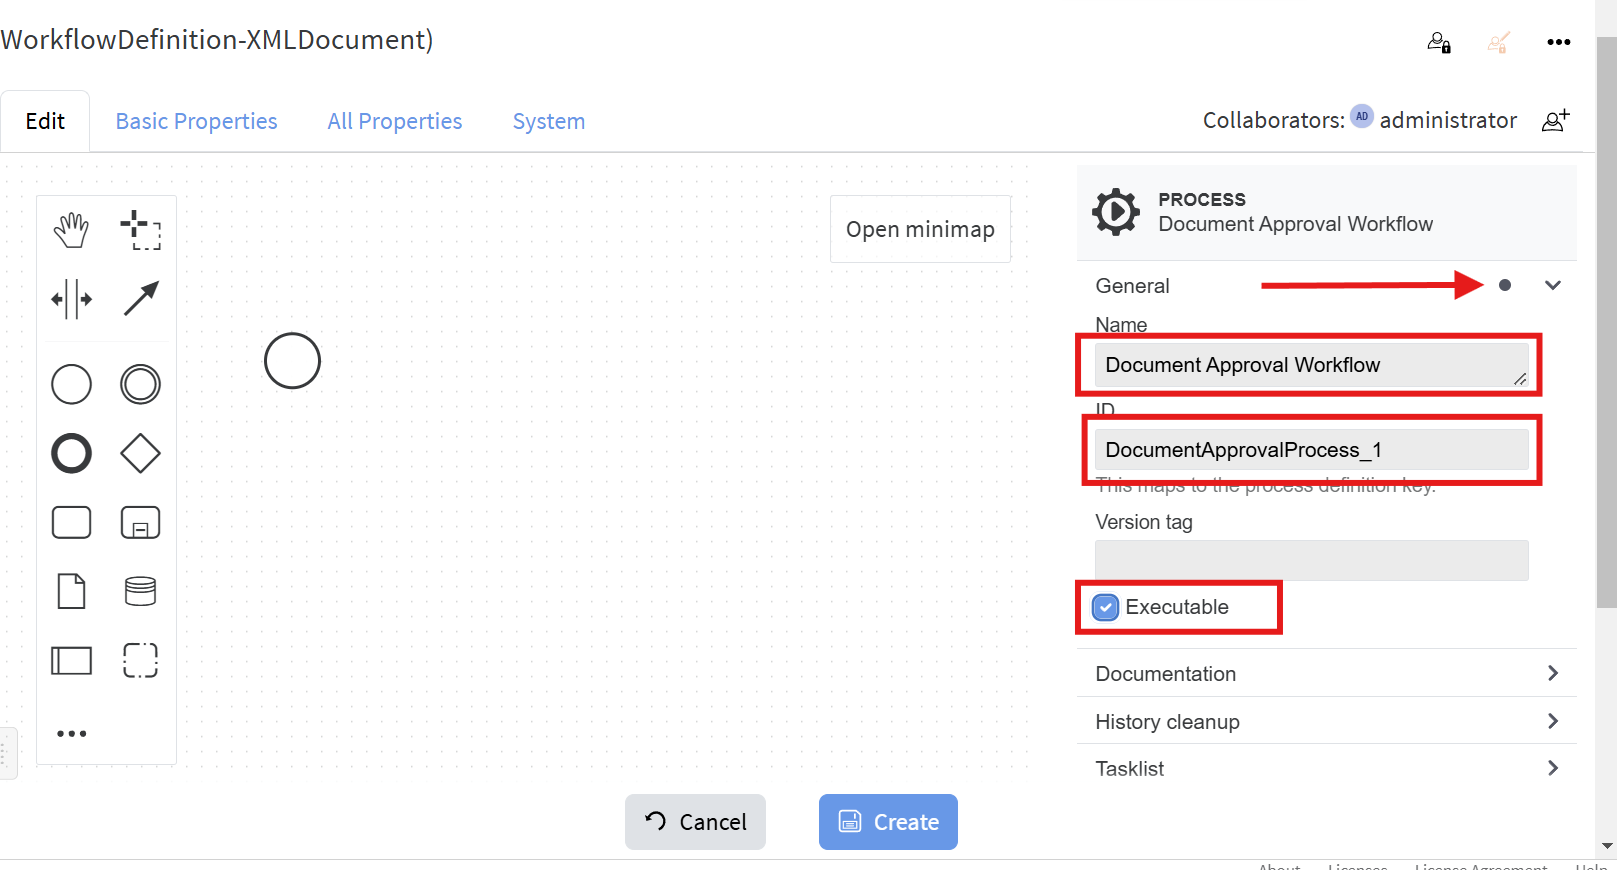
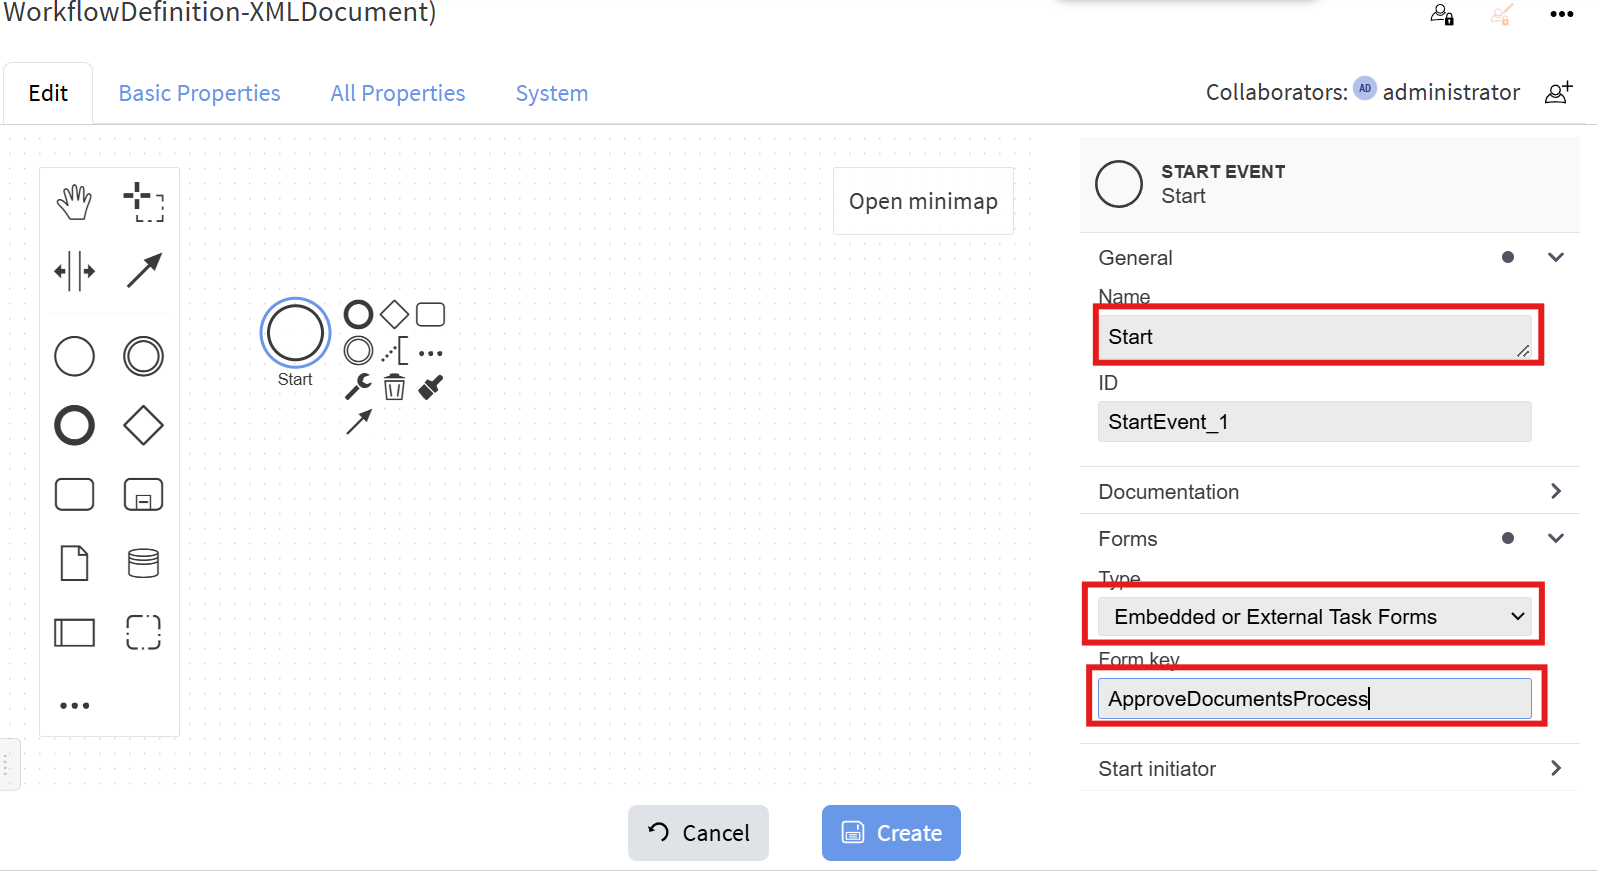
- Set the properties of the process. Expand "General", fill Name and ID (must be unique in your installation) and check "Executable":
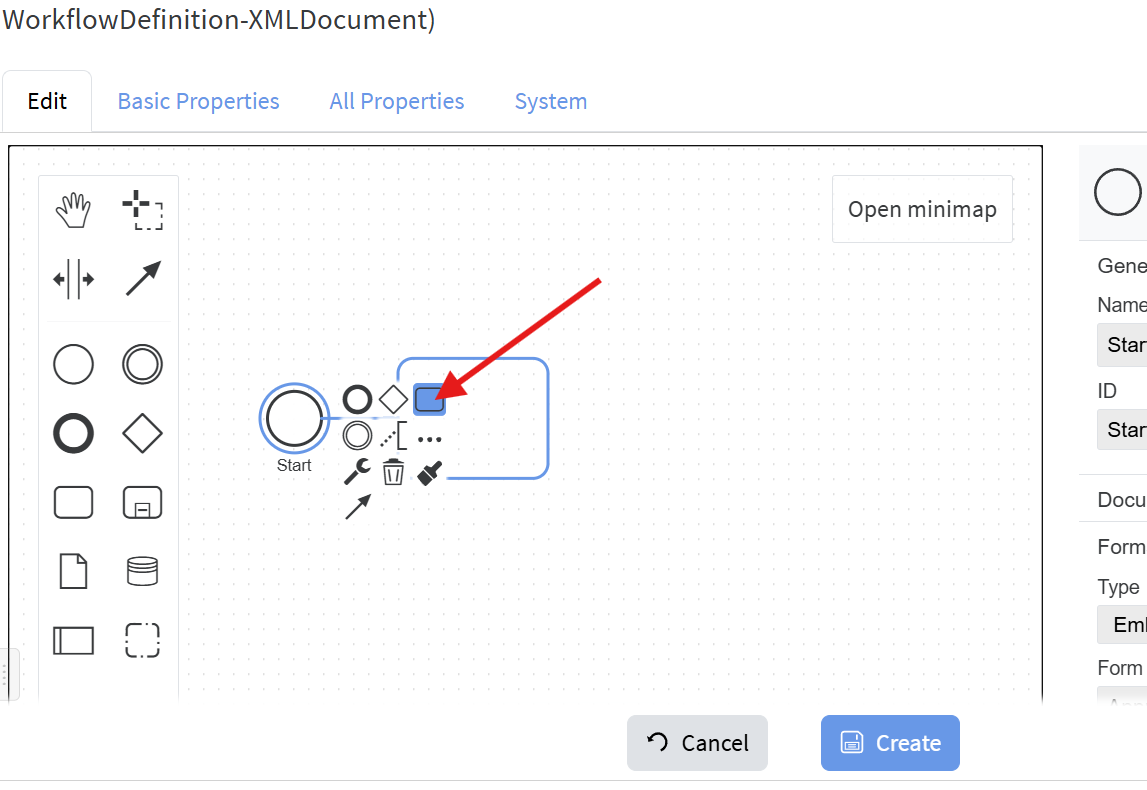
- Select the start event (the only circle in the process diagram) and fill its properties. For the Form key put the name of newly created Workflow Instance's subtype "ApproveDocumentsProcess":

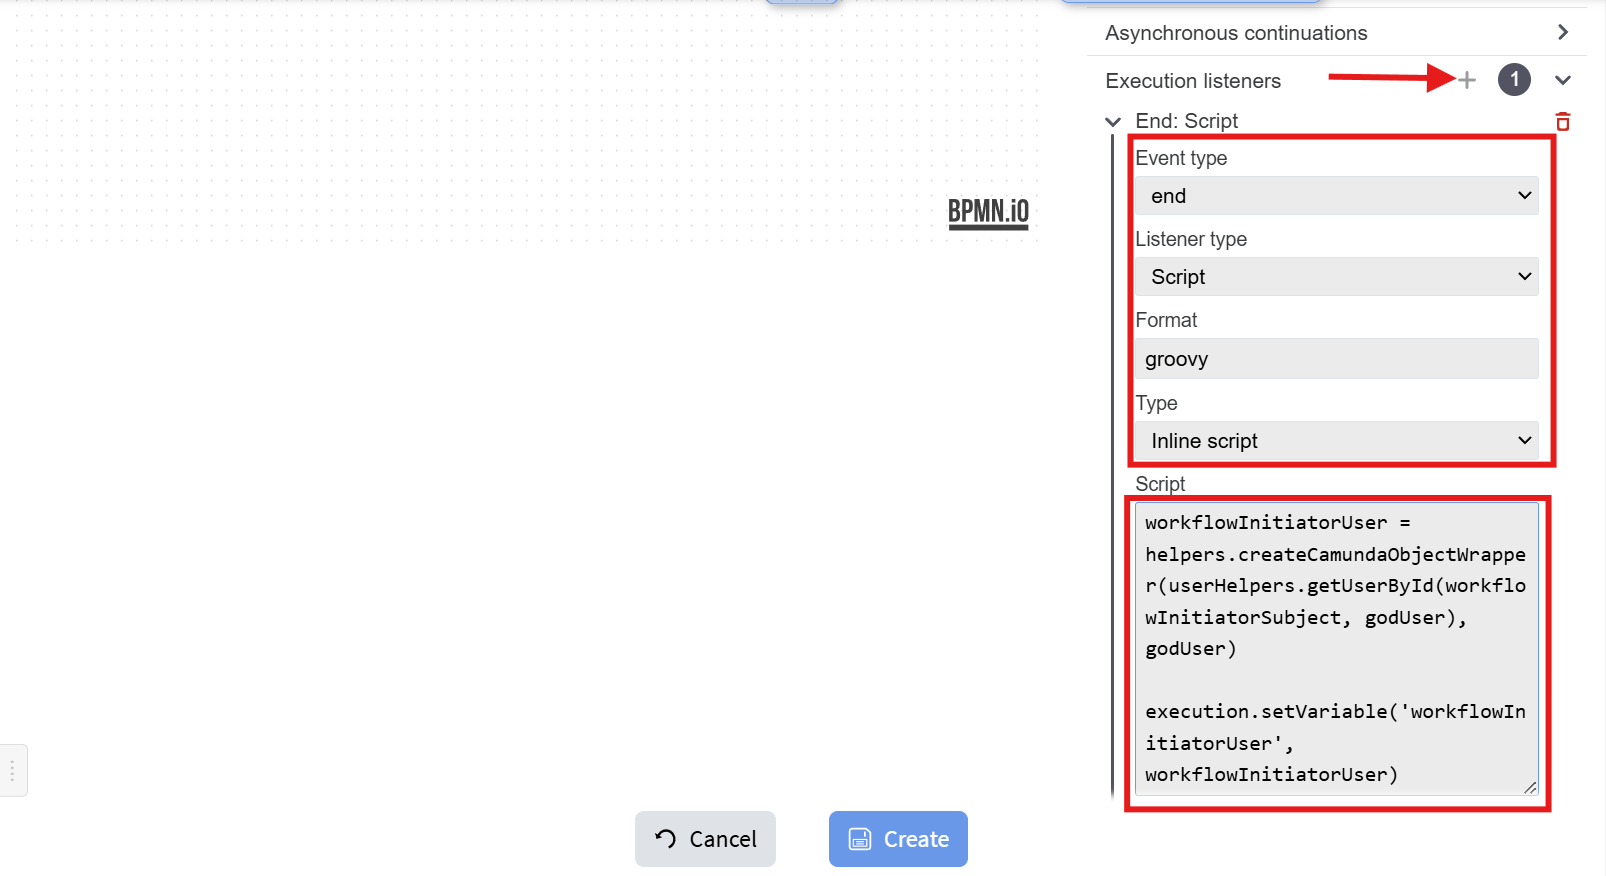
- Create two Execution listeners for start and complete and put the corresponding inline
groovyGroovy scripts to each of those:
The script is:
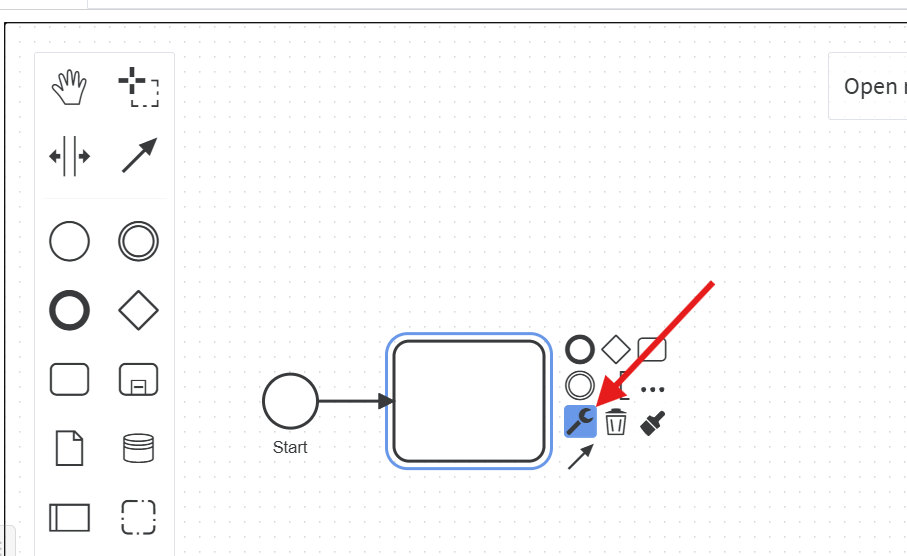
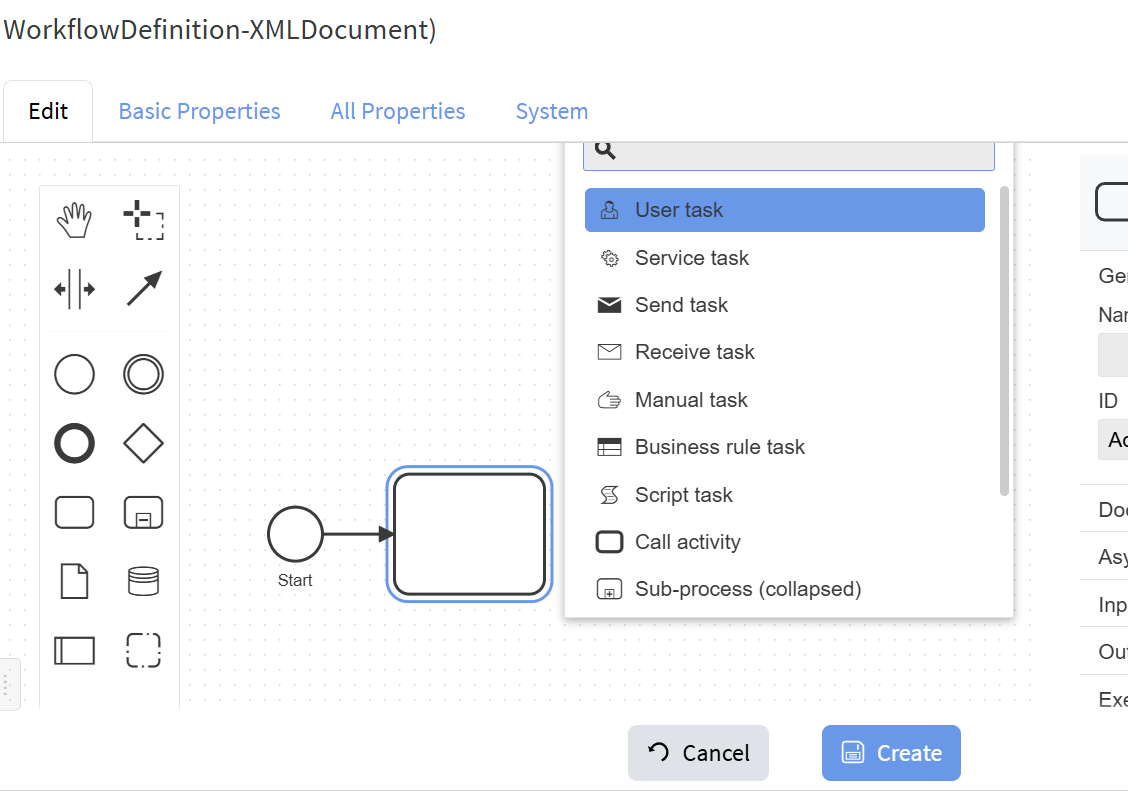
def workflowInitiatorUser = helpers.createCamundaObjectWrapper(userHelpers.getUserById(workflowInitiatorSubject, godUser), godUser) execution.setVariable('workflowInitiatorUser', workflowInitiatorUser)itIt sets the variable workflowInitiatortowhich will be used in other parts of the workflow. - Click on "Append Task" next to the Start event to create the next step:
- Click "Change Element" and select "User Task":


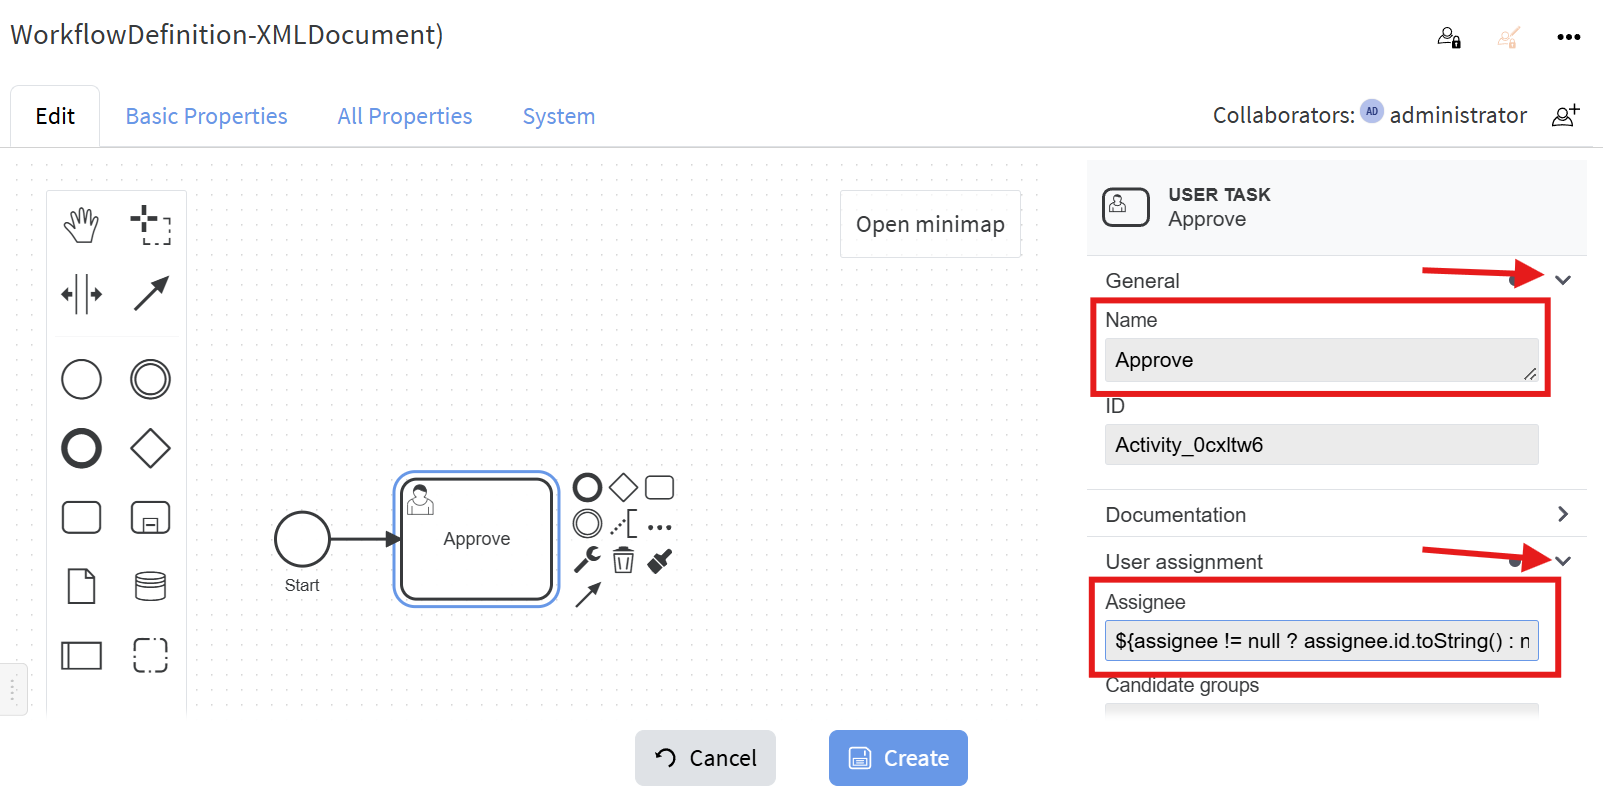
- Set the properties of the step:
For Assignee enter:
${assignee != null ? assignee.id.toString() :. For Due Date enter:null }null}${dueDate == null ? null : dueDate.toDate()}.
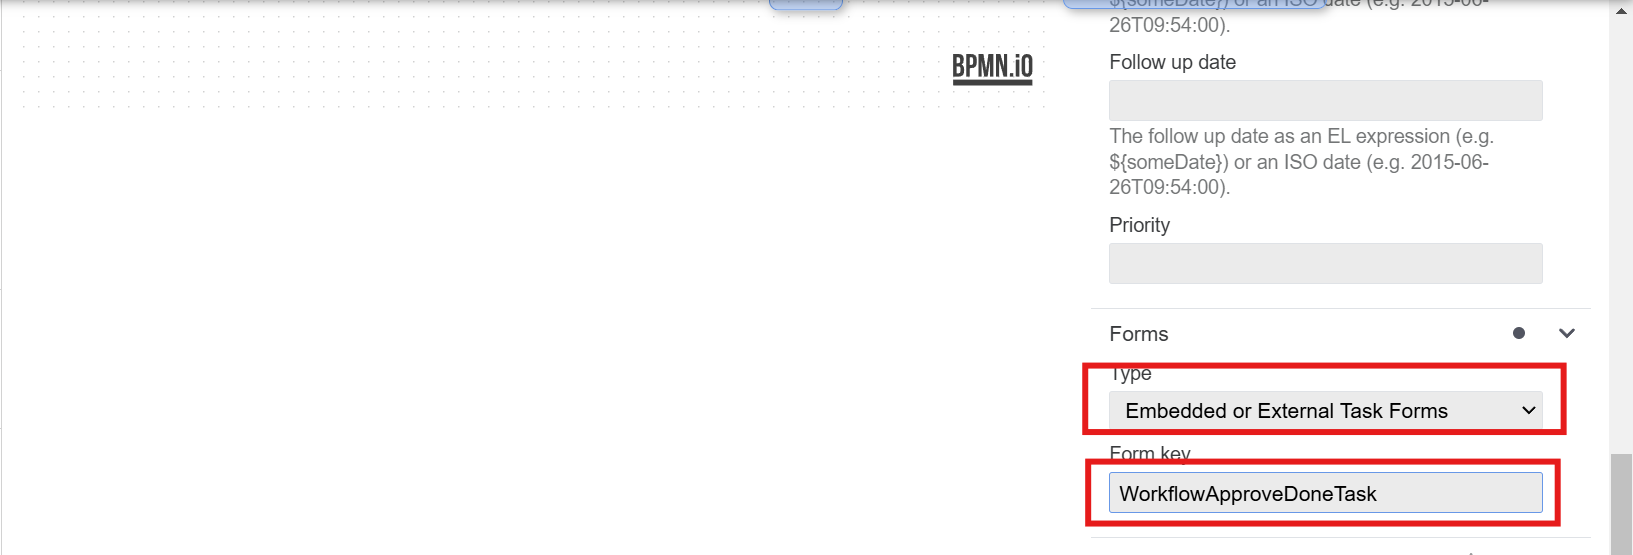
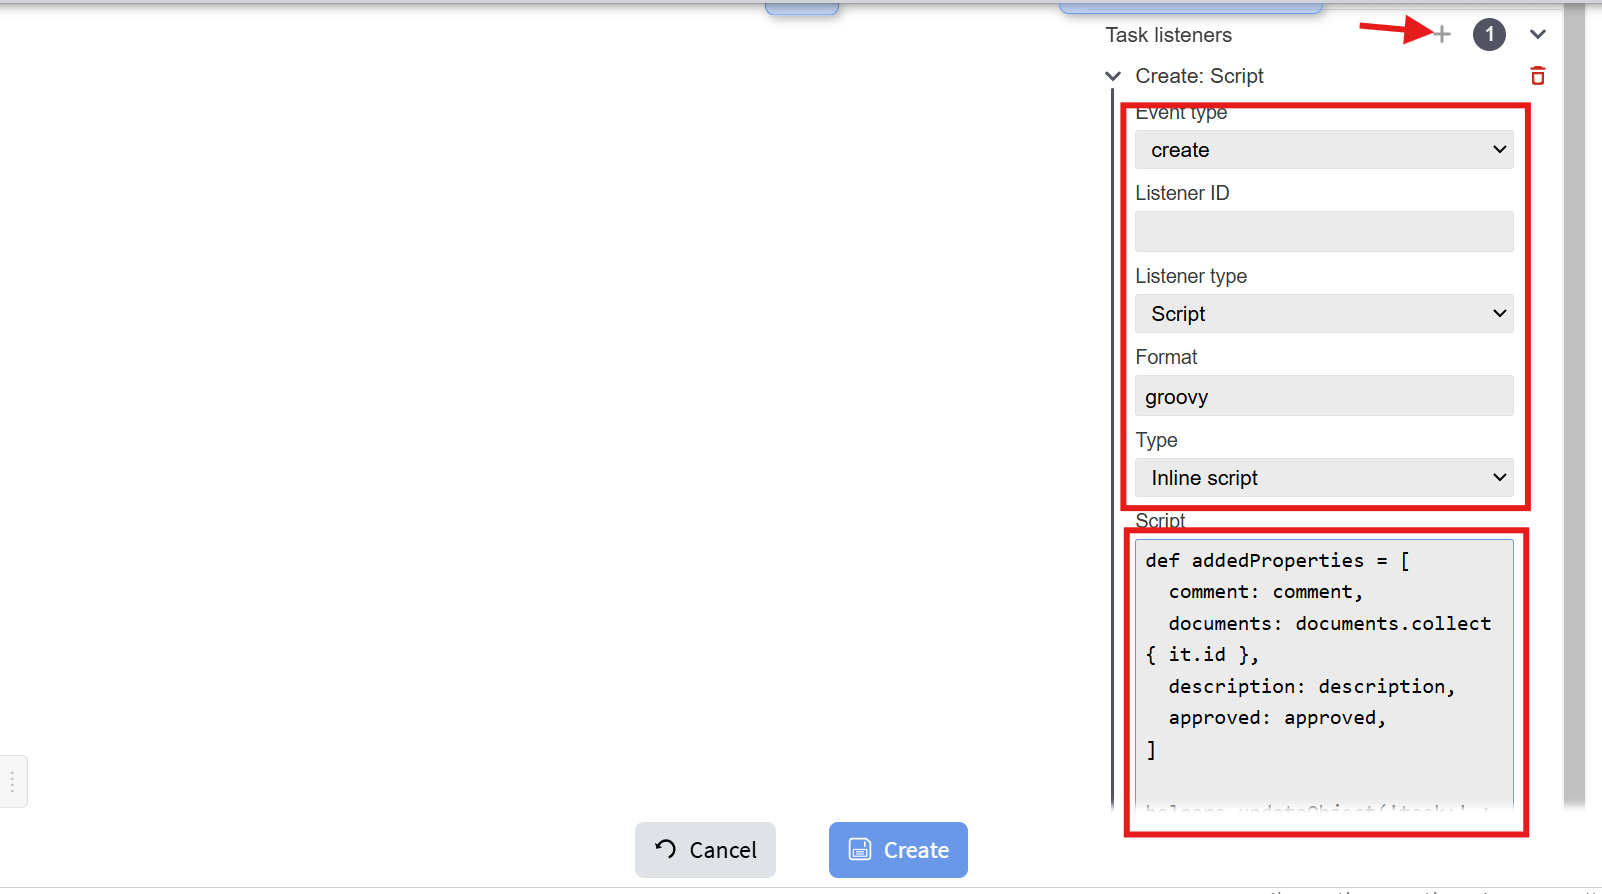
For Form Key use the name of the newly created workflow task type WorkflowApproveTask. - Add two Task listeners for create and complete events:
Script is: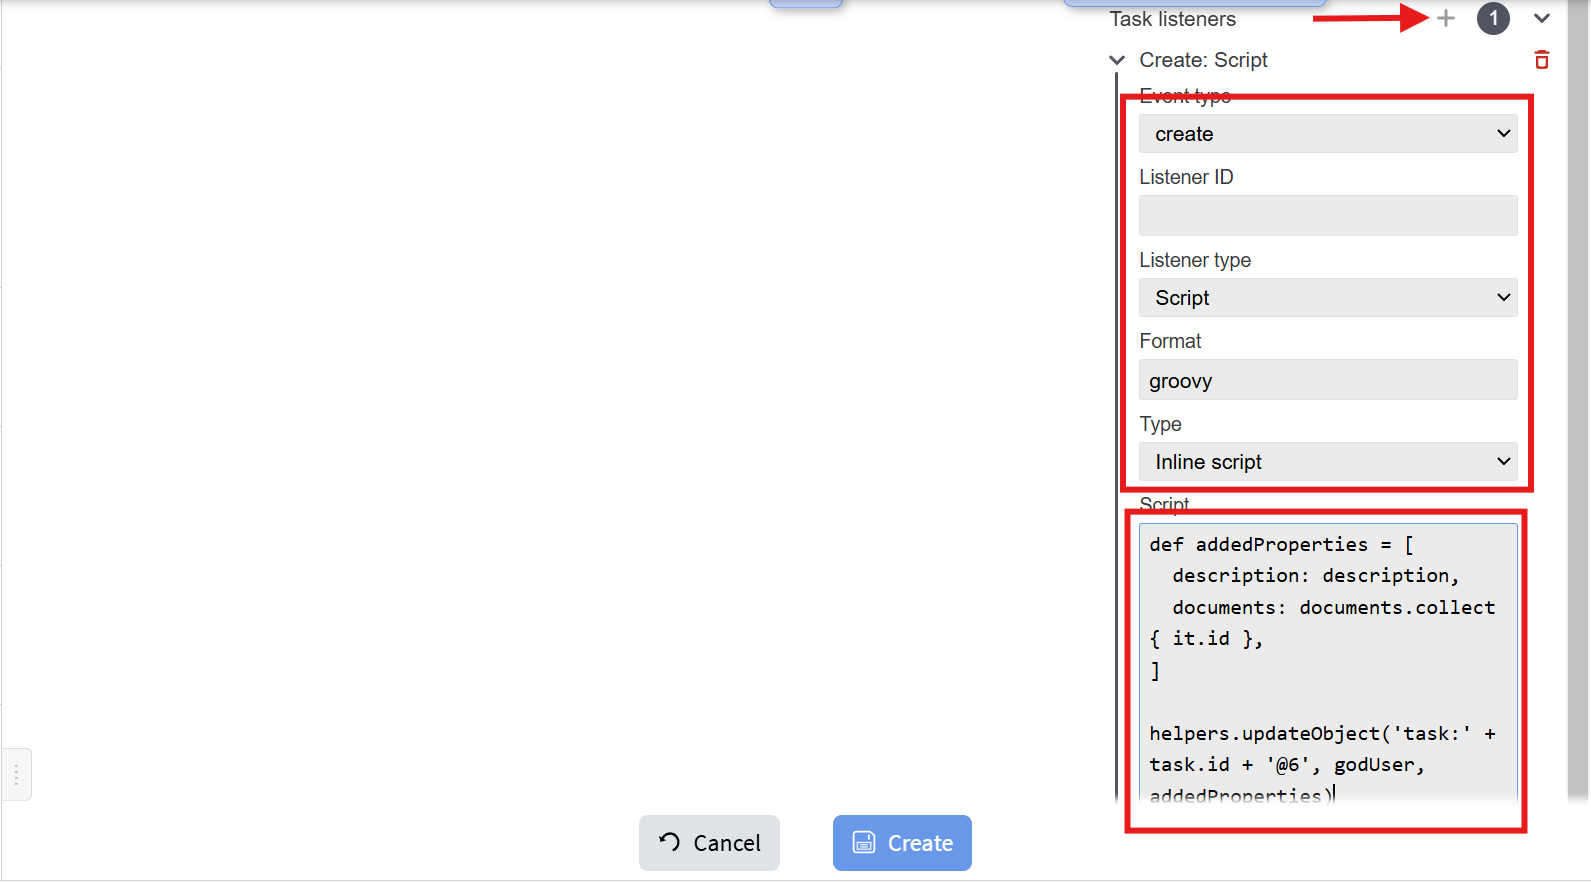
def addedProperties = [
  description: description,
  documents: documents.collect { it.id },
]

helpers.updateObject('task:' + task.id + '@6', godUser, addedProperties)
which sets the description and documents properties to the task.

Script for the complete event is:def thisTask = helpers.getObjectById('task:' + task.id + '@6', godUser) task.execution.setVariable('approved', thisTask.get('approved')) task.execution.setVariableLocal('comment', thisTask.get('comment'))which sets the approved and comment properties to the process.
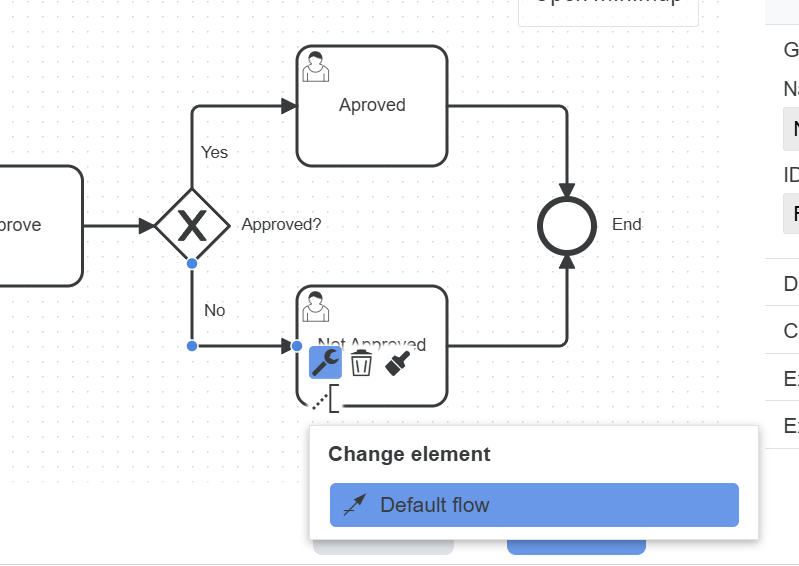
- Add and connect the next steps, and fill their properties:
- Select the "No" path and set it as "Default
FLow"flow":

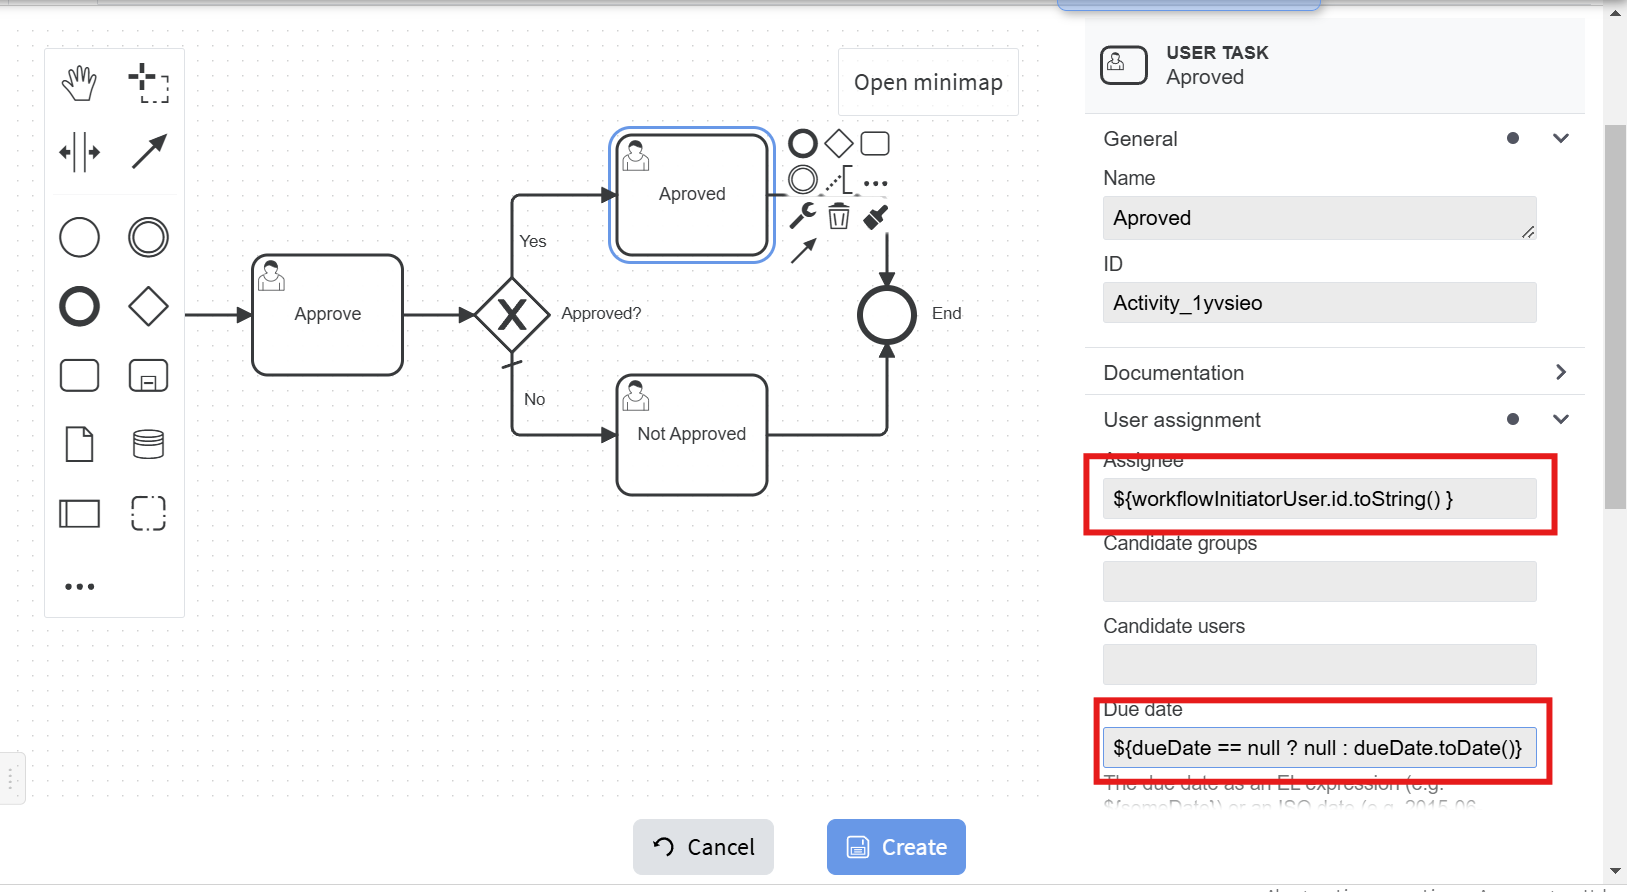
- Select "Yes" flow and set its properties:
Condition expression is: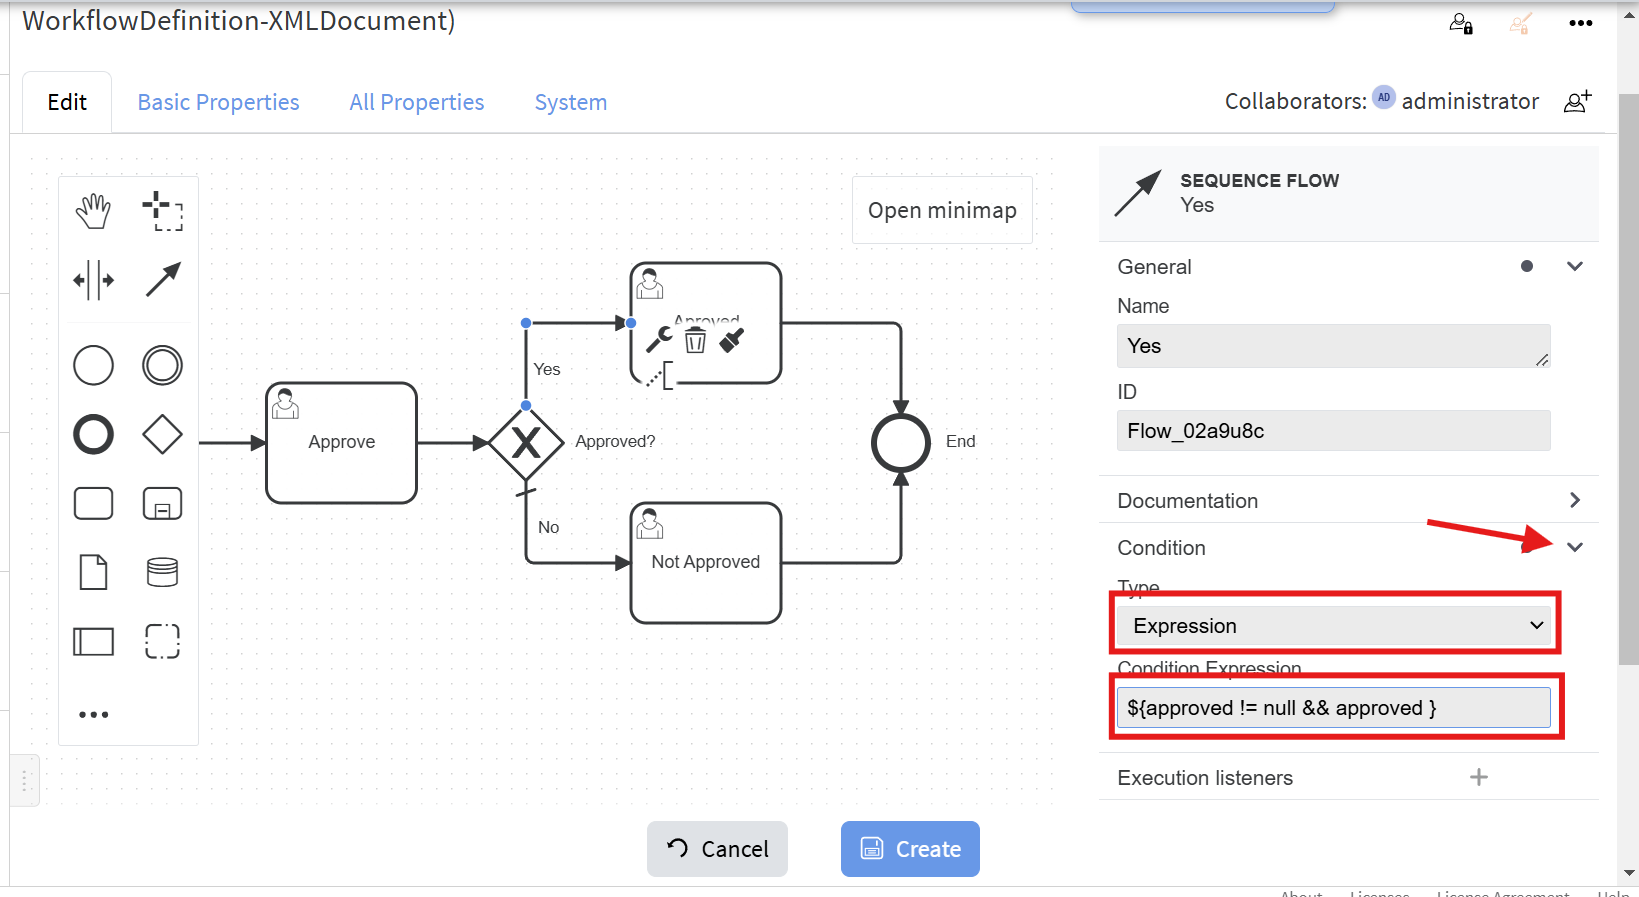
${approved != null &&, i.e. this path is taken only when the approved is set to true in the Approve task.approved }approved} SimilarSimilarly to the Approve task set properties of the "Approved" and "Not Approved" tasks:

For inline script use:
def addedProperties = [
  comment: comment,
  documents: documents.collect { it.id },
  description: description,
  approved: approved,
]

helpers.updateObject('task:' + task.id + '@6', godUser, addedProperties)
which sets the corresponding properties from the process to tasks.
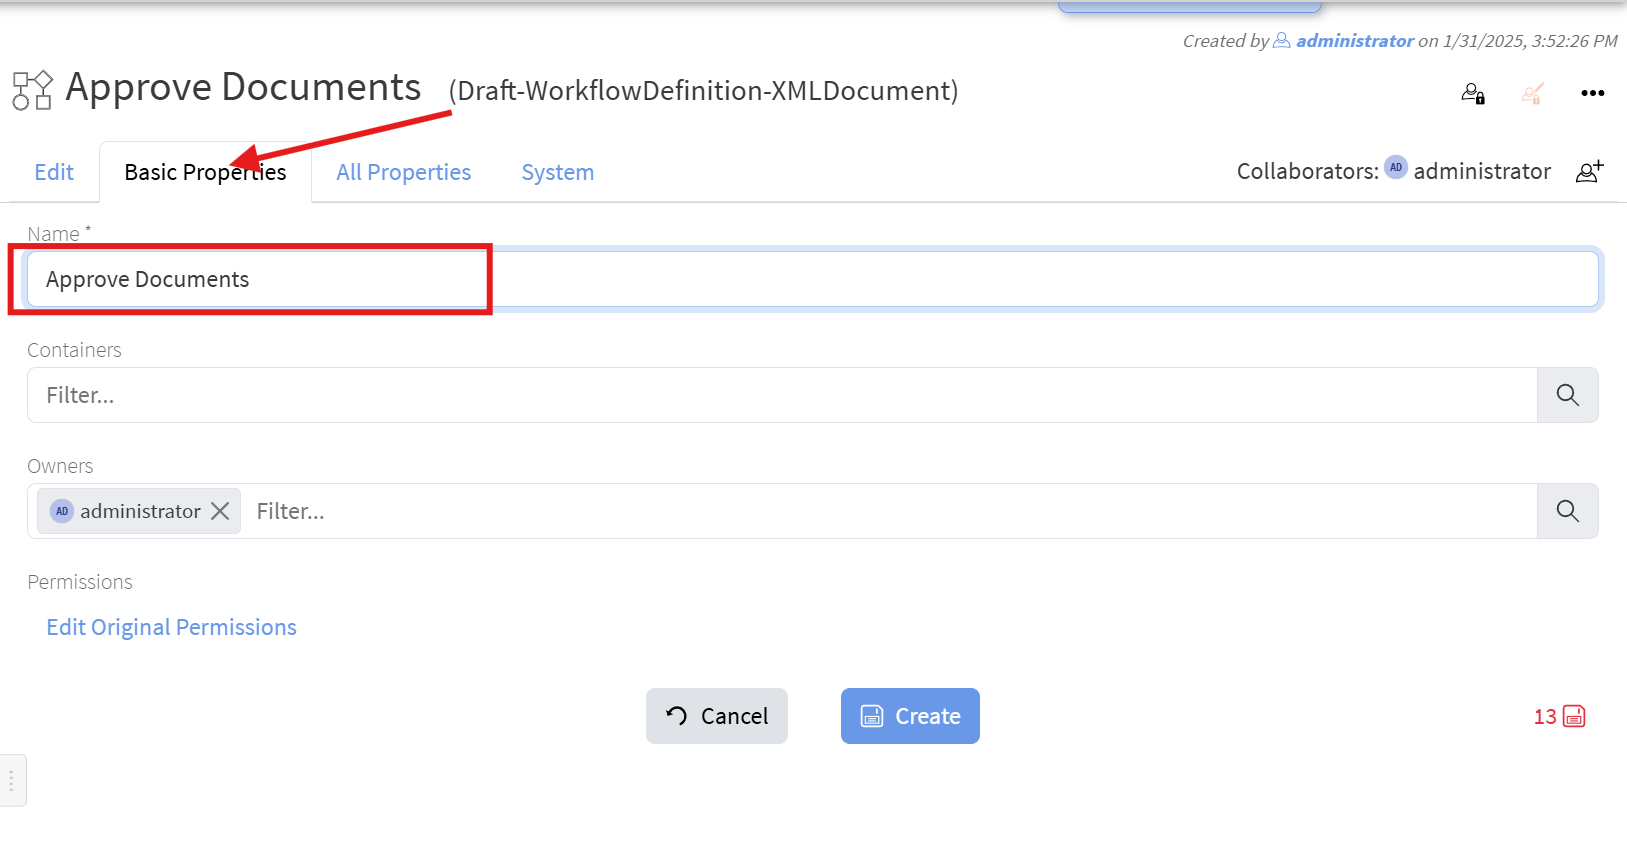
- Enter the name of the workflow:

- Click the "Create" button and your new workflow definition is ready and can be used to create instances based on it.


You can download the BPMN of the above example from here. The types and properties created for the above example can be downloaded from here and then can be imported through Operations -> Import/Update from JSON.
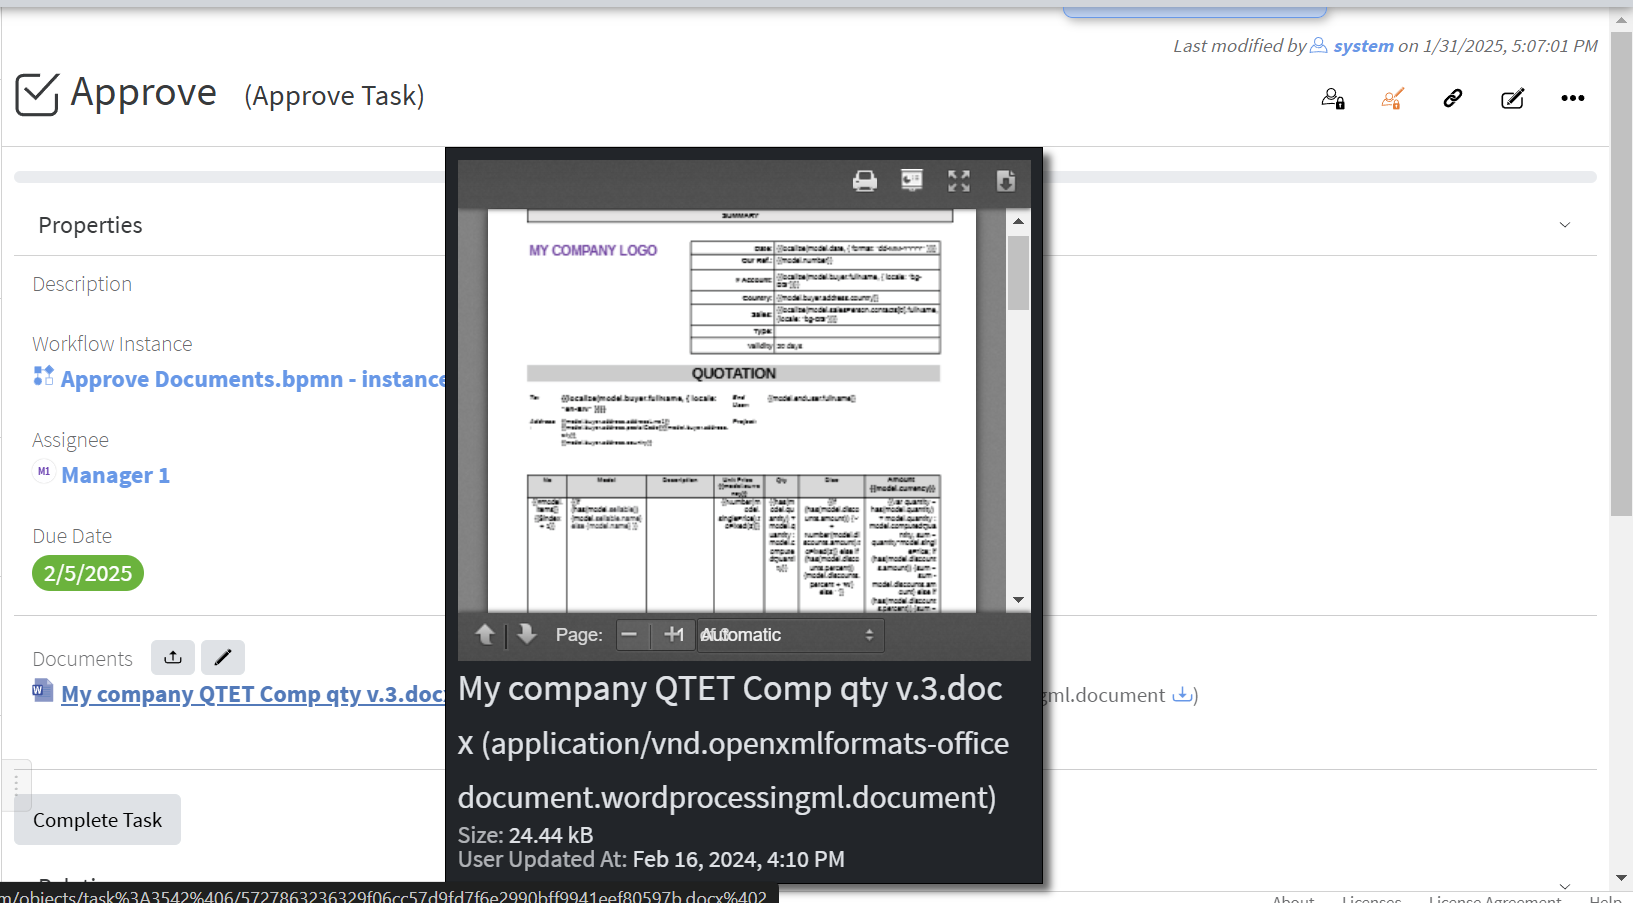
Test the new workflow
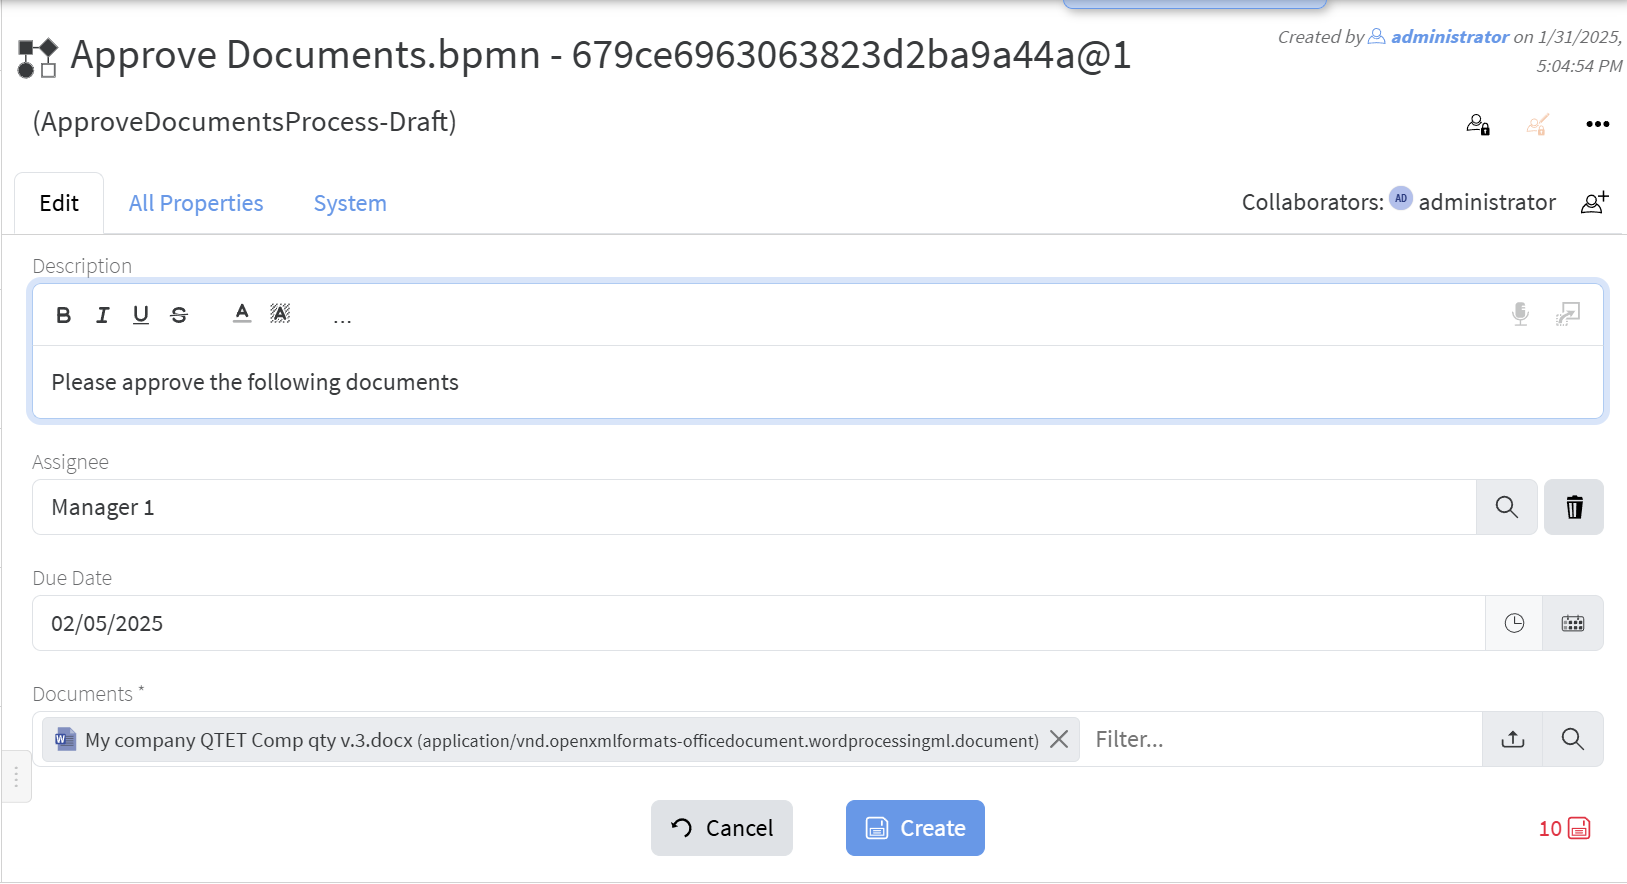
- From the Approve Documents workflow definition's object menu select "Start Workflow":


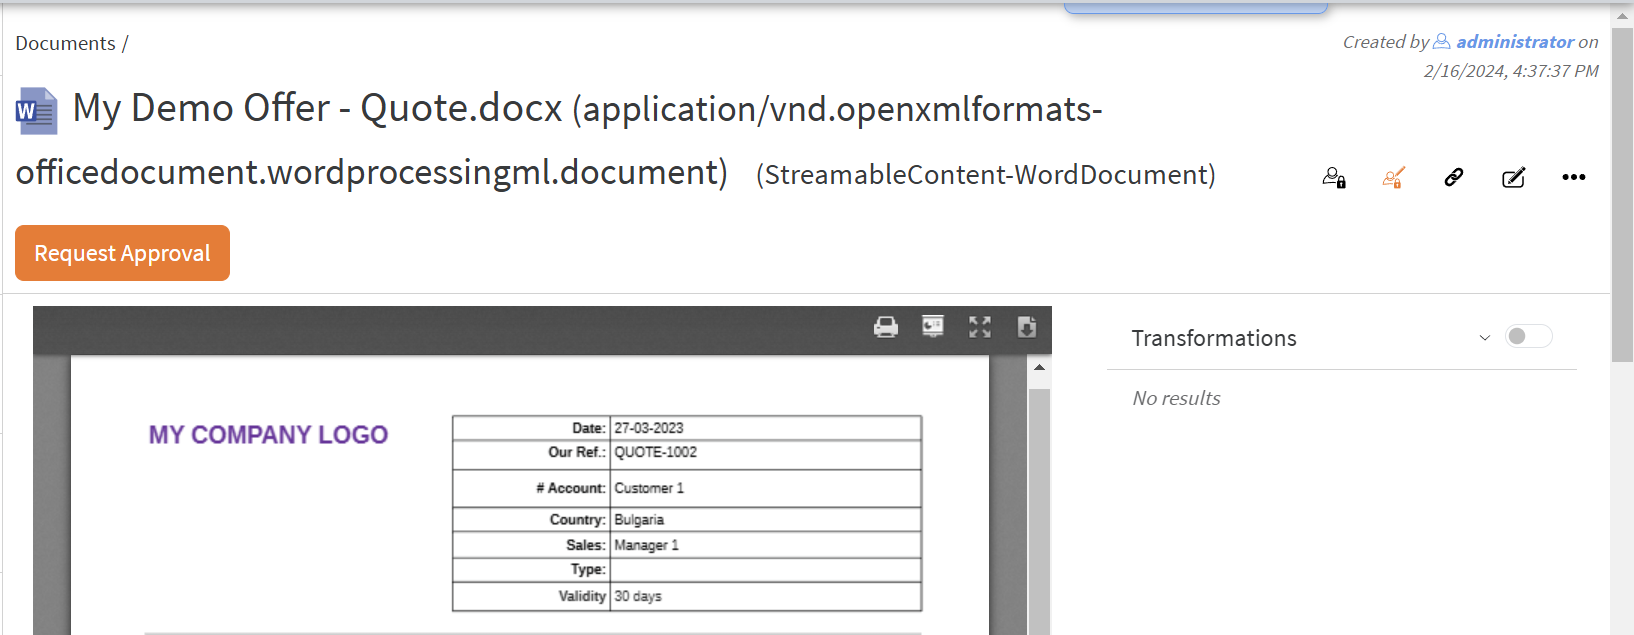
Add a button in the header of Document objects to start approval process with the above workflow
- Go to Document type:

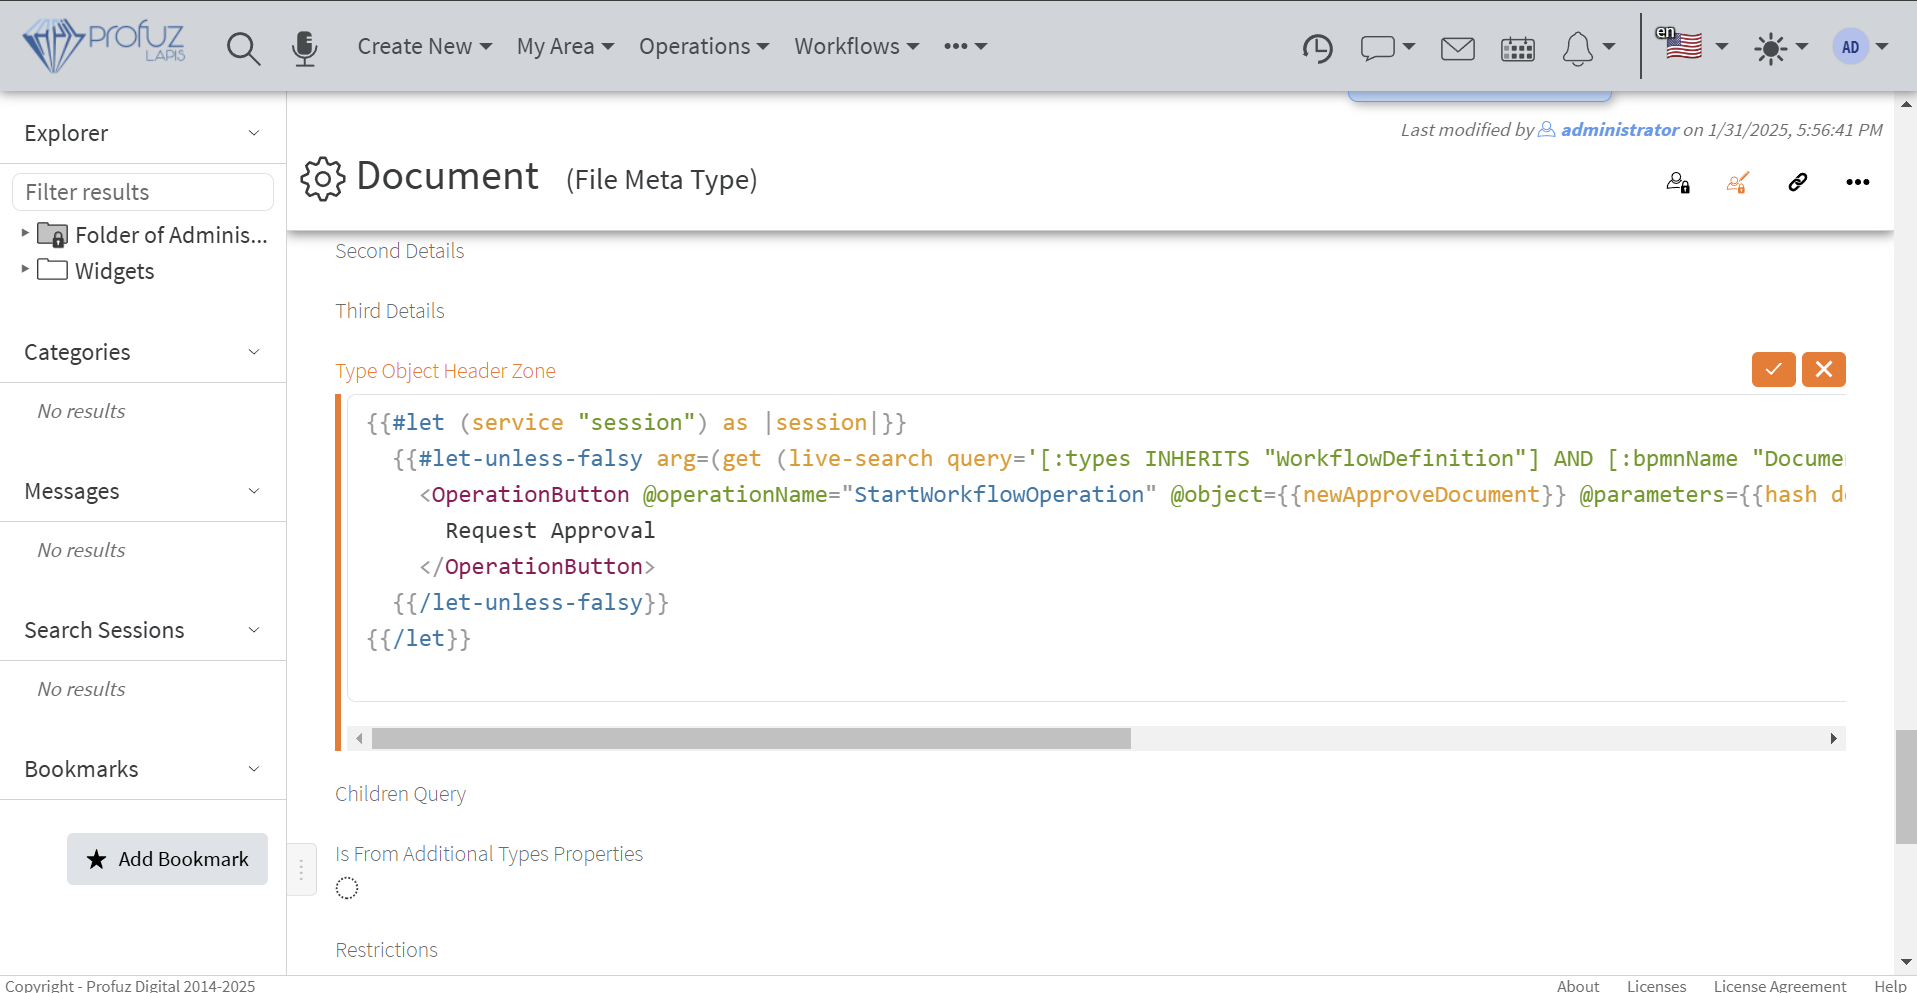
The code is:{{#let (service "session") as |session|}} {{#let-unless-falsy arg=(get (live-search query='[:types INHERITS "WorkflowDefinition"] AND [:bpmnName "Document Approval Workflow"] SORT BY :name ASC LIMIT 1') 0) checkForEmptiness=true as |newApproveDocument|}} <OperationButton @operationName="StartWorkflowOperation" @object={{newApproveDocument}} @parameters={{hash documents=(array @model.id)}} @buttonClass="btn btn-warning"> Request Approval </OperationButton> {{/let-unless-falsy}} {{/let}}- On your document's header the following button will be shown from which you directly can start the approval workflow: