
Sales process
General Sales process goes in the following way:
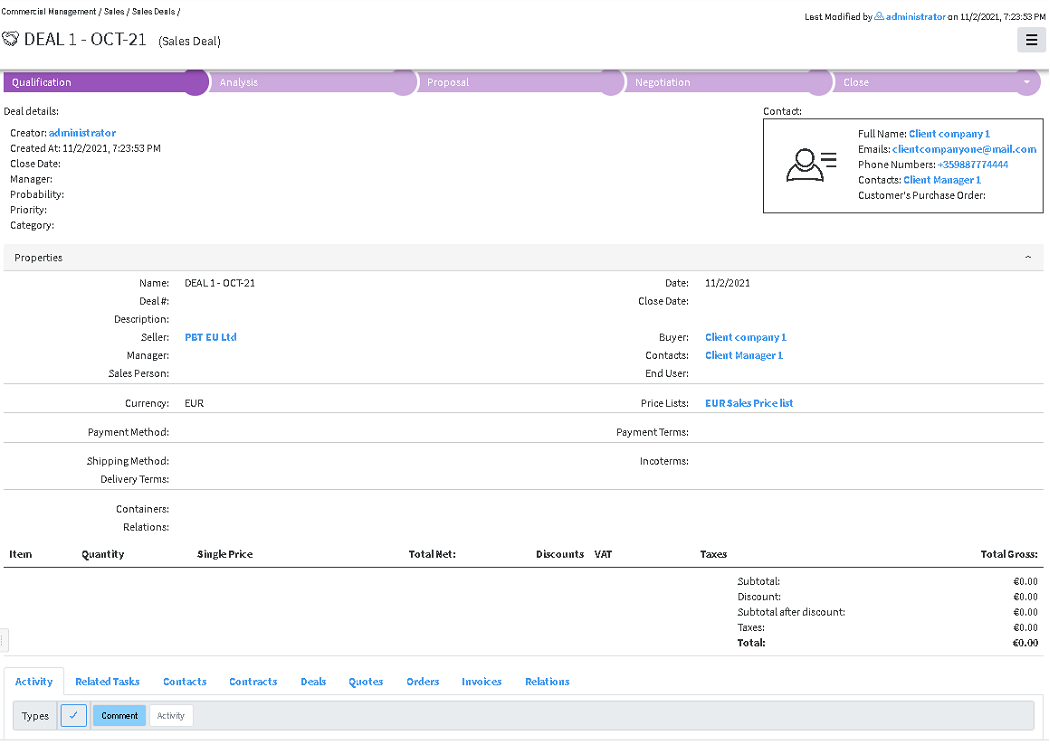
The Process starts by creating a Deal. This is the first entry in the system of the deal details. It can be used for internal approval if necessary or that can be done on some of the following steps as well.
Then Quote – Order – Project - Invoice
Before starting sales process, products and services have to be defined. Please refer to Products and Services Section
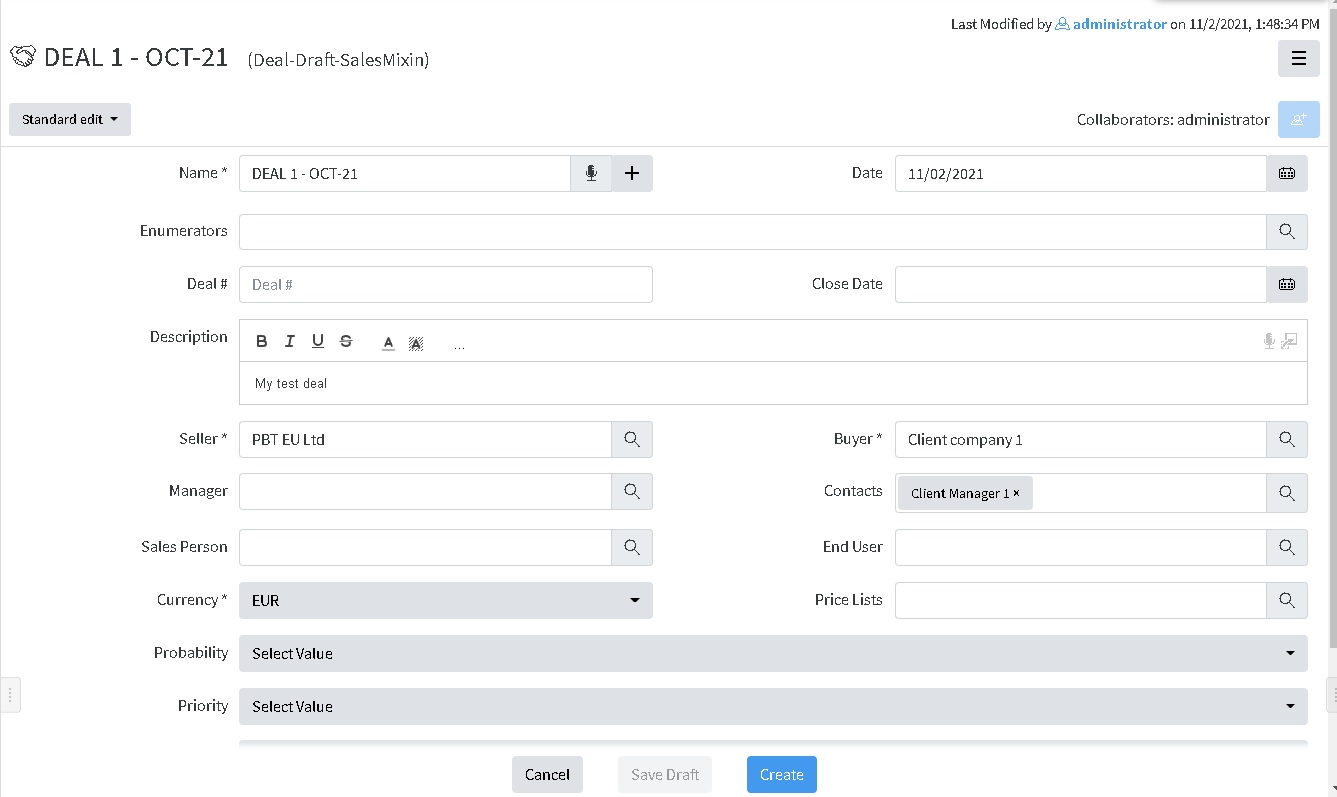
Starting a Deal
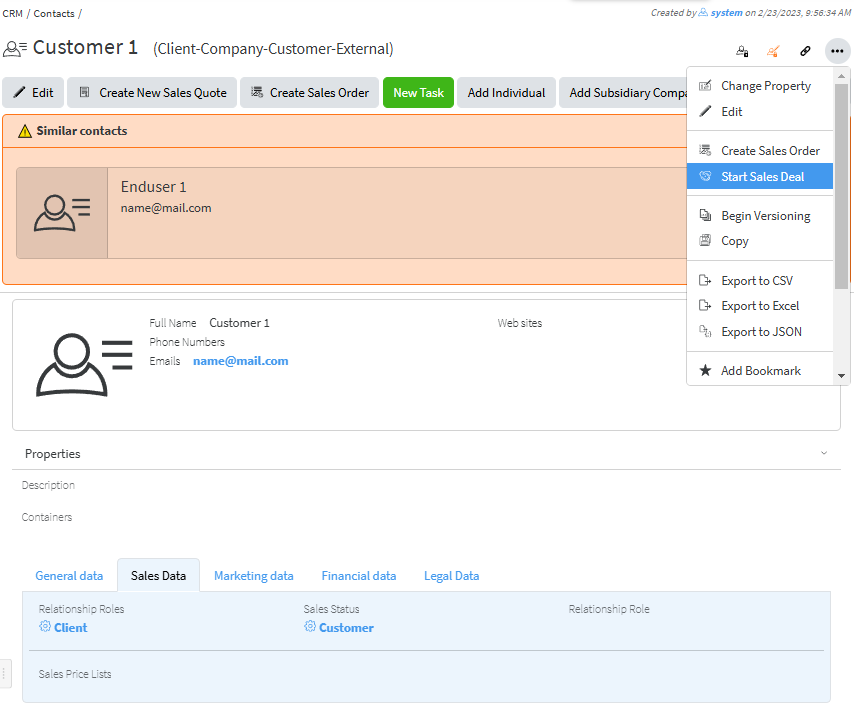
- From a contact, which type is External, and relationship role is Client (which might be a company or individual) Actions/Start sales Deal.
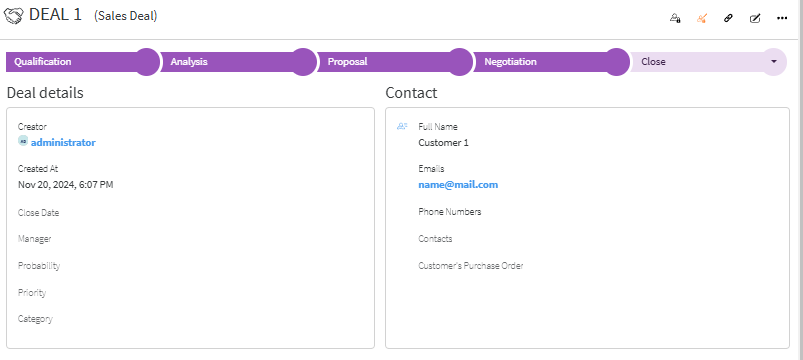
The details then need to be added.
Name – a name of the deal
Description – some description or additional details can be added
Close date – if there is a deadline it can be added here
Currency – it is selected from a dropdown menu. If not selected USD is used by default.
Price list – it is selected from a drop-down menu, as options shown depend on the currency chosen. For Price list see Creating Price List
Payment method, Payment terms, Shipping method and Contacts are added if needed.
Deal # by default is a text, depending on the company policy for numbering Sales deal, however automatic numbering can be additionally configured. Enumerators can be added in advance to use automatic numbering. Creating Enumerator
By Pressing Create, the Deal is created.

Items (Sellables) can be added after that in Edit Mode (Actions/Edit) or by quick edit button 
When pressing Add item at the bottom left of the deal screen, a field with item details is shown.
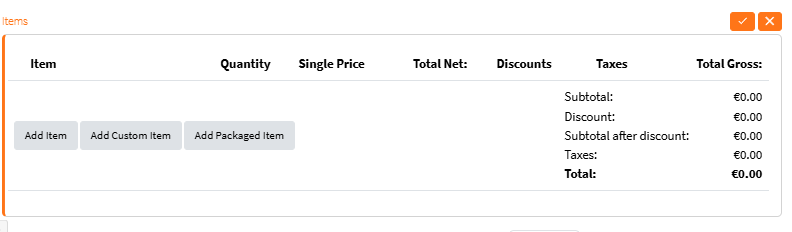
By clicking in an empty field a list with suggested Products is shown,
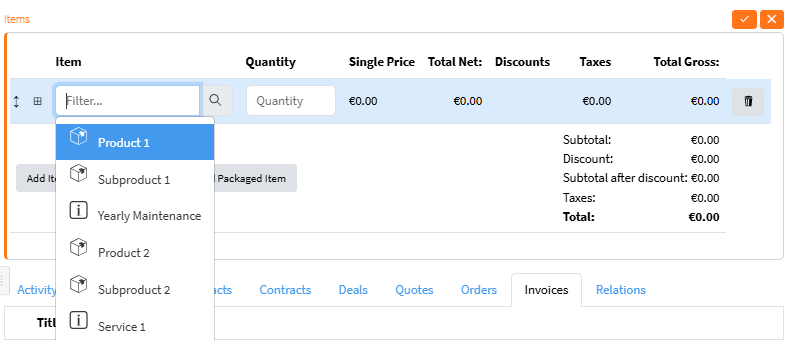
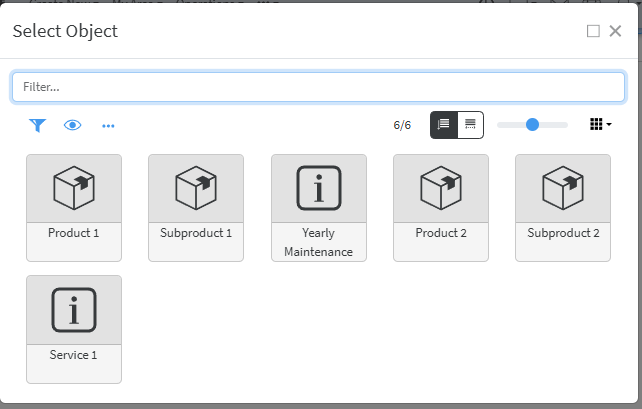
If another one needs to be found or new created you have to click on the magnifier and in the pop up screen you can find an existing item.
The new product or service can be created and it will directly appear in the deal.
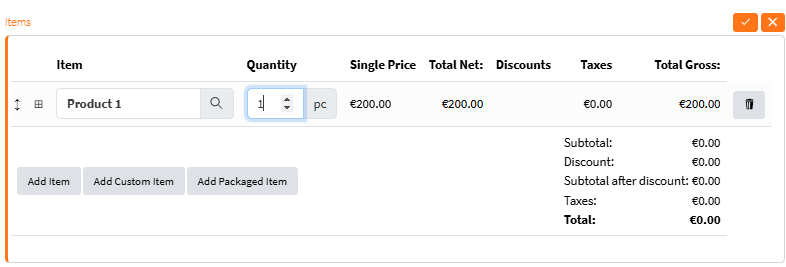
Once the Item is added and quantity is set to 1 or more, the price from Price List appears. It can be edited if necessary.
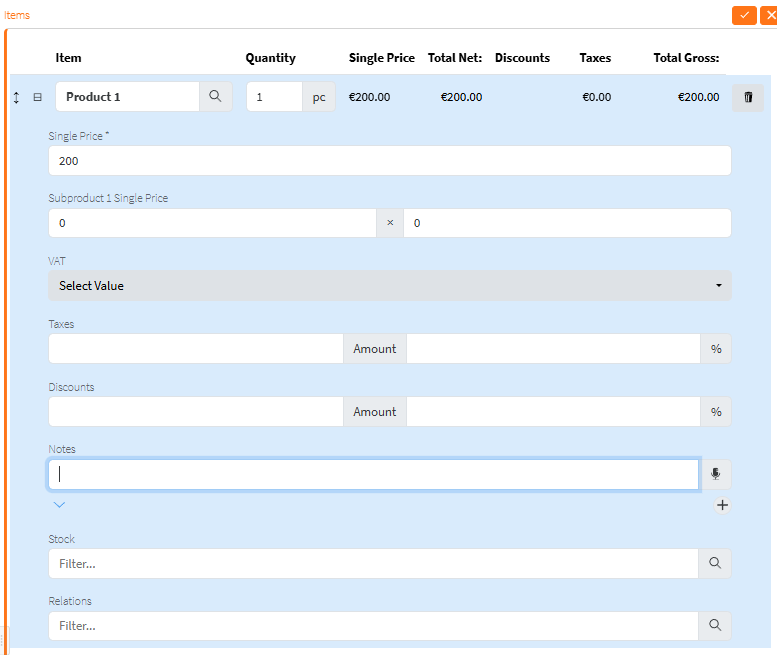
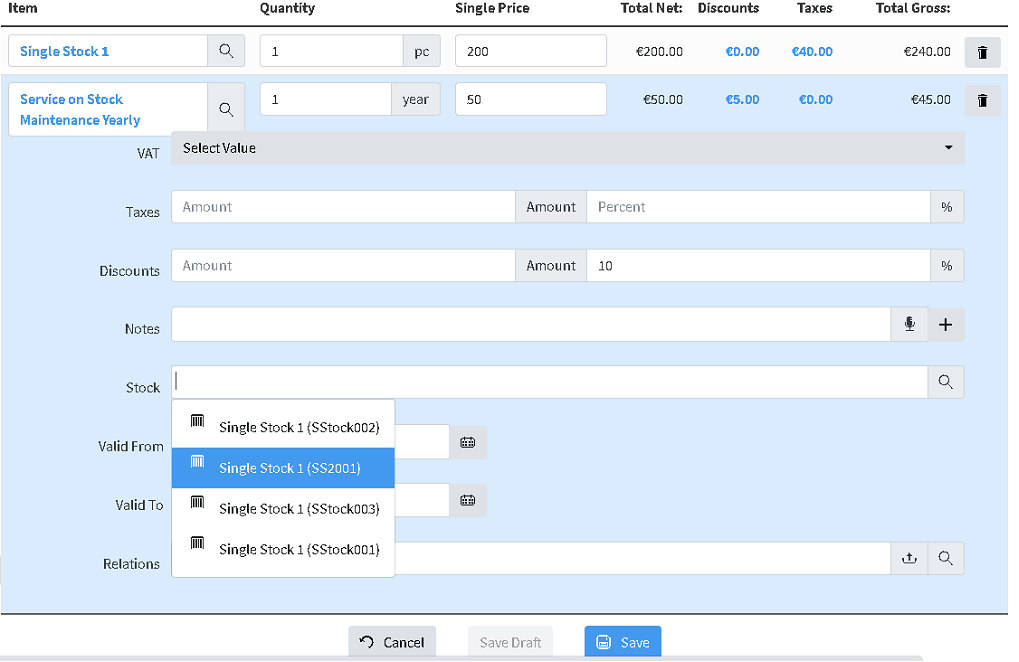
Some additional information needs to be filled in and it appears by pressing here 
Quantity and single price can be edited.
The VAT, additional taxes and discounts (in % or with a value) can be added.
Stock will be defined later.
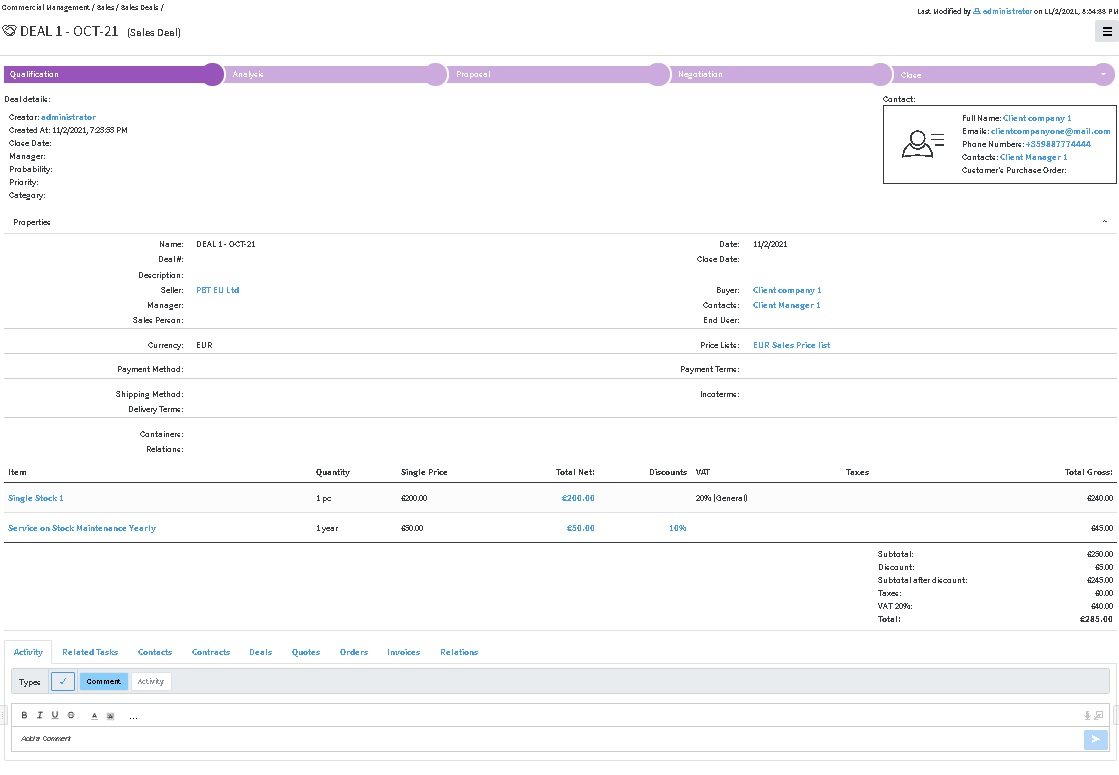
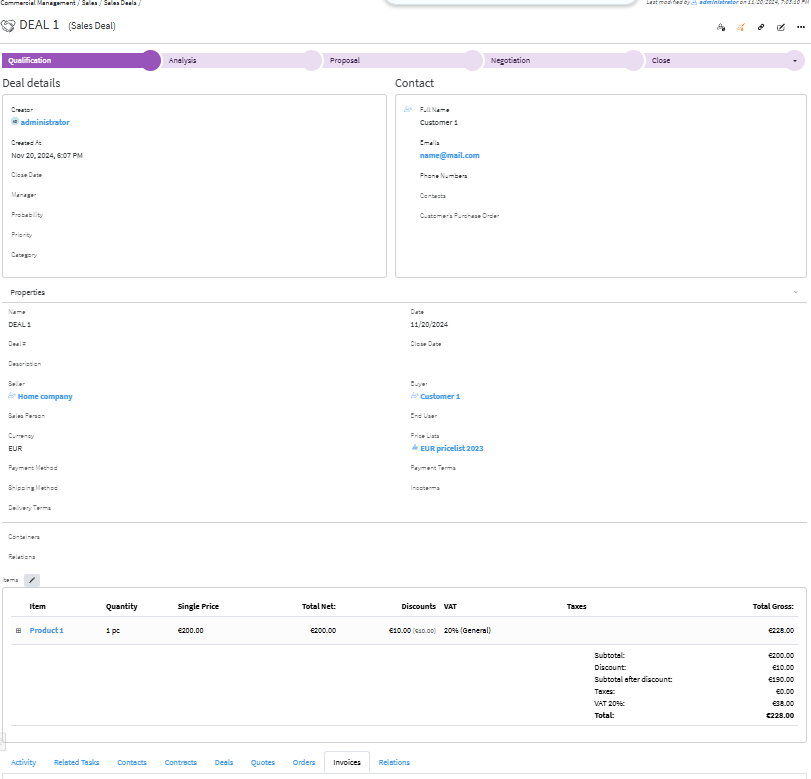
Deal statuses by default configuration are
Qualification – Analysis – Proposal – Negotiation – Close Approved/Close Declined
Depending on customer’s needs these statuses can be more or less and named in a different way.
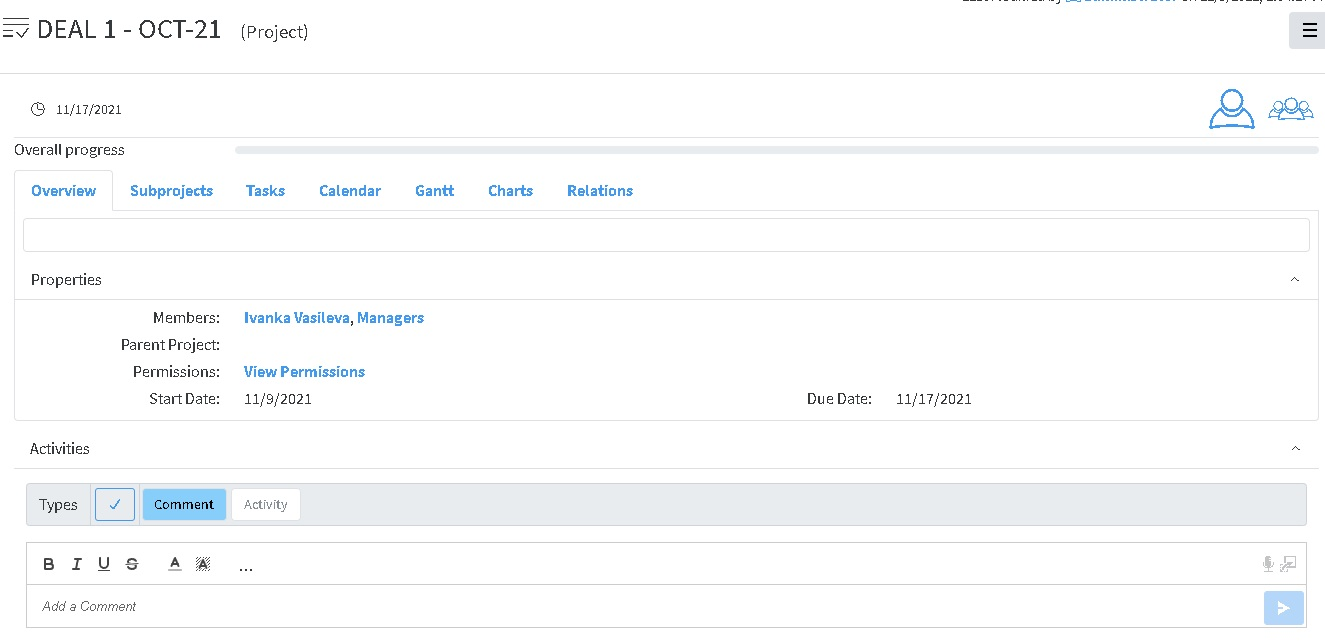
In the Deal Object at the bottom of the page there are several tabs with useful links and information.
Activity – shows log of the Activities and Comments and user can choose what to see by clicking on the text Comment and/or Activity – if highlighted the tab names, the corresponding information can be seen below.
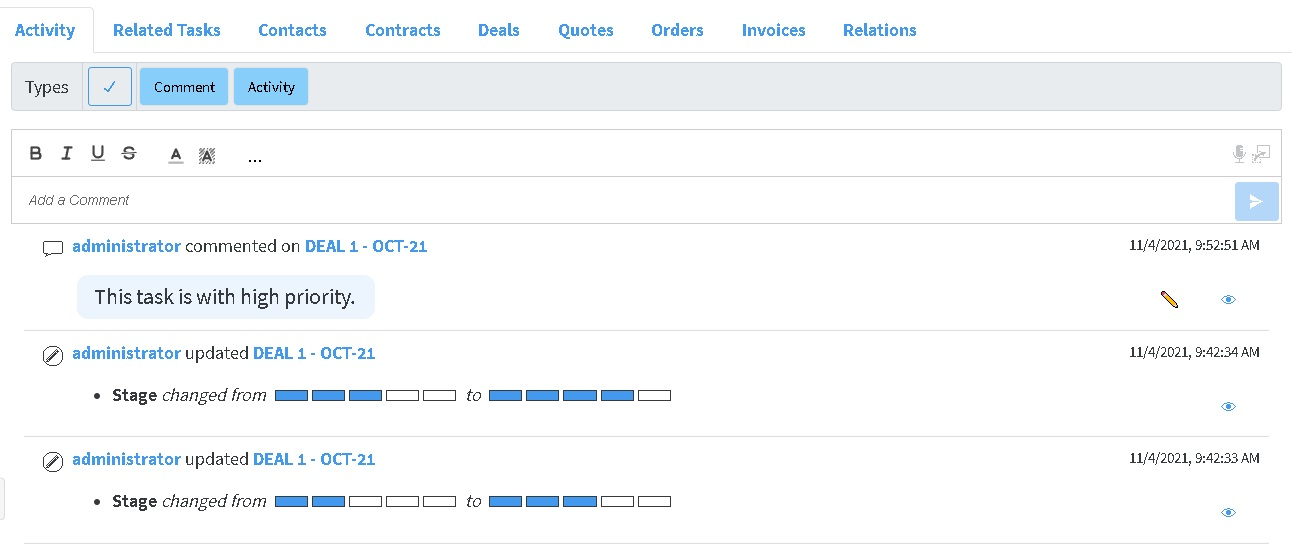
Adding a comment.
In the bottom part, Activity tab – Add a comment is visible in grey, there the comment is written and it is added by pressing Submit Button.

In the other tabs, the corresponding information appear.
In Relations any related file or object can be seen Relating a file or an object.
Creating a Quote
From Deal the Quote can be created by Actions/Generate Quote with the details that are in the Deal
Quote # by default is a text, depending on the company policy for numbering Sales quote, however automatic numbering can be additionally configured. Enumerators can be added in advance to use automatic numbering. Creating Enumerator
Quote Statuses by default are Qualifications – Sent to Client – Reviewed by Client – Close(Approved/Declined)

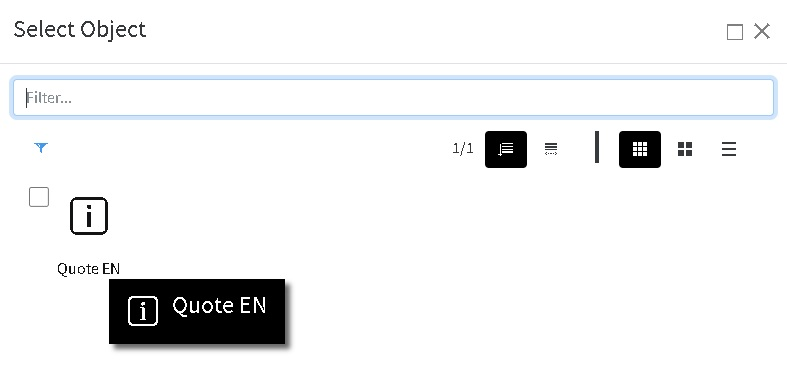
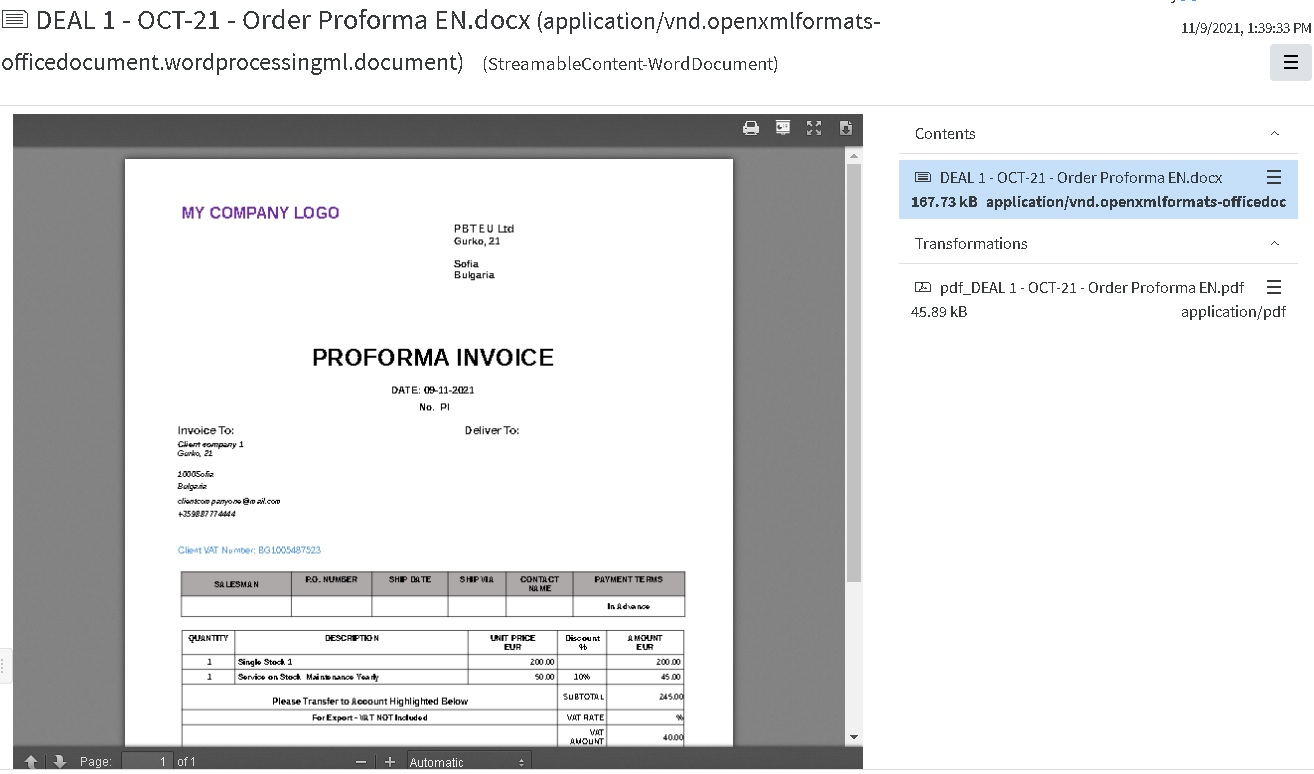
To create A file from Template with the details from the objec, go to Actions – Fill in Template

and choose the Template you need.
Once selected, the document is generated. It might need some time.
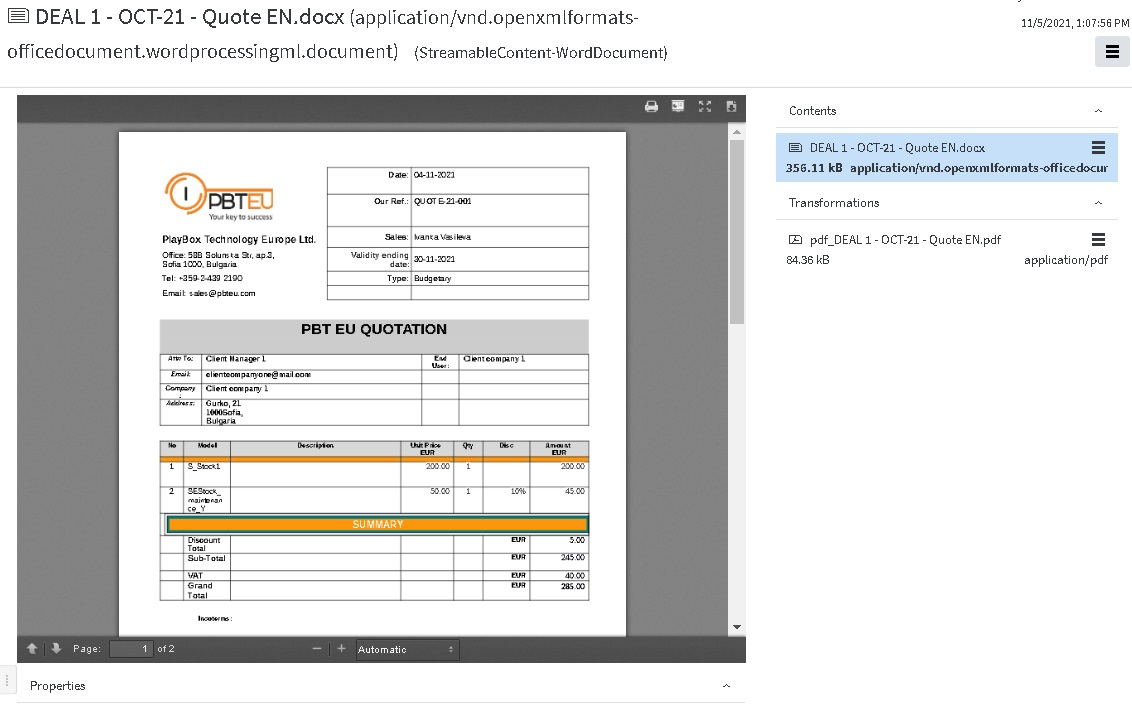
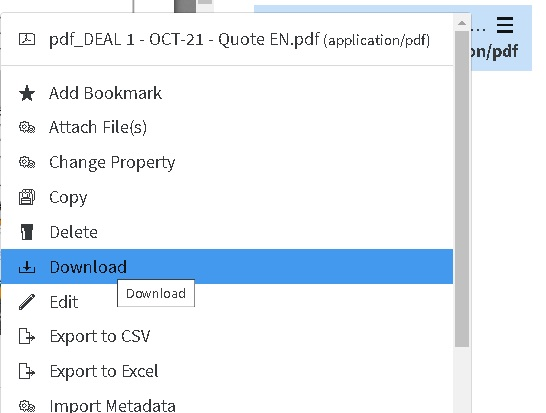
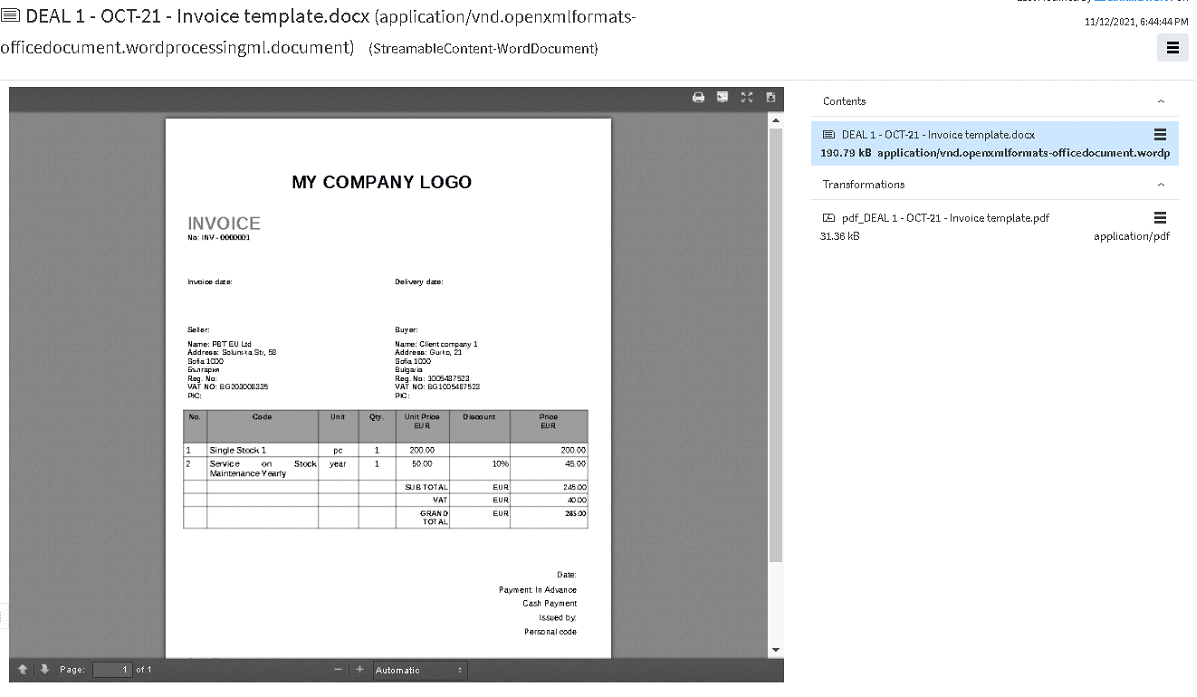
Then the file is generated in docx format, and there is pdf transformation available as well. The download of .pdf file can be done by download button in JS viewer or in the Transformation field. Docx file is shown in the Contents field. By clicking the Actions icon ![]() the Download option appears.
the Download option appears.
The Quote object can be accessed from the current view of the generated file as it appears at the bottom in the Relations section
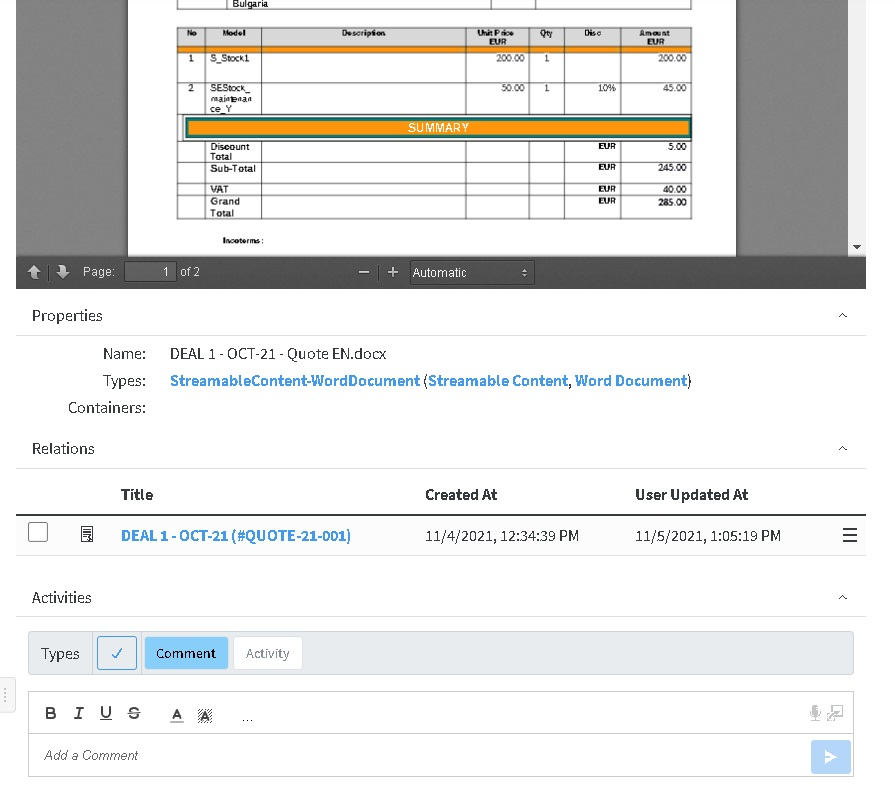
A docx file appears in Relations tab at the bottom of Quote object. It can be downloaded from there as well via Actions icon ![]()
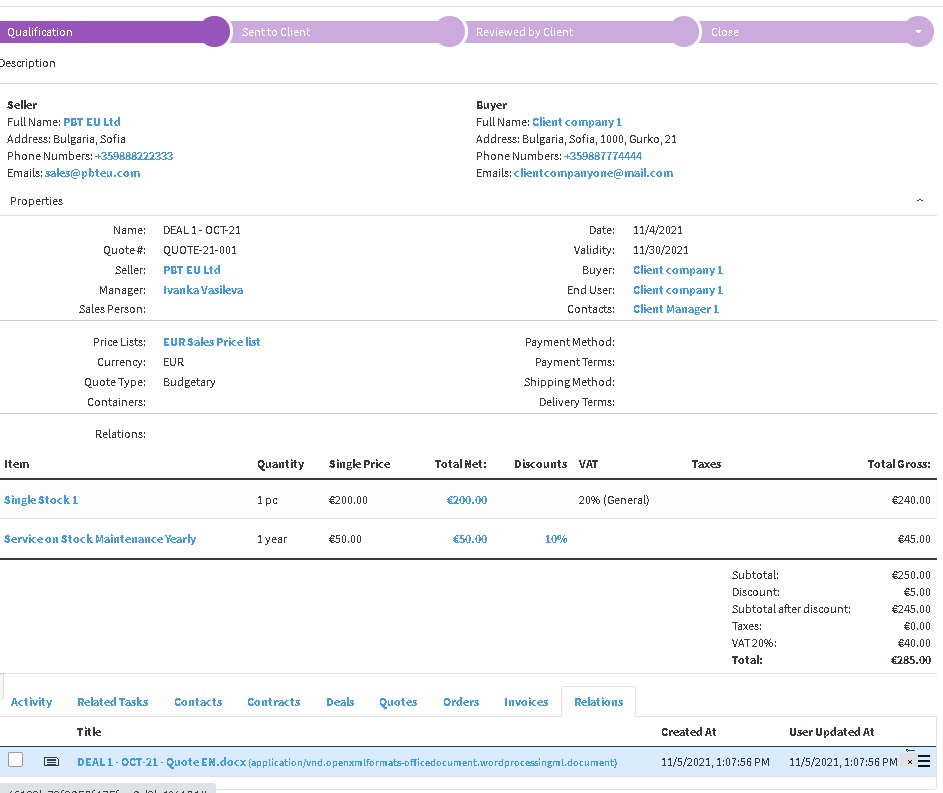
Once the status of the Quote is set to Approved, the next step can be done – creating an order
Creating an order
- From Create New/Other – Sales order – in case Sales process doesn’t go via Deal-Quote
- From a contact, which type is External, and relationship role is Client (which might be a company or individual) Actions/Creates Sales Order - in case selling process doesn’t go via Deal-Quote
- From Quote the Order can be created by Actions/Create Order
Order statuses by default configuration are Draft – Validated – Processed - Close (Delivered or Canceled)
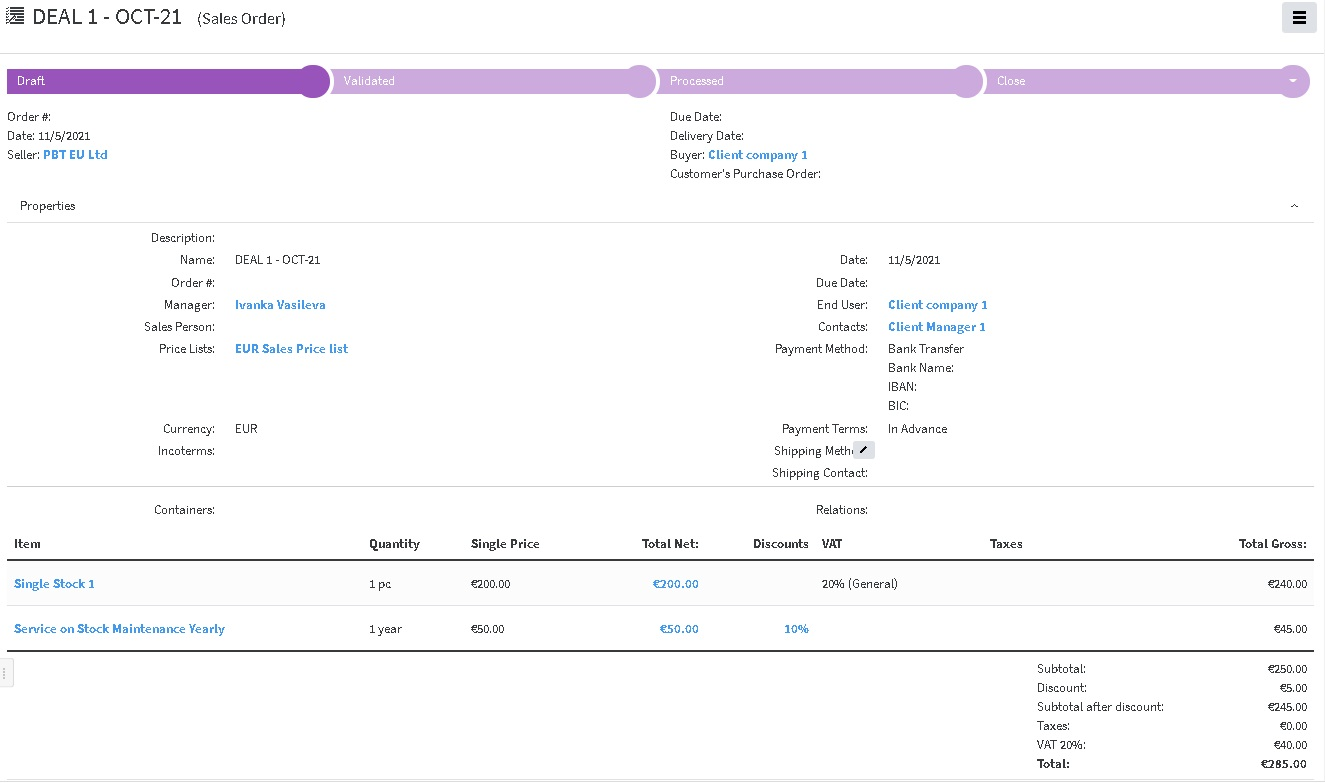
Order has the same data as Quote. If necessary, some may be added and some amended.
Order # by default is a text, depending on the company policy for numbering Sales orders, however automatic numbering can be additionally configured. Enumerators can be added in advance to use automatic numbering. Creating Enumerator
Order statuses by default configuration are Draft – Validated – Processed - Close (Delivered or Canceled)
In order to go to Stage Processed, the stock for each Product or Service on stock has to be set. That means that exact stock, from the inventory has to be appointed. If that is not done the current message will appear

This is how the stock is appointed:
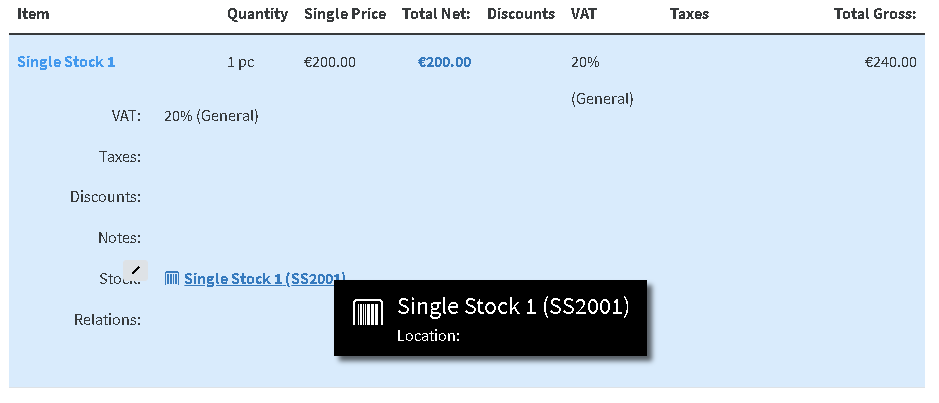
Via quick edit, by click on the details in Total Net or Discounts in the line of the Item

Then the Item area appears, in the Stock field click quick edit
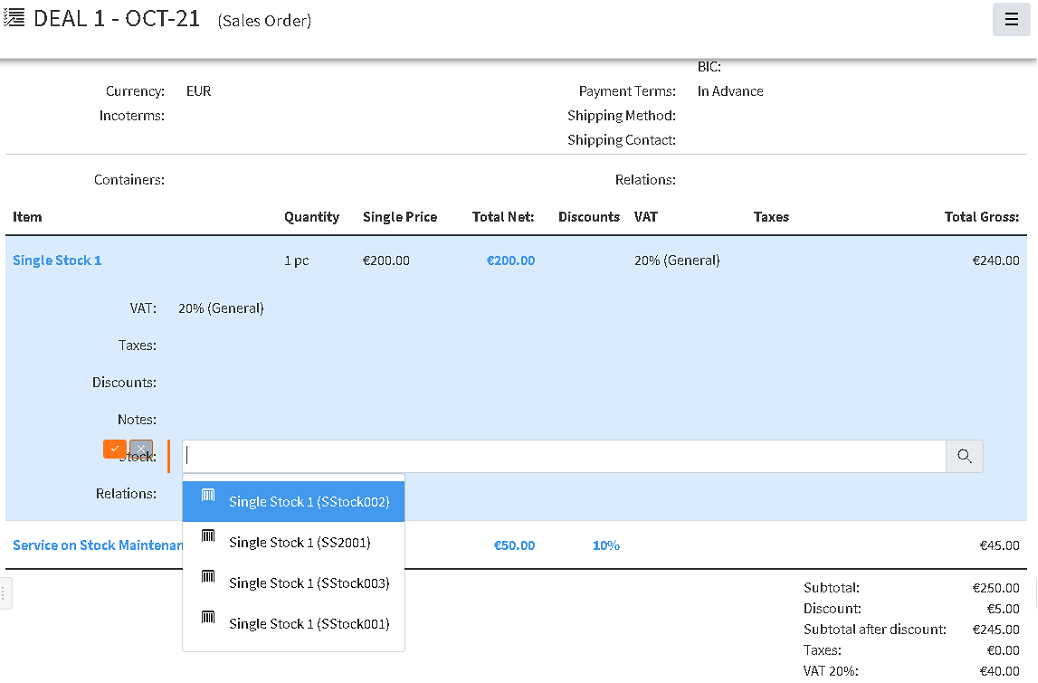
The stocks that are available, appear as choices.
Same is done in the Edit mode of the Order
After the stocks are set for each Item that needs it, the status can be changed to Processed and Invoice can be created.
Proforma Invoices, Order Acknowledgements (or other documents) can be generated by Fill in Template in Actions.
Creating a project from Sales Order
More information can be found in Project Management chapter
- From Create New/Other – Project
- From order the Order can be created by Actions/Create Project from Order
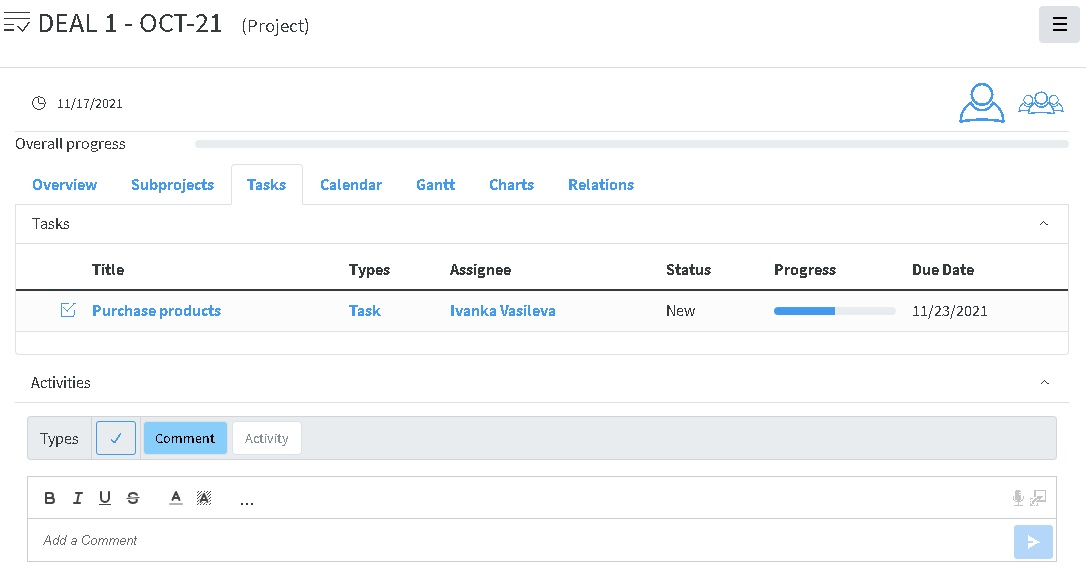
New tasks or subprojects can be added as follows:
If different types of Tasks are defined, they can be used for the specific processes in the company.
This is how a simple task looks like:
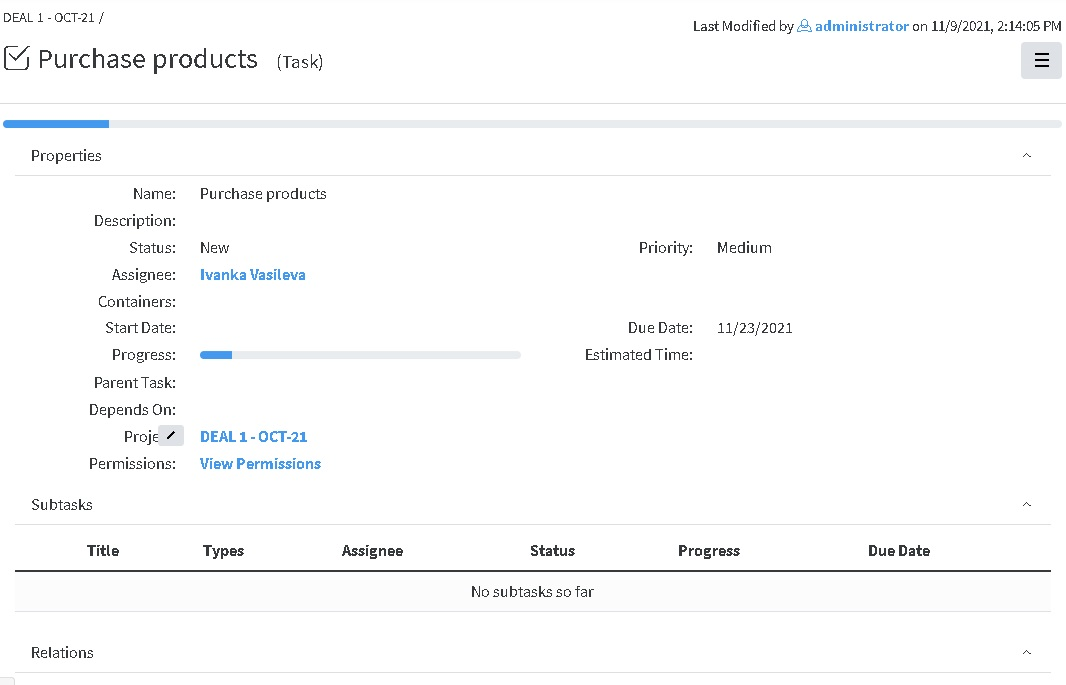
Tasks to the Projects appear in the Tasks tab
Issue an Invoice
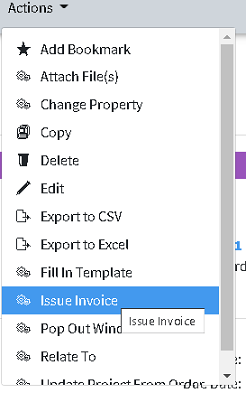
From the order, which status is Processed Invoice is created by Actions - Issue Invoice
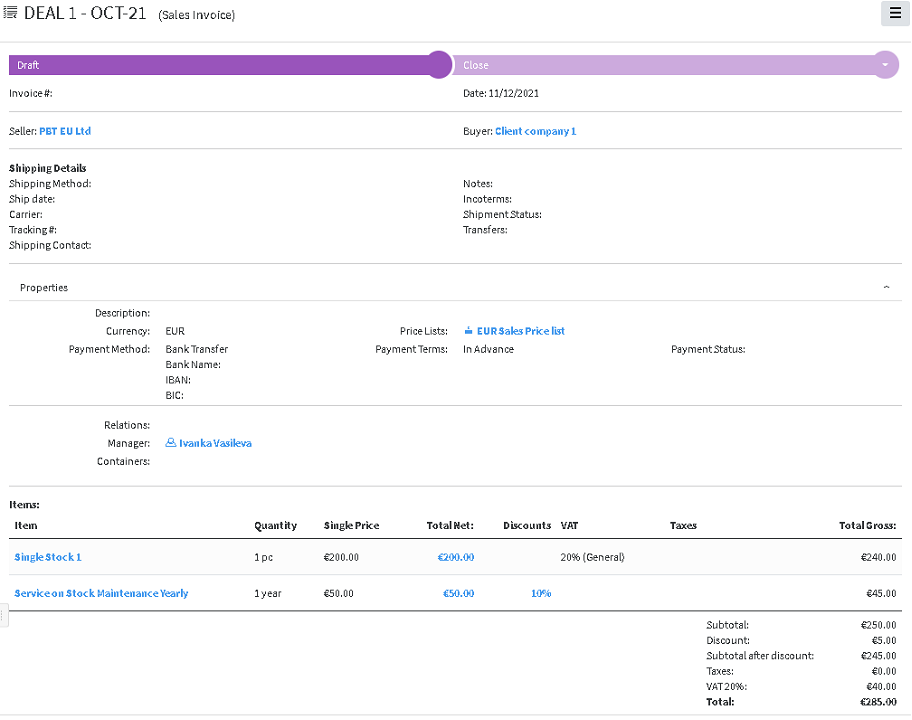
The object Sales Invoice is created with the data from the order.
Generally, depending on the official rules for Invoice numbering, different Enumerators can be chosen. See Creating Enumerators for details,
When it is validated, the number and current date are automatically assigned.
If you need to see which stock is assigned to the Item, click on the price in the Item's row and the Stock can be accessed directly from there for reference.
The Invoice document can be generated by Fill in template, choosing the corresponding Template.
The process of delivering Stock items to customers is described in Sales Transfer section