
Purchase process
It usually goes this way:
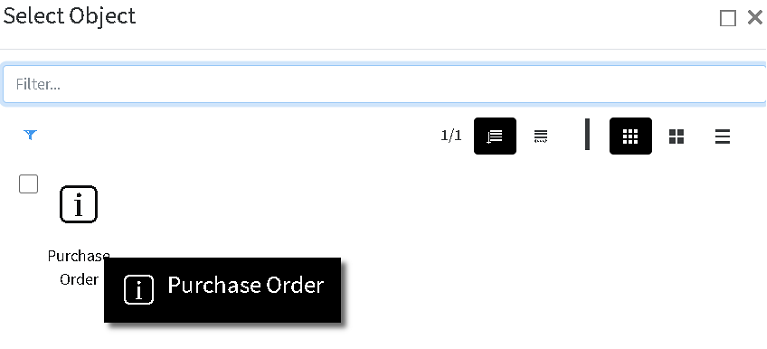
Purchase Deal (Optional)– Purchase Quote (Optional) – Purchase Order – Purchase Invoice – Purchase Transfer (for products) – Inventory (for Products), but it can be configured to skip some steps if do not necessary.
In oder to start, Products, services and Price lists has to be defined. Please, refer to Products an services section
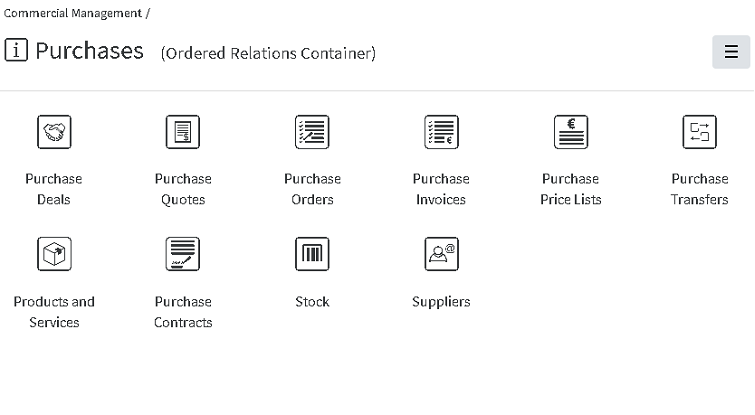
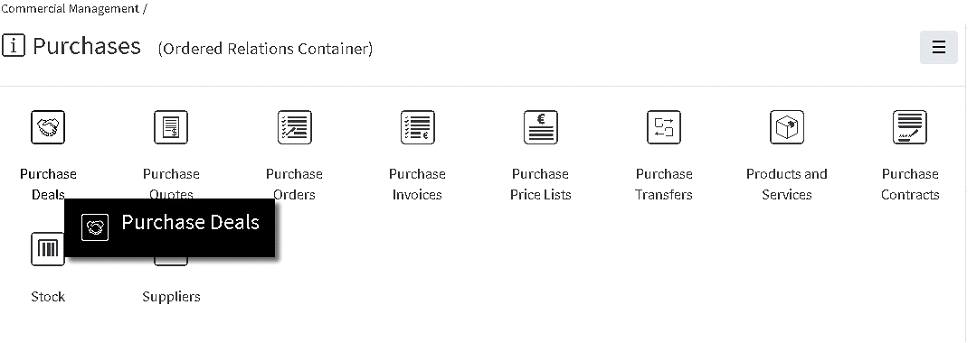
All objects part of the process or related are listed in containers Purchases section of Commercial Management module.
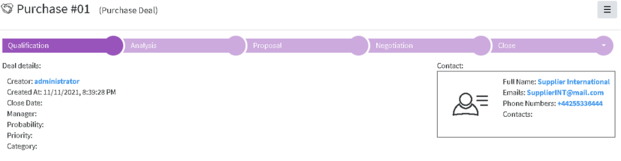
Starting a Purchase Deal
- Starting a Purchase Deal can be done directly from the Purchase Deals container in Commercial Management folder
Several basic details need to be defined upon starting: Name (you choose as per important information), Seller and Buyer, Currency and Price List (Mandatory)
Seller can be chosen within suggestions, shown after entering several letters in the Seller field. The list of available options to choose from contains companies, defined as External and Suppliers. LINK TO Contacts
There are other optional details, such as Manager, Close date, Payment Method. Payment terms, Shipping method, Contacts etc., that can be added or edited later.
Enumerators can be added in advance to use automatic numbering. Creating Enumerator
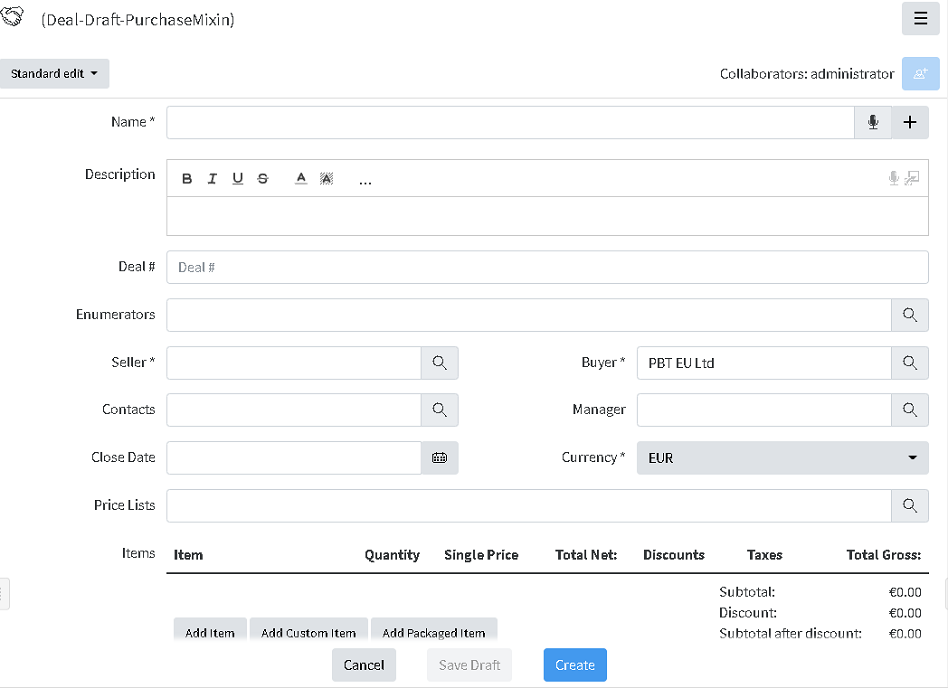
Items can be added now or later on by Actions/Edit.
Add item is used for adding defined products/services (see Products and Services), included in the corresponding selected Price list.
Add custom item does the same thing, for the items, which are not defined as products, usually this is necessary for custom products, with a special description or price, needed once.
By pressing Add item, a new field is shown, where to select the item to be sold and define Quantity and Price will appear, once Quantity is selected, VAT, taxes (fixed amount or percentage, discounts (fixed amount or percentage) and relations if any.
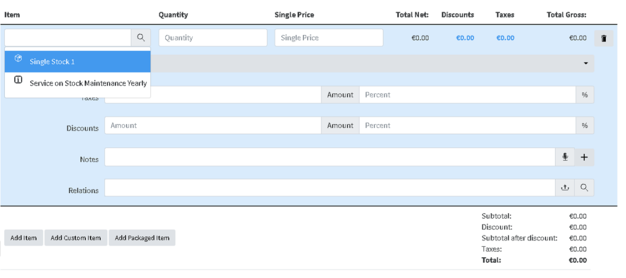
More Items can be added by buttons below.
After entering all details, press Save and the item will appear in the Deal. If amendment is needed that can be done via Actions/Edit (or Edit button) and pressing on the item to view the fields described above.

Additional details such as Probability, Priority, Category and Container could also be defined if needed.
Deal # by default is a text, depending on the company policy for numbering Purchase deals, however automatic numbering can be additionally configured. Enumerators can be added in advance to use automatic numbering. Creating Enumerator
After entering the necessary details and Saving Deal is created. If edit is needed that can be done via Actions Menu/Edit.
Purchase Deal Stages
Default Stages of the Purchase Deal are: Qualification, Analysis, Proposal, Negotiation, Close (Won/Lost)
Create a Quote from the Deal
Creating a Quote from the Deal can be done in any of the Deal’s stages and That is done via Actions Menu/Generate Quote.

Once Quote is generated, the relation between the Deal and the Quote can be seen in the tabs at the bottom of the Deal object.

The generated quote has the same Title as the Deal. In order to avoid confusion, the text in brackets near the name of the Object shows the kind of Object it is (Purchase Quote).
It can be Edited by Edit Button or via Actions Menu/Edit.
Details can be added or edited.
Quote # by default is a text, depending on the company policy for numbering Purchase quotes, however automatic numbering can be additionally configured. Enumerators can be added in advance to use automatic numbering. Creating Enumerator
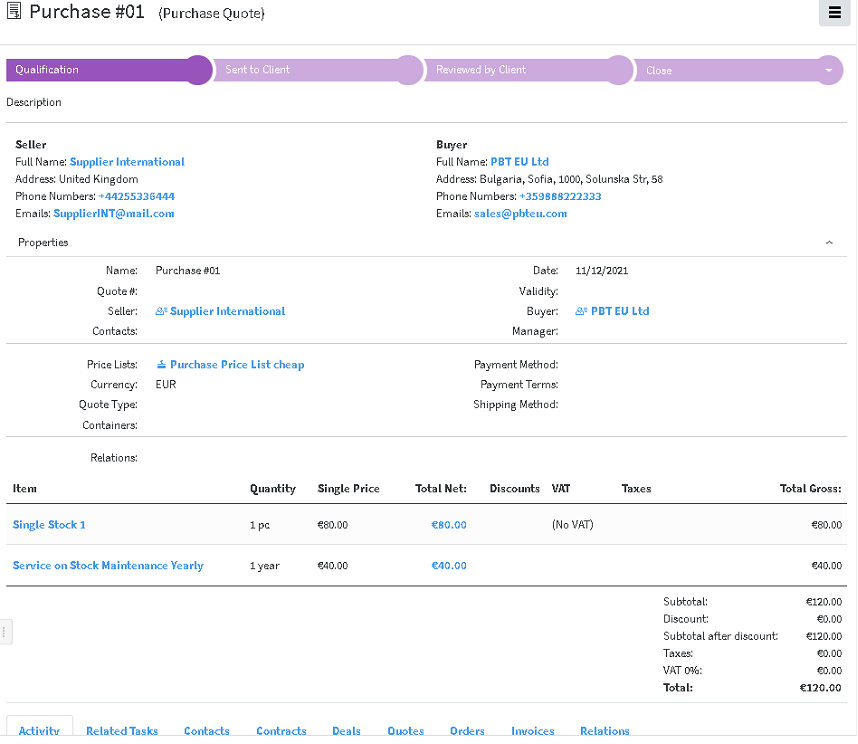
Quote has the following stages:
Qualifications, Sent to Client, Reviewed By Client, Close (Approved/Declined), which can help track the different Quote stages.
If necessary, Fill in template operation can be used to generate previously designed template for Quotation.
Next step is Create Order from Quote
Create Order from Quote
Order can be created from Quote or directly from the button in the Purchase Quote folder.
In case created from Quote, the details are copied to the Order created.
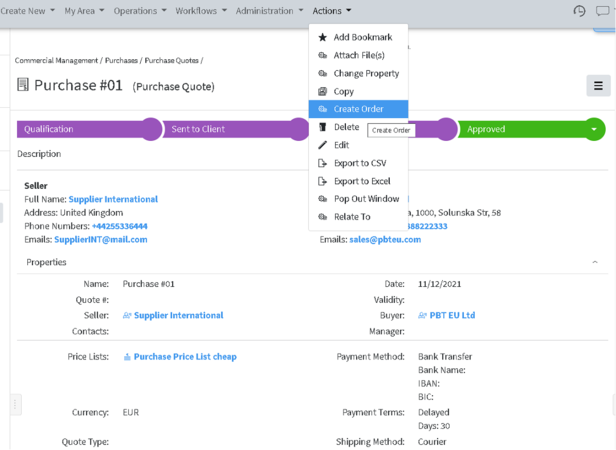
Again, the Purchase order created is opened automatically and can be edited or details can be added via Edit Button or via Actions Menu/Edit.
The generated Purchase order has the same Title as the Purchase Quote
Order # by default is a text, depending on the company policy for numbering Purchase orders, however automatic numbering can be additionally configured. Enumerators can be added in advance to use automatic numbering. Creating Enumerator
Stages of the Purchase order are as follows: Draft – Validated – Processed – Close (Delivered/Canceled)
Once it is Validated Fill in Template operation can be used to create Purchase Order documents.
It is available via button or via Actions Menu/Fill in template.
It can be used to generate from previously created template, a file in pdf format, which can be sent to the seller if necessary.
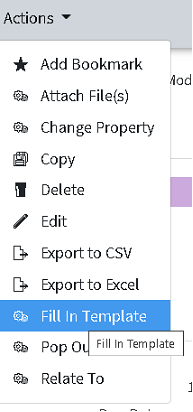
Here is how it can be done:
After clicking on the Fill in template button, a window opens, asking to Select the template to be used. The corresponding templates appear possible for selection
Once selected, the template is created and opened in .docx format, and the corresponding .pdf file can be seen in the Transformations field on the right.
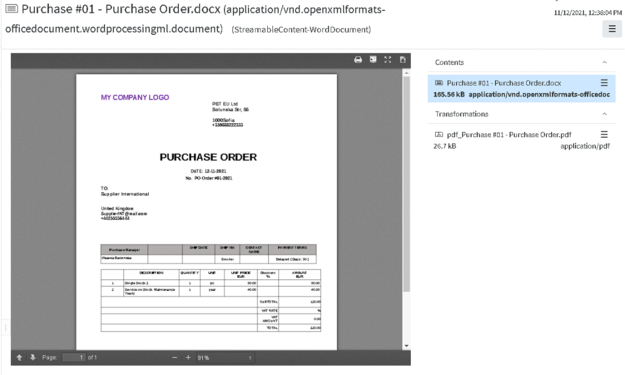
Names of the generated files are combination between Title of the Purchase order and Template name. It can be downloaded by pressing on the ![]() sign
sign

When in Purchase order, these files appear in the Relations tab at the bottom

Issue an Invoice
When proceeding to the next stage of the Purchase order - Processed, Issue Invoice button or Issue Invoice in Actions menu, becomes available.
When pressing the Issue Invoice button, Invoice is created. It contains the details from the order, but some additional details appear such as: Invoice #, Date, which corresponds to the details from the Invoice from the supplier. The Invoice from supplier, if available digitally, can be uploaded in Lapis and then related to this object
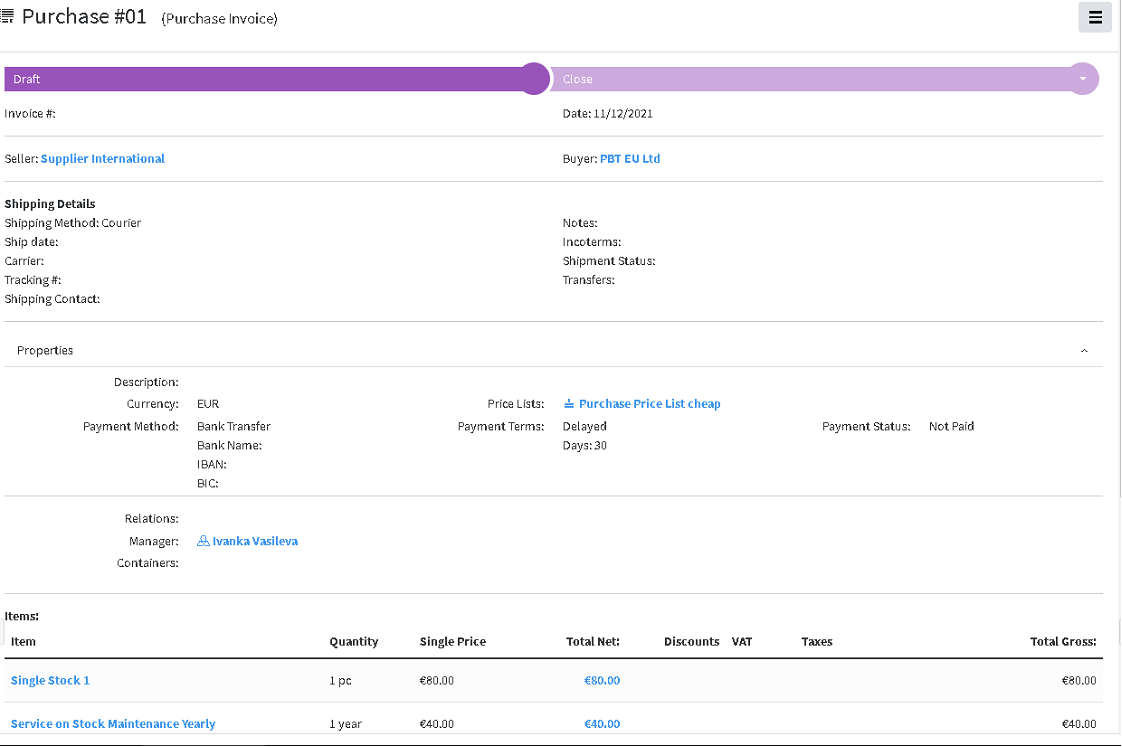
If Сhipping details are available, they can be added as well.
Payment status appears here and has several options, which are visible in Edit mode via quick edit
The Invoice status can be changed, once all available details are entered.
Once Purchase Invoice is created, it is already possible to enter the stock in the warehouse, which is done by Create transfer in
Transfer – the link to object Transfer will appear there, when available. Transfer creates stock in the Warehouse in Inventory container, with the details from the Invoice. The process is described in Inventory section.