Project Management
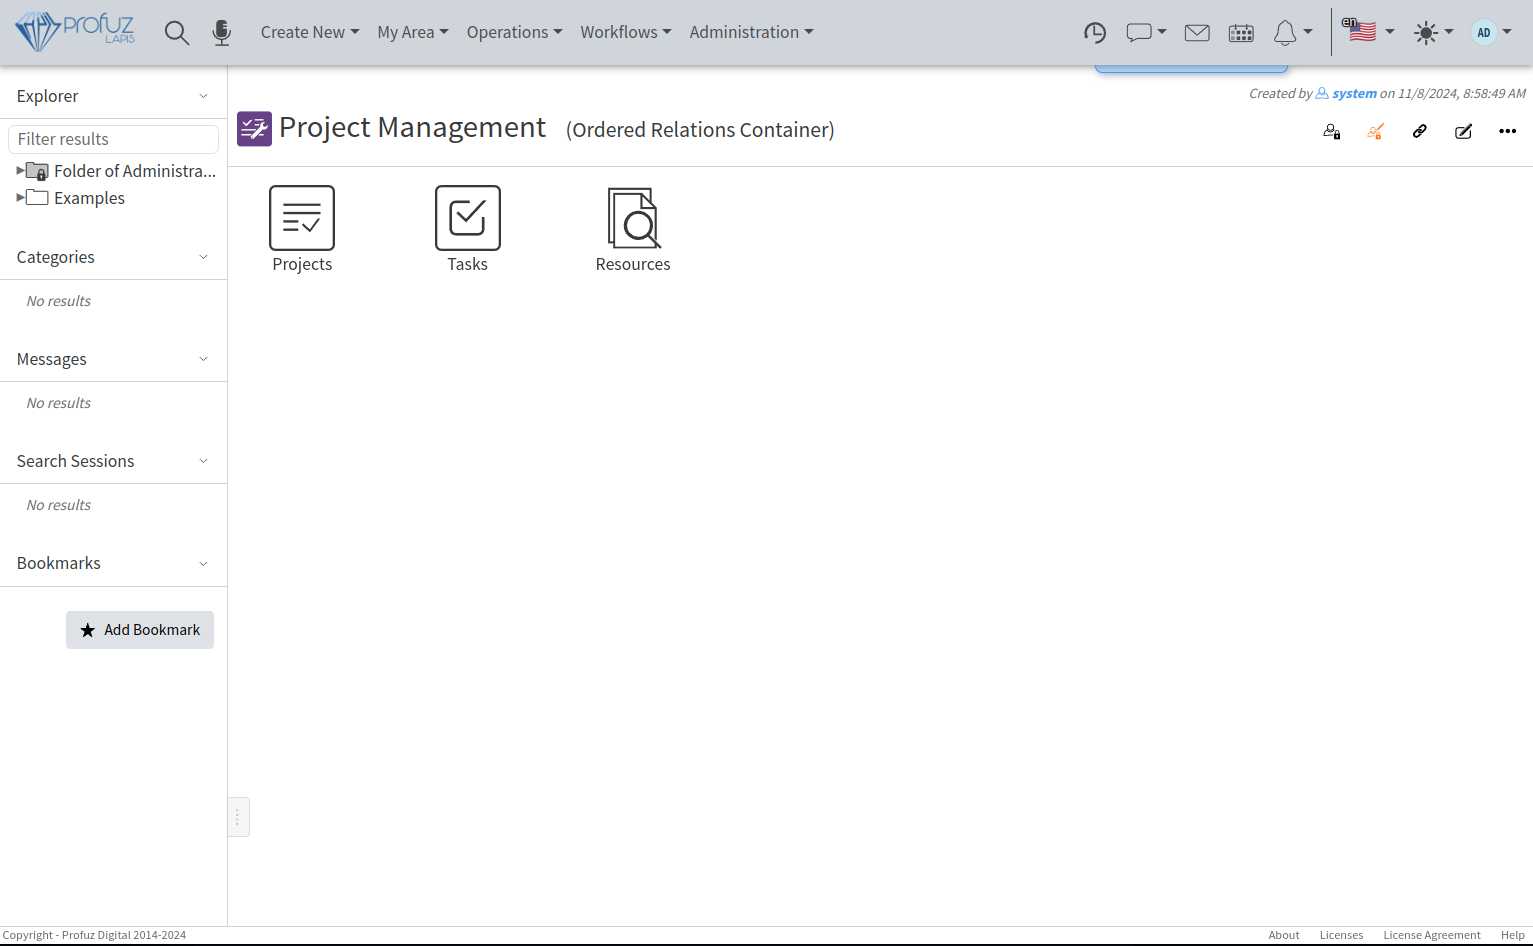
Profuz LAPIS provides simple tasks handling as well as complex project management functionalities. The default installation contains Project Management Module with the following default objects: Project (Calendar Event Metatype), Task (Calendar Event Metatype) as shown below and Resources.
Profuz LAPIS provides simple tasks handling as well as complex project management functionalities. The default installation contains Project Management Module with the following default objects: Project (Calendar Event Metatype), Task (Calendar Event Metatype) as shown below and Resources.
There are different ways of visualizing the projects overview (different views) such as Icons view, Grid view, List view and Calendar view. You can switch between them by selecting one of the icons in the upper right side of the screen. You can filter the information in the projects using a search.
Projects have the following default Properties: Name, Description, Members, Status, Priority, Assignee, Start Date, Due Date, Progress, Parent Project. New properties can be added and configured additionally. Properties placements can be changed for creating new, editing and viewing a project.
Creating a new project/task
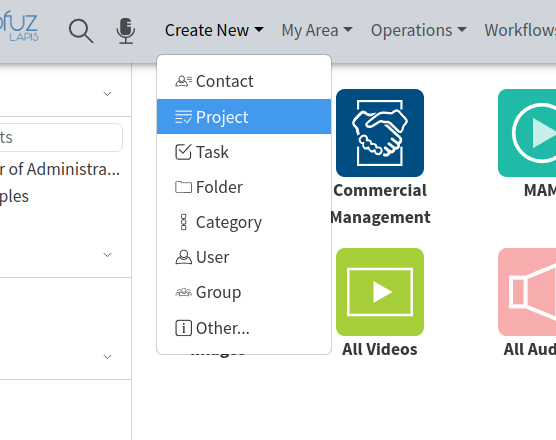
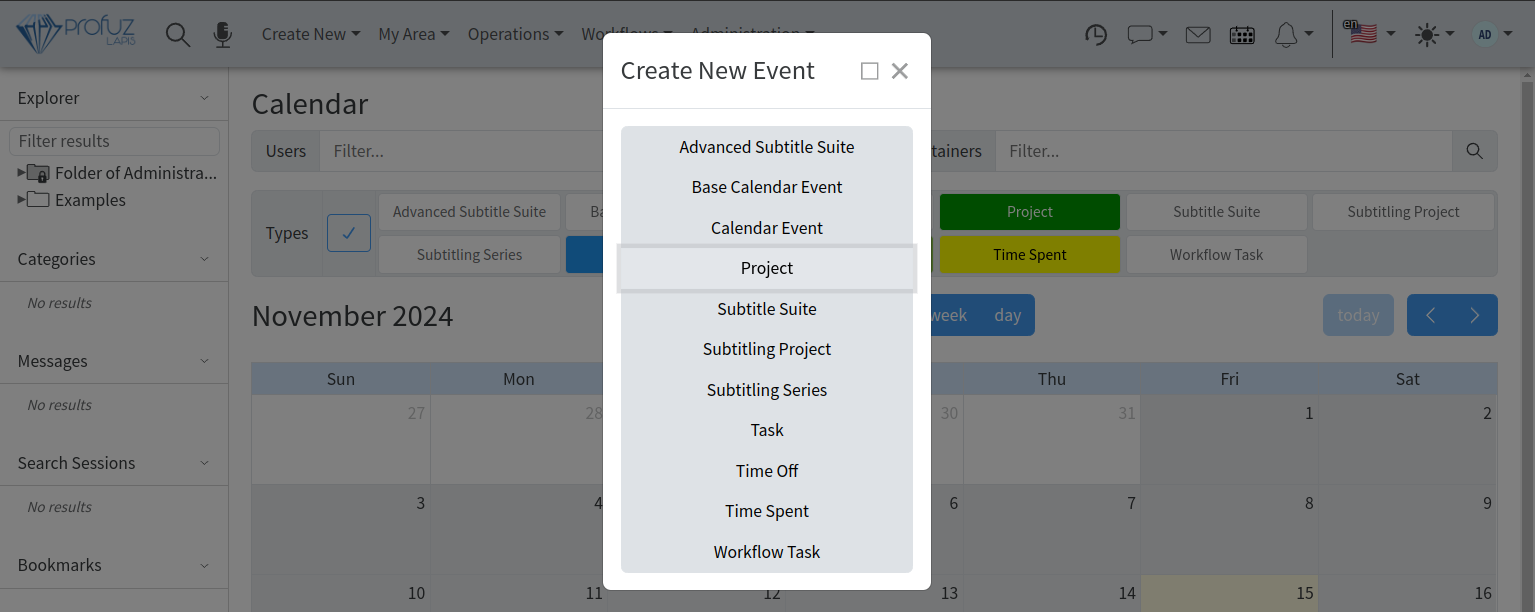
Projects and tasks can be created from the Application’s Main Menu by clicking on Create New → Project and Create New→ Task as shown on the screenshot below:
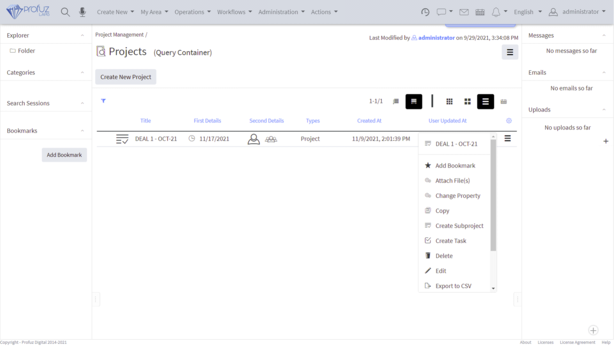
or you can go to Project Management - Projects (or Tasks) and press Create New Project (or Create New Task) button:

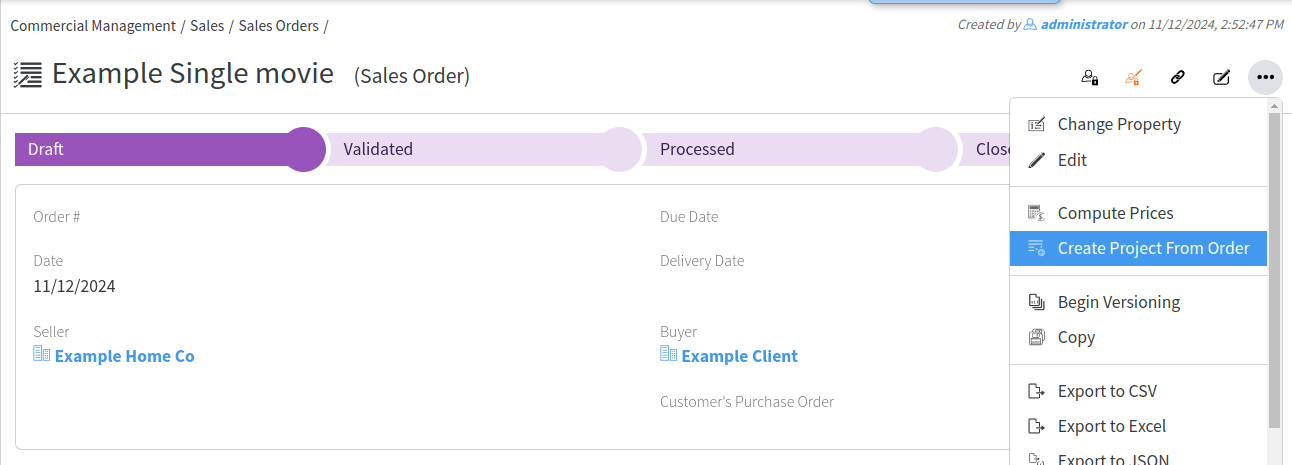
If you are using Profuz LAPIS CRM module, you can also directly create project from the order by using the
operation Create Project From Order which is available in the Actions Menu when you are working with an Order. Please see the screenshot:
New Tasks can be created also from the Calendar by selecting the period from the start date to the due date as shown below:
Creating a Sub-project
How to create a Sub Project?
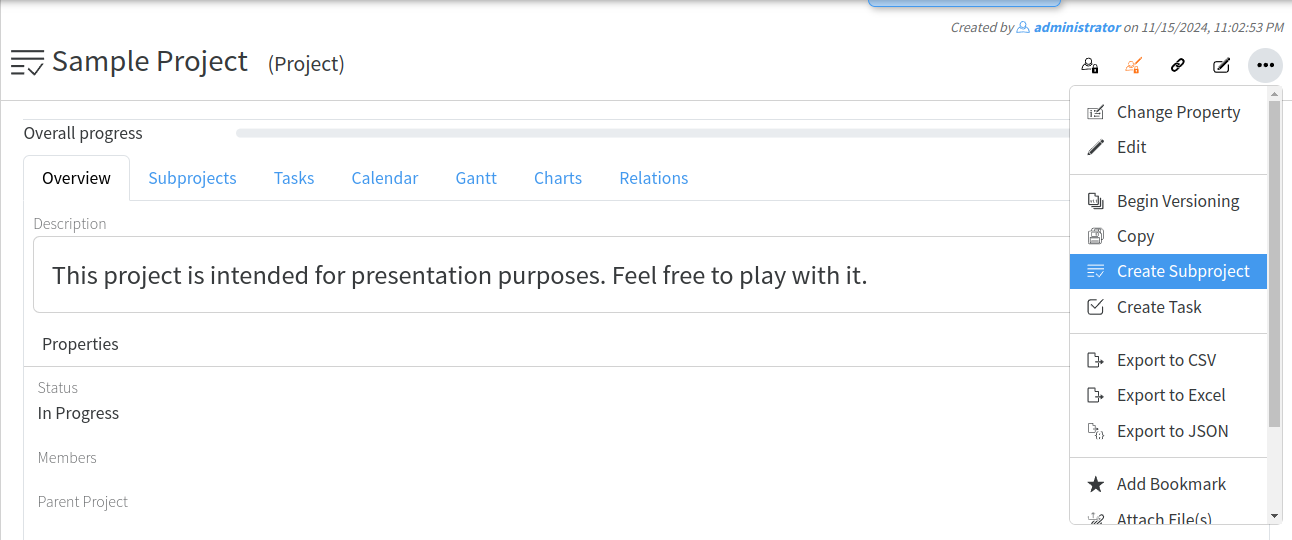
Sub-projects creation is a standard functionality in Profuz LAPIS PM. You can create sub-projects from the Selection Actions Menu as shown on the 2 screenshots below:
While you are inside a project, you can create a new sub-project from Actions menu as shown:
Finding my projects/tasks or the projects/tasks I am involved?
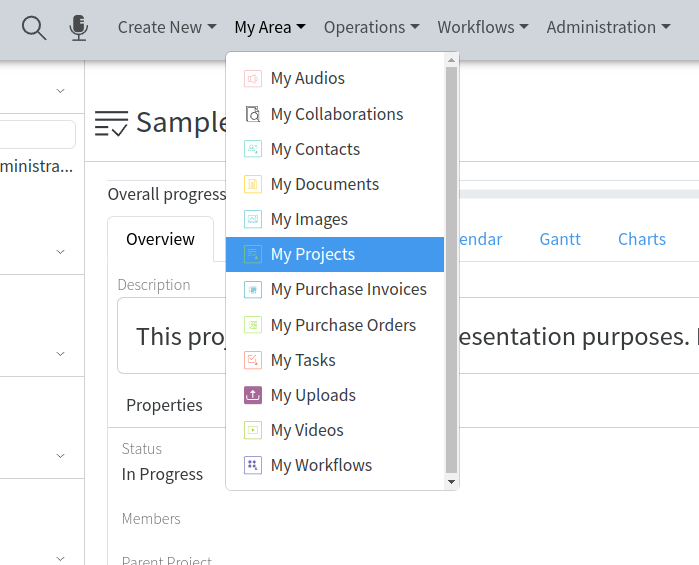
All projects/tasks to which I am Owner, Creator, Member or Assignee will be listed in My Area accessible from Applications Main Menu:
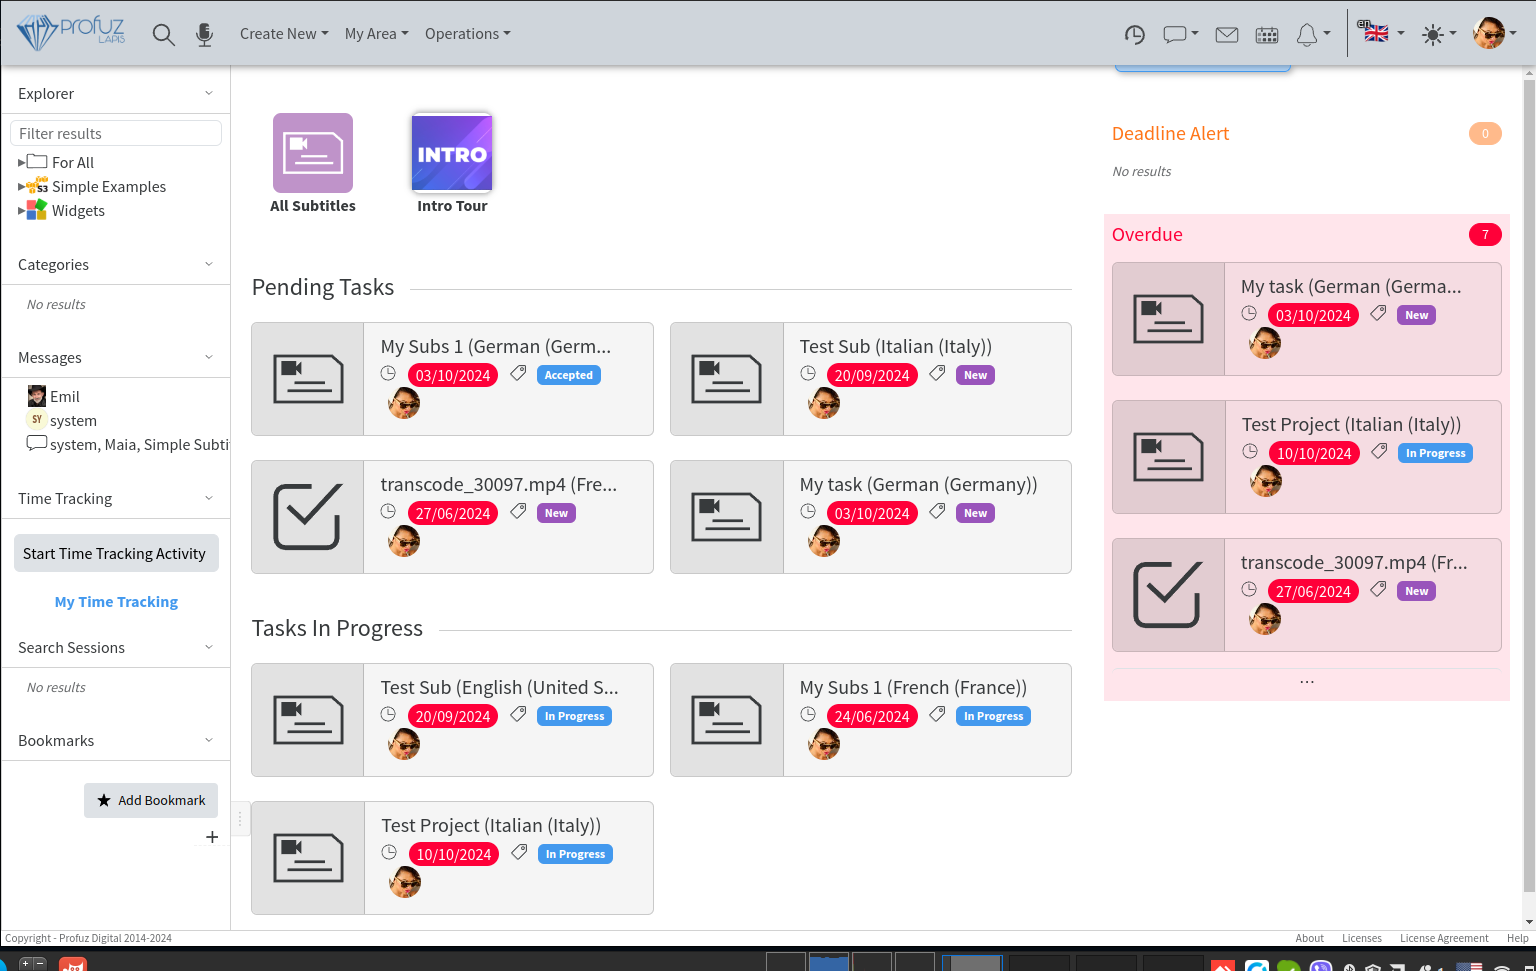
There is also a possibility to have a user specific dashboard where to list projects/tasks based on defined by the user criteria. An example of a personalized dashboard can be seen below:
In addition to that, there is a possibility to have multiple task-specific or user-specific Project Views/Overviews. An example is shown below:

Editing projects/ tasks
You can use the EDIT command from the Application’s Main Menu - > Actions like shown below:
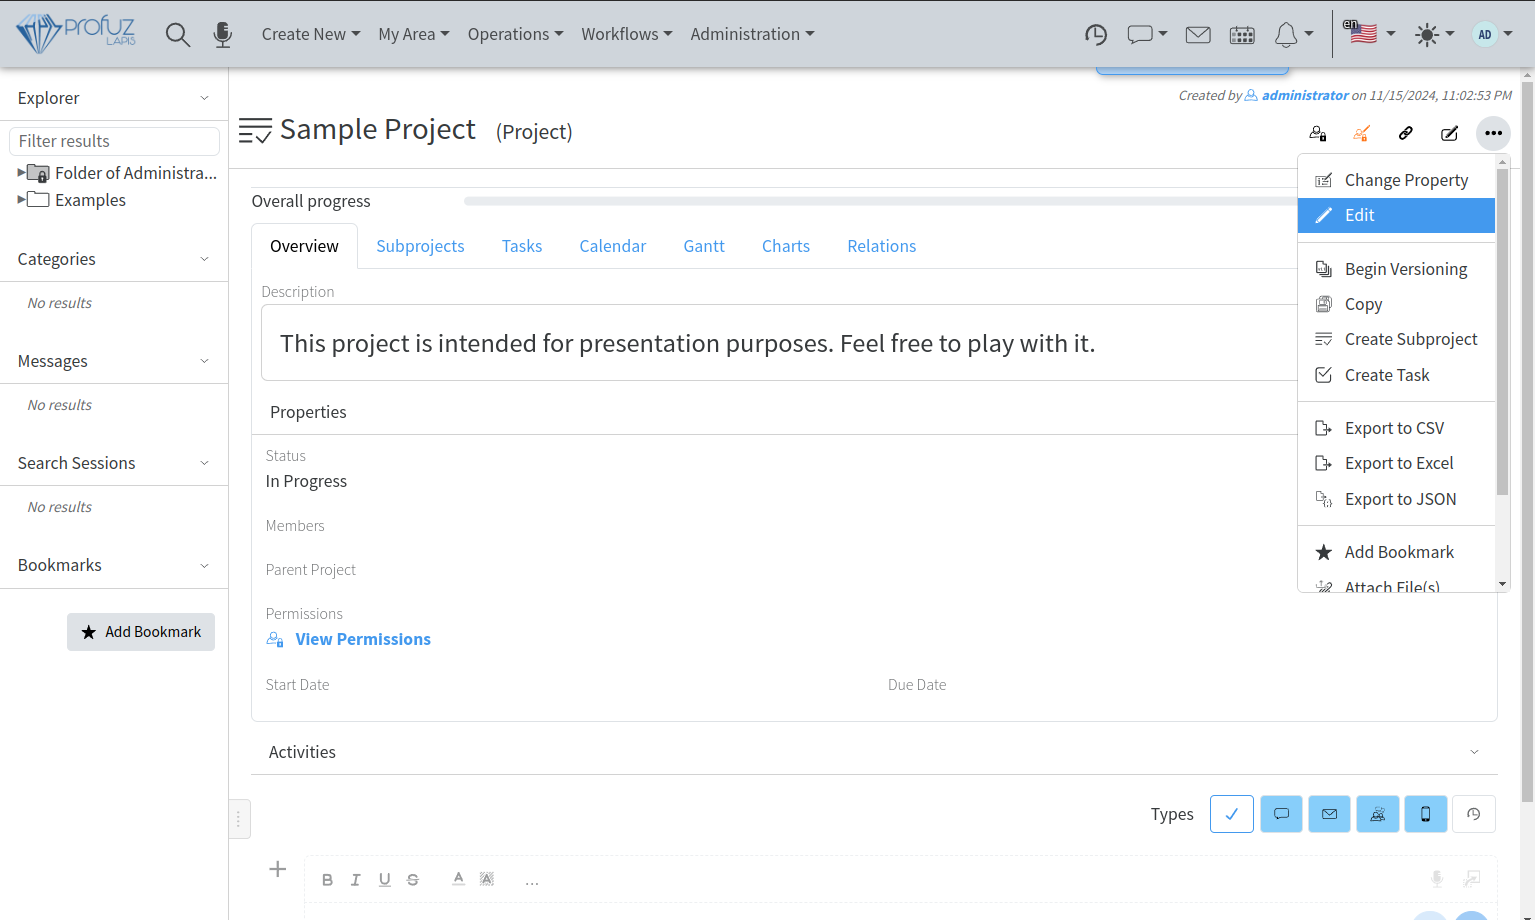
Every property (parameter) of the project or task can also be edited individually by using the edit icon appearing next to the property when you hover it.
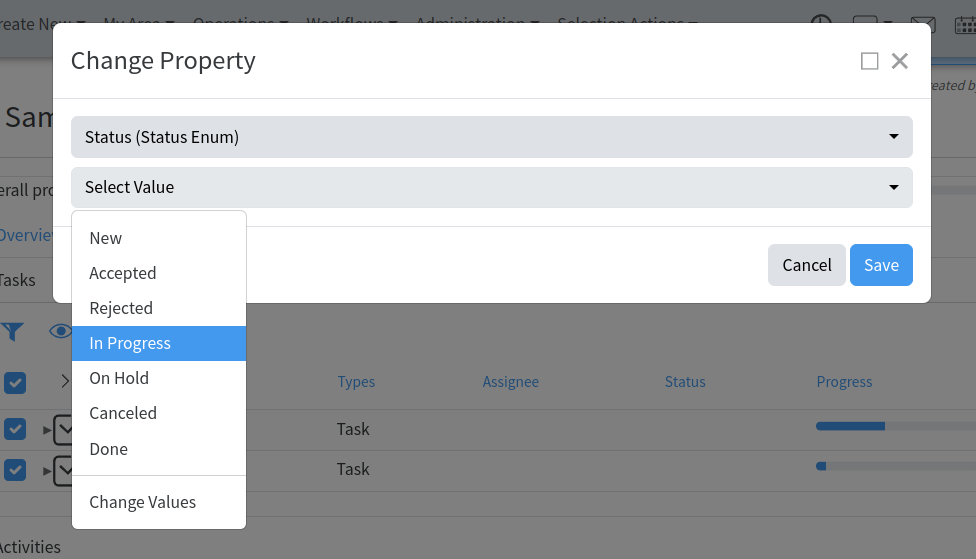
You can also change quickly one and the same parameter of multiple projects or tasks by selecting the projects/tasks to which you want to make this change and use the Change Property command available in Selection Actions Menu at top of the application as shown here:
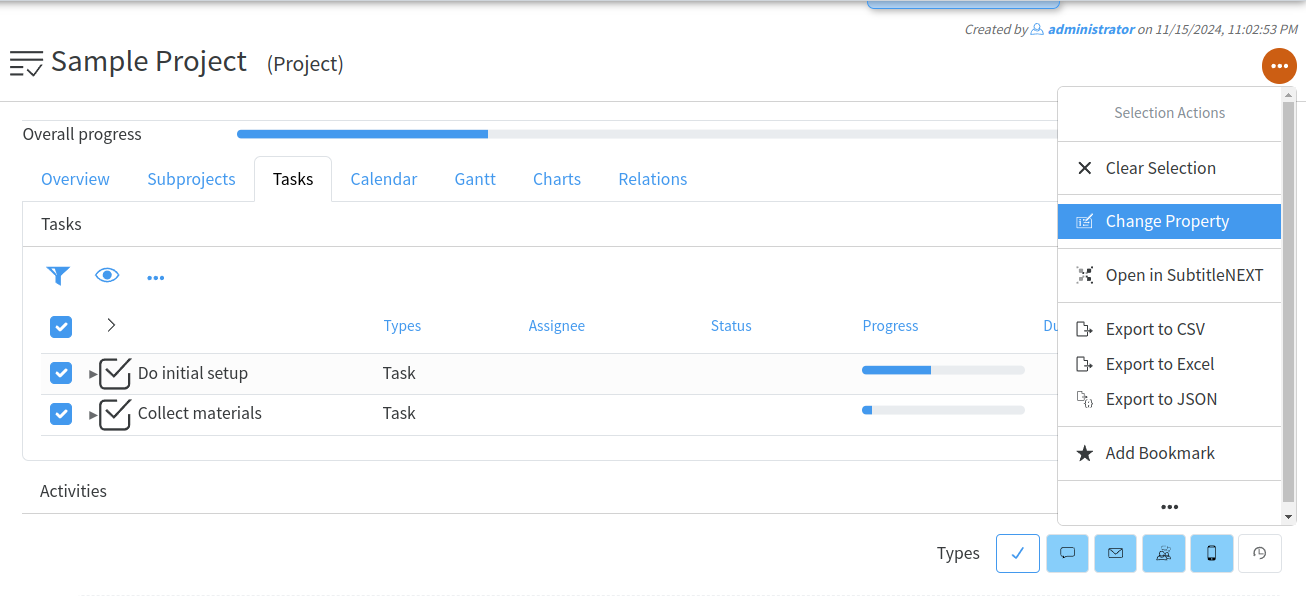
This can be used to change Statuses, Members, Assignee, Owners, Start dates, Due dates, Priority, Progress, etc.
You can attach files to a project/task by using the same name command available in Actions Menu or by linking it through the Relations.
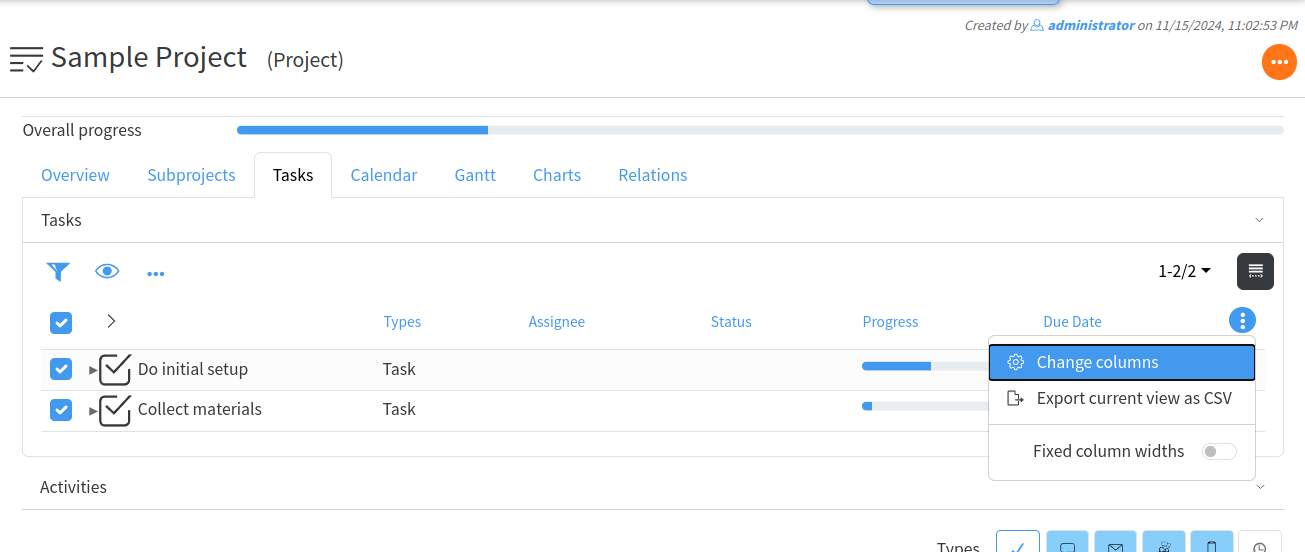
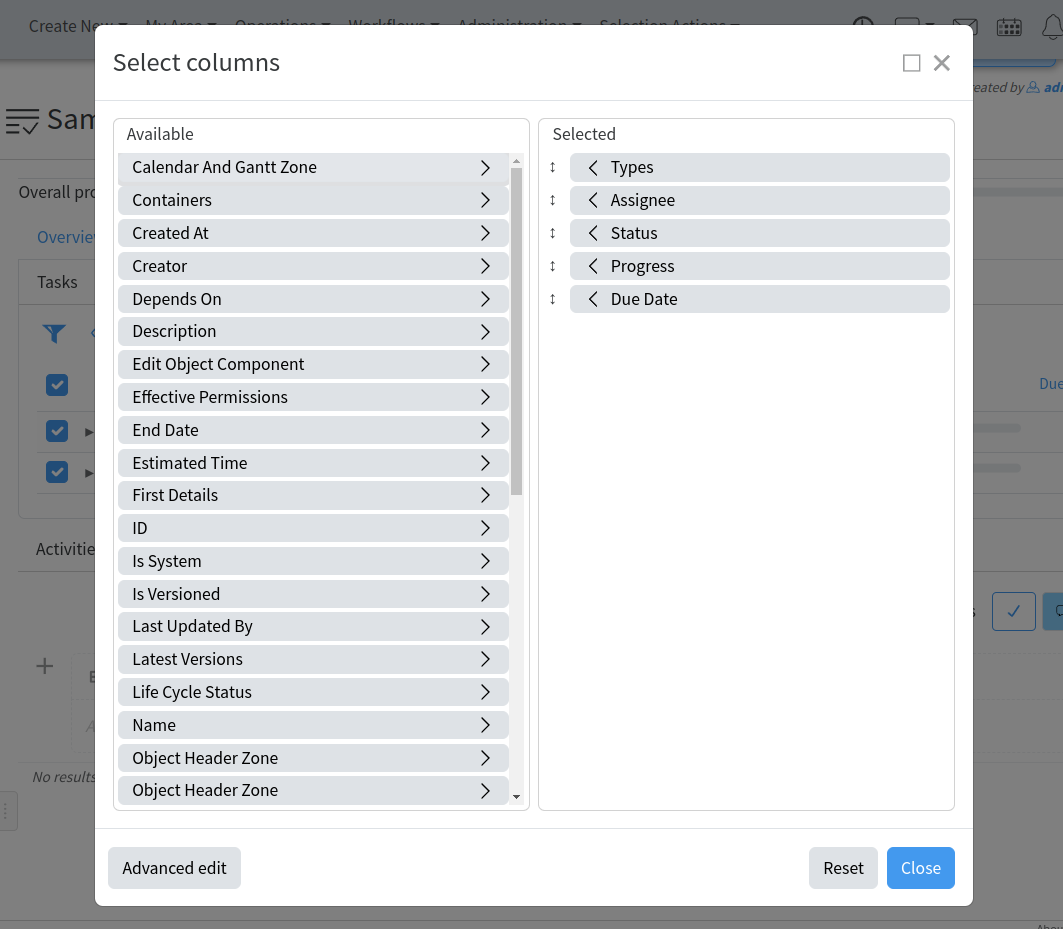
Filtering parameters in the projects/tasks overview
When you use the List view of projects or tasks, you can click on the rack-wheel sign to see the available parameters, tick the ones you would like to see in the overview and close the window:
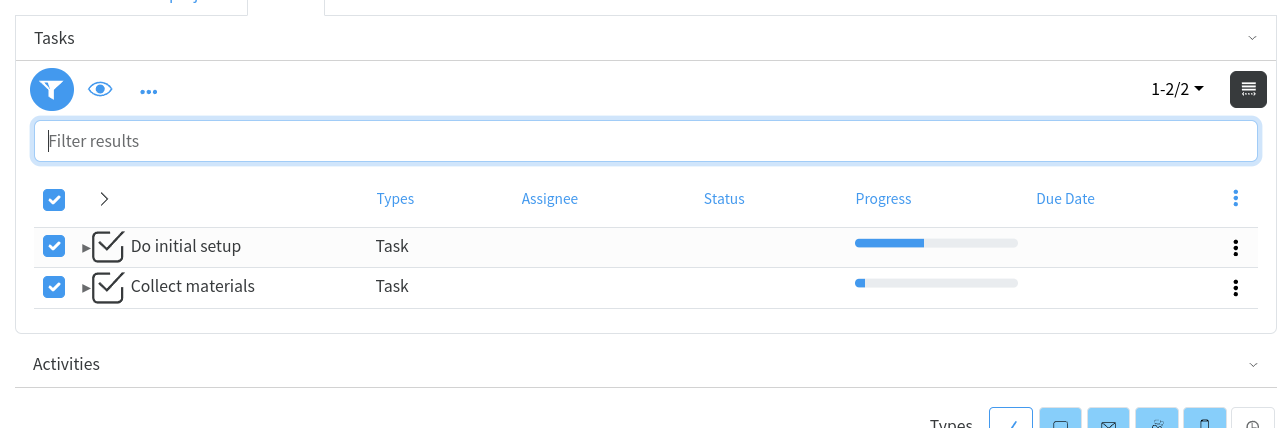
Once in list view, you can use the Filter sign to filter all the entries by a chosen parameters or you you can use the main filter to search for information in all parameters of the entries.
Managing resources for the projects/tasks
Apart from the manual selection when you know in advance the name of the resource (individual or group) you would like to assign the task to, you can also have some suggestions from the system corresponding to your current project specifics and needs. It works in the following way:
- In order a contact to become a resource for your projects, while creating it, you need to give it some additional parameters needed for their proper classification. We call those additional parameters “Skills”.
- Skills are used to describe what specific characteristics this contact has and what type of specific jobs he can perform. These skills can vary depending on the type of business you do and the type(s) of projects you manage. We have defined some default Skills for the Translation industry, this way all contacts of the system who have Translation Skills assigned, become Translation Projects Resources.
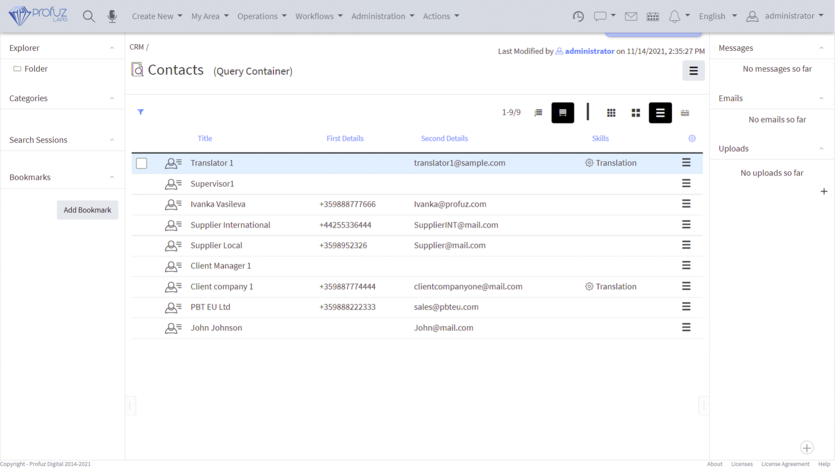
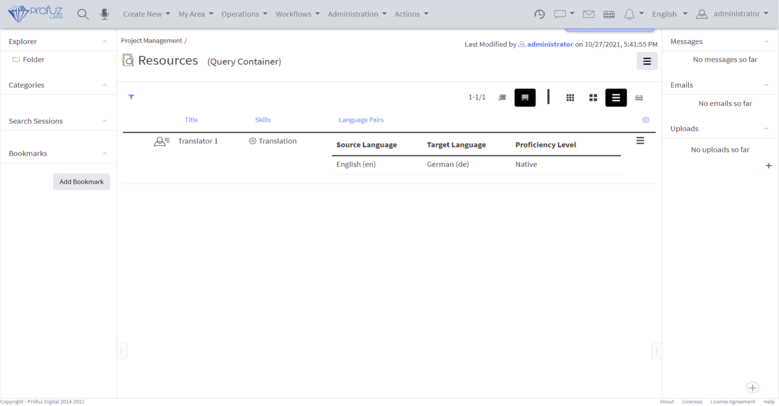
You can list all Resources from the Project Management’s main Query Container “Resources” as seen here:

Once you click on the Resources you will see a list of all resources available for all projects: