# Create user defined metadata fields
To Create user defined metadata field:
1. Press the “Create New” drop down menu from Profuz LAPIS header. Then select “Other”
2. In the newly appeared window type “property” as shown below:
[](https://docs.profuzdigital.com/uploads/images/gallery/2024-11/2ujimage.png)
3. In the newly appeared window input the desired new custom metadata and press “Create”as shown below:
[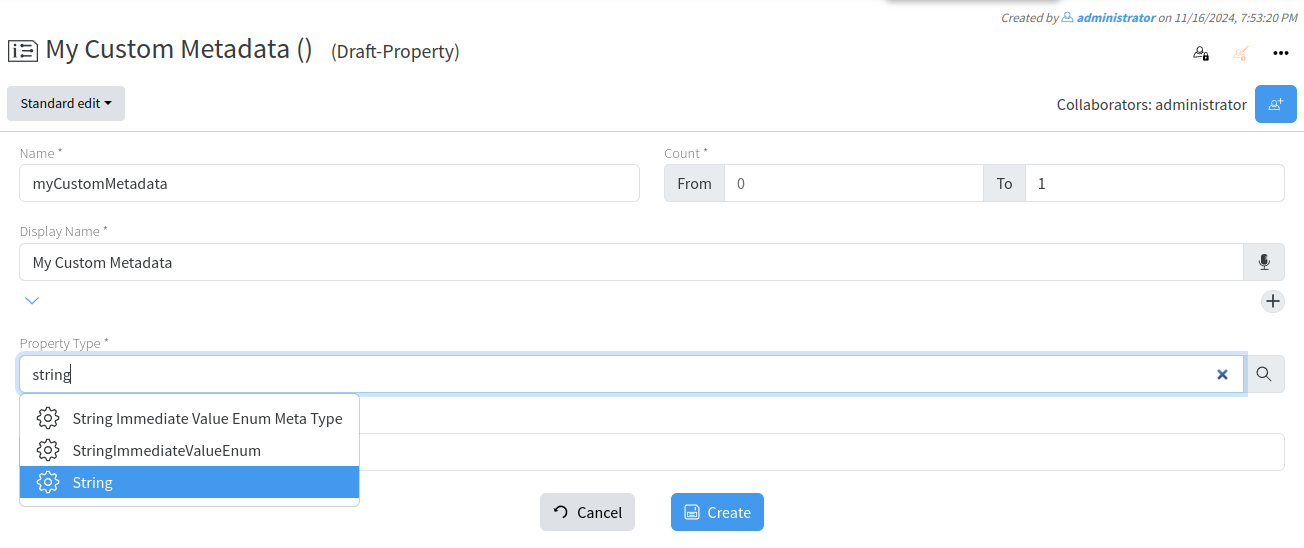](https://docs.profuzdigital.com/uploads/images/gallery/2024-11/Ejtimage.png)
**Hint**: Don't forget to set Count value, best practice is 0 to 1. Means field will have1 entry/value. If you would like it to have multiple values, set "from" to 0 and leave "to" empty. From Property Type select “String” if data will be added as normal text
NOW WE ARE READY TO ASSIGN THE METADATA TO ANY VIDEO MEDIA ASSET WHICH THE CUSTOMER ADDED BY FOLLOWING THE STEPS BELOW:
1. Type in search box: VIDEO
2. From results listed choose Video File Meta Type
[](https://docs.profuzdigital.com/uploads/images/gallery/2024-11/MV8image.png)
3. From taskbar select Actions→EDIT or click the edit button next to the properties field
4. From Properties window search and add already created custom metadata name.
[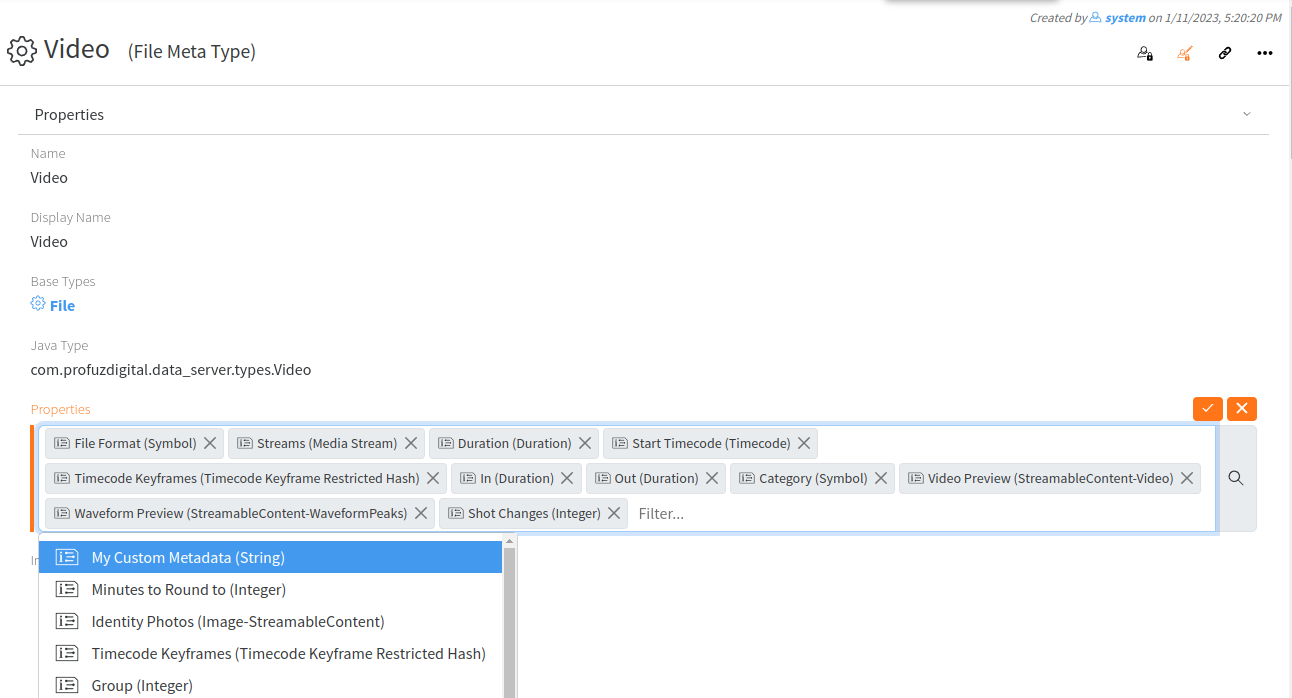](https://docs.profuzdigital.com/uploads/images/gallery/2024-11/RrWimage.png)
5. Go to the end of “Properties View Placement” list and press PLUS icon
[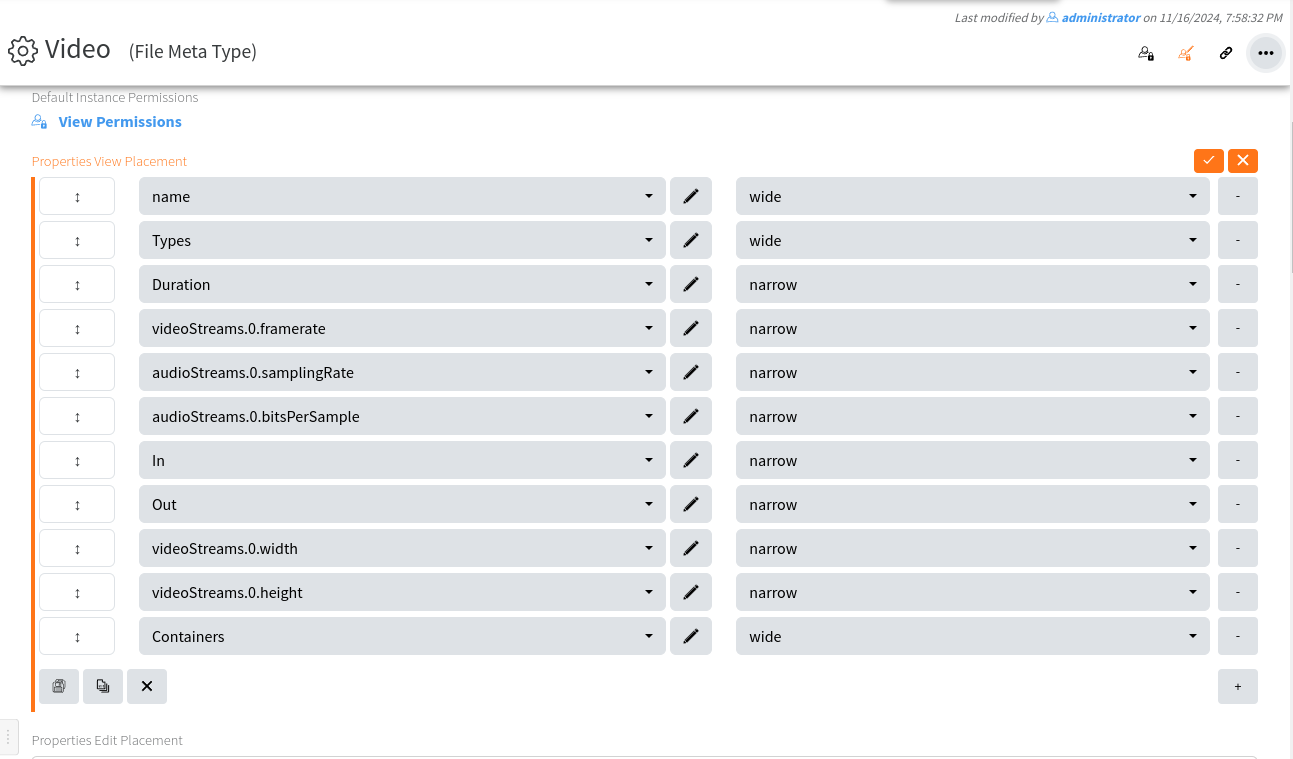](https://docs.profuzdigital.com/uploads/images/gallery/2024-11/7o8image.png)
6. From the menu select same name attribute NARROW and press the SAVE
[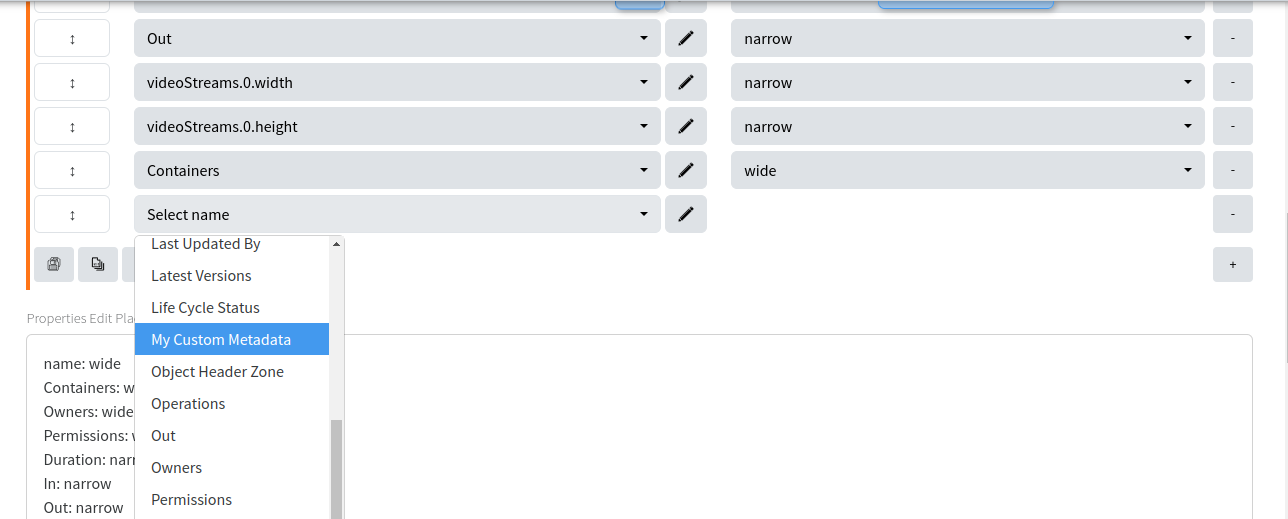](https://docs.profuzdigital.com/uploads/images/gallery/2024-11/AVLimage.png)
[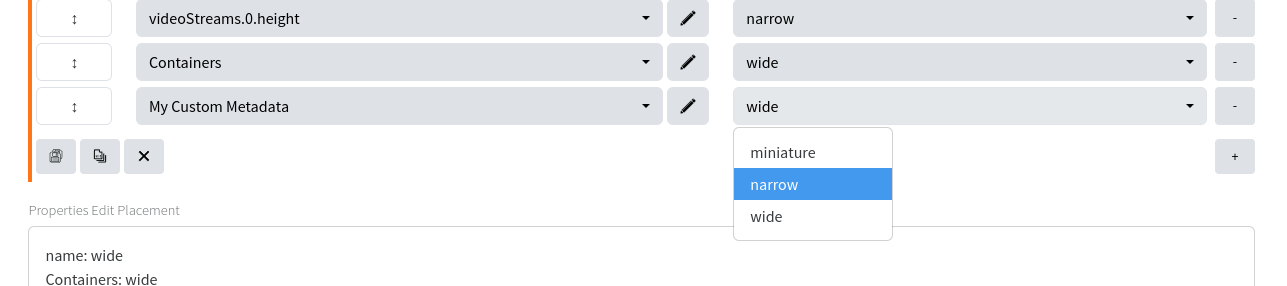](https://docs.profuzdigital.com/uploads/images/gallery/2024-11/kd9image.png)
7. Go to “Properties Edit Placement“ Repeat same as point 6.
Editing metadata can be edited by selecting desired media then Actions and EDIT:
Example here illustrate how to add and modify a field called: My Custom Metadata. Attributes belonging to one media asset can be modified in the same way.
[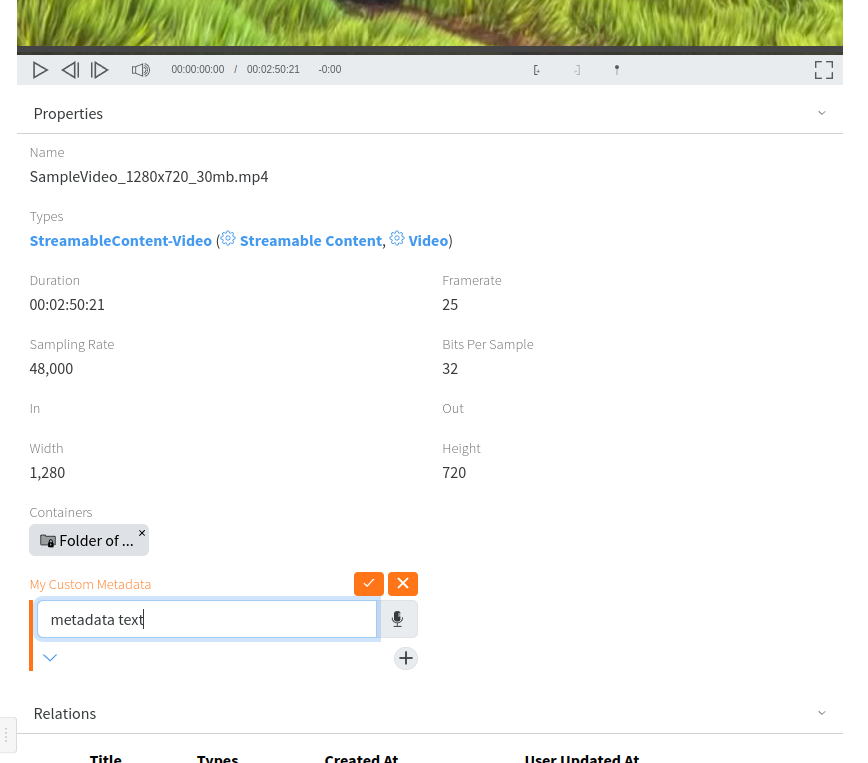](https://docs.profuzdigital.com/uploads/images/gallery/2024-11/4TQimage.png)
**Here is our data:**
[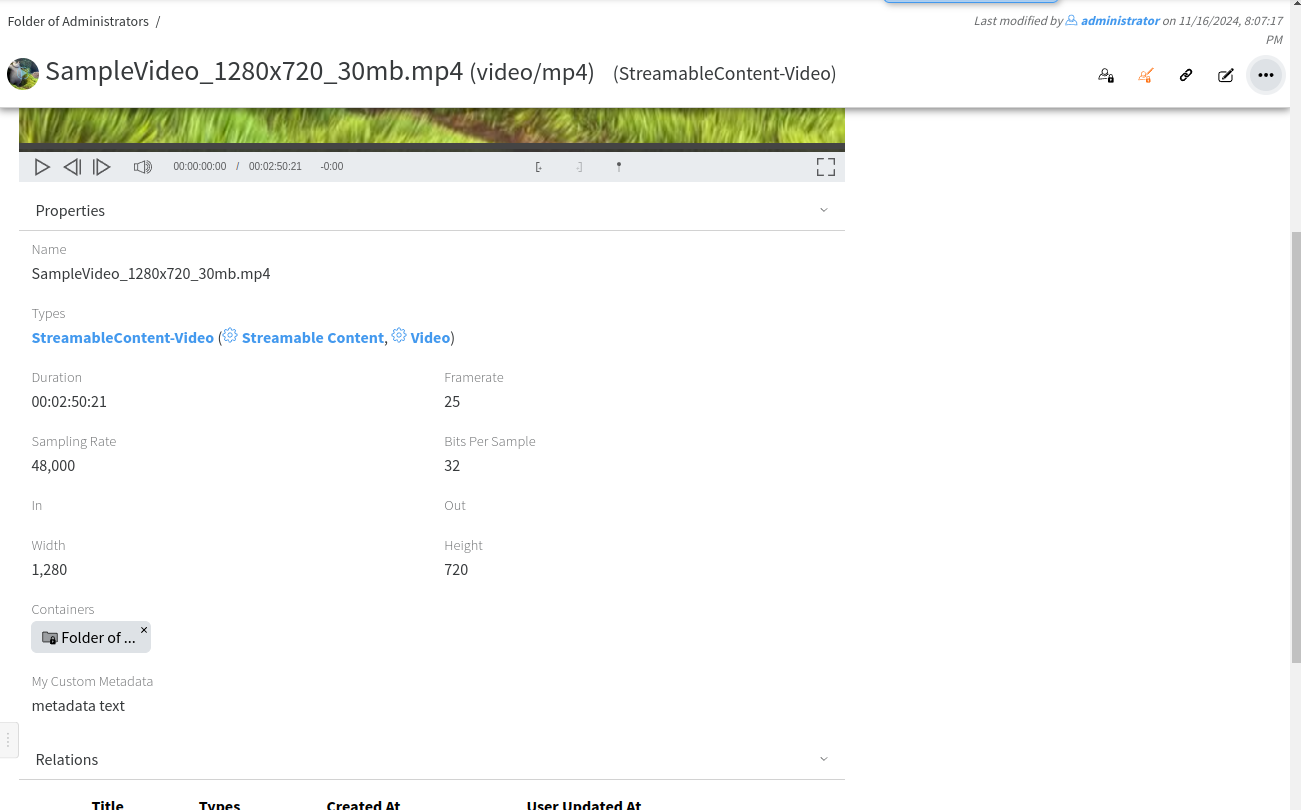](https://docs.profuzdigital.com/uploads/images/gallery/2024-11/Fdhimage.png)