Media Asset management
- Media Asset Management introduction
- Upload content to LAPIS
- Create Asset
- Create and manipulate File Records (virtual contents)
- Add Metadata
- Create user defined metadata fields
- Transcode a file
- Transcoding templates creation and editing
- Organization
- Exporting
- Downloading
- Moving contents
- Monitoring
- Filtering
- Reports
Media Asset Management introduction

Each global icon visible on the main dashboard leads to different pages aiming to handle different processes or data. When we select MAM a new sub web window will appear as shown on the Screenshot.
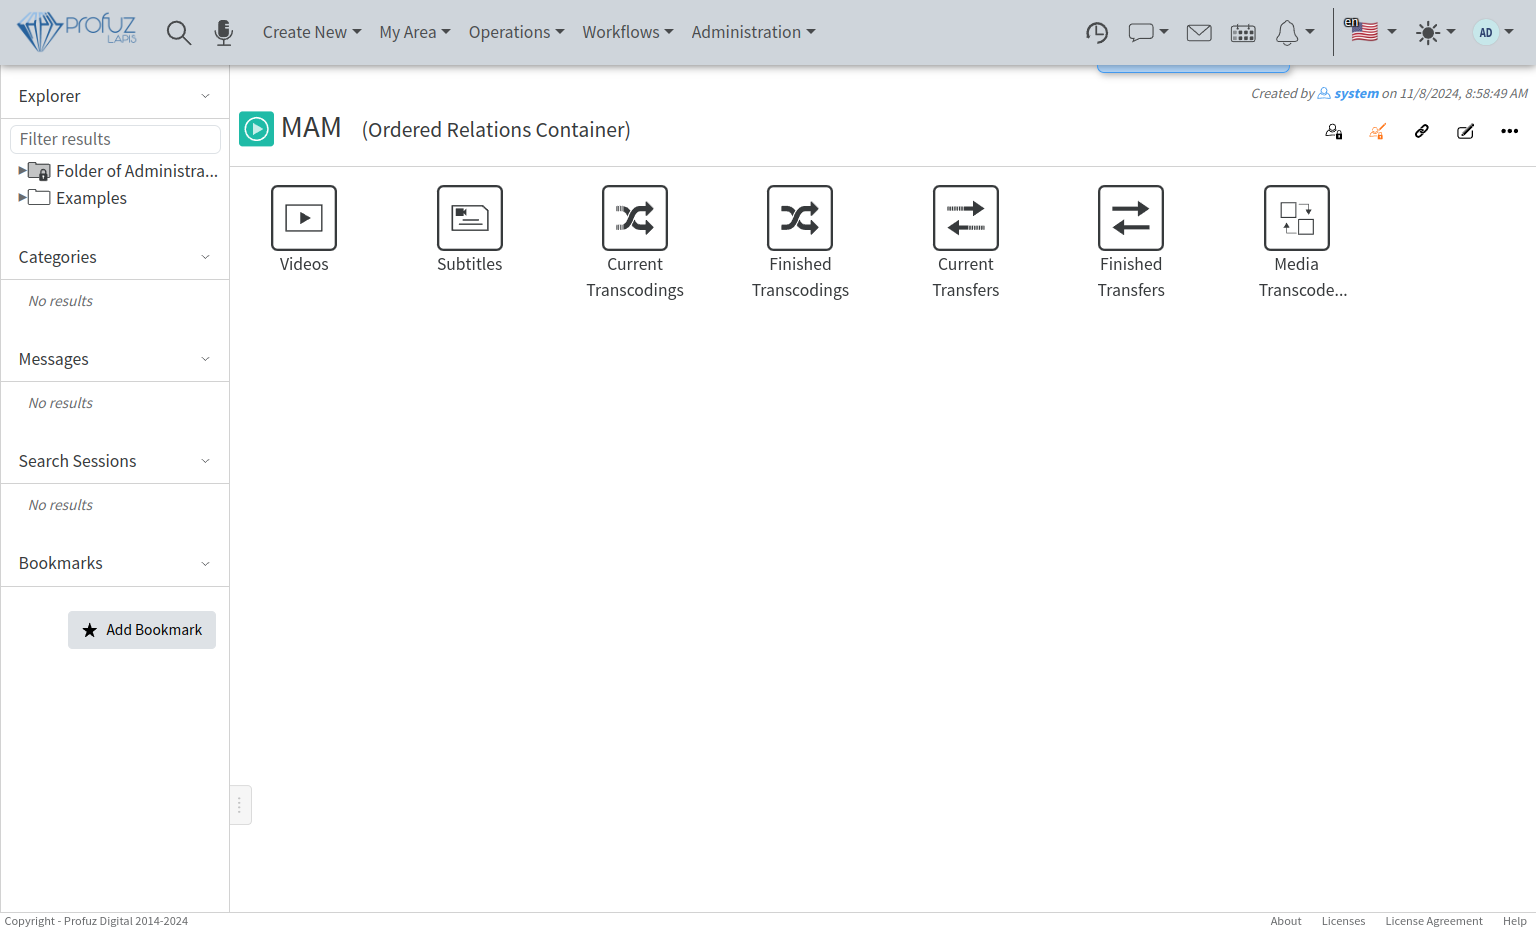
The default query containers are:
- Storyboards: Playlist management, creation, filtering and anything related to editing, exporting and scheduling.
- Channels: Here are mapped the tasks for handling broadcast - playlist, metadata, agenda and scheduling
- Videos: Database query for all video objects available for usage through Profuz LAPIS. This query will list all video files, virtual video contents and video assets.
- Subtitles: Database query for all subtitles available for usage through Profuz LAPIS. This query will list all subtitle files and subtitle suites.
- Current Transcodings: Here you can monitor the list of all ongoing transcodings of files
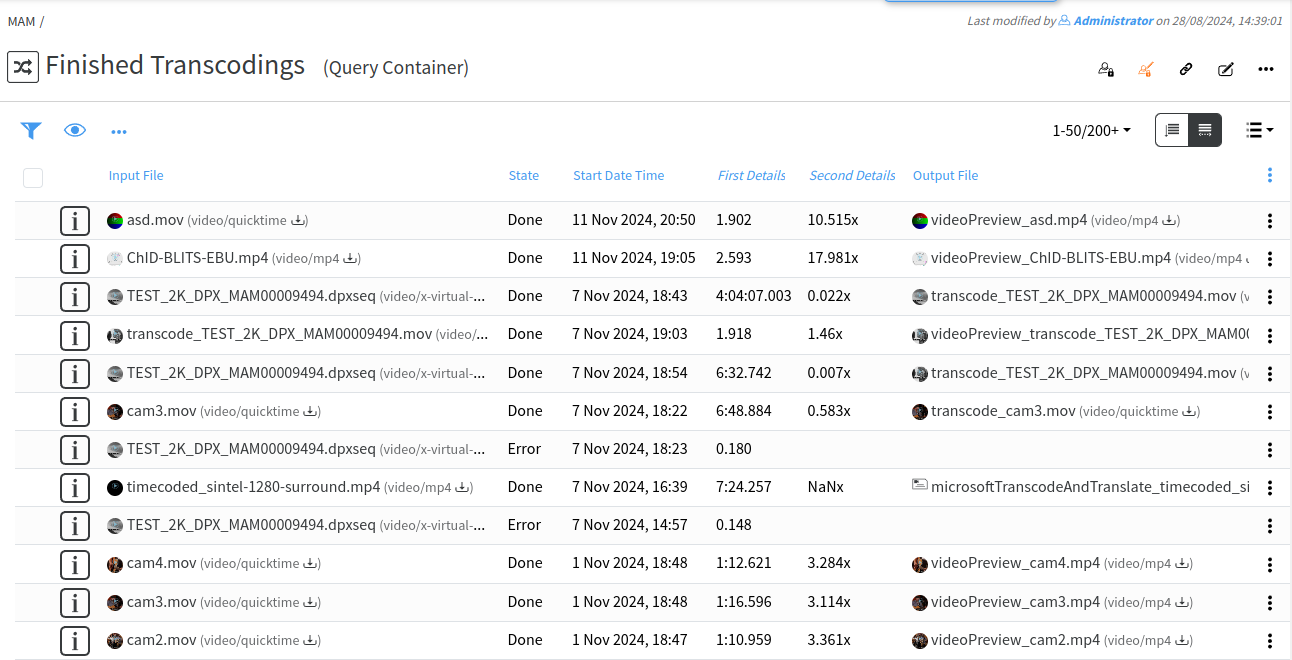
- Finished Transcodings: Here are listed all the transcoding processes which have been completed
- Current Transfers: Here you can monitor the list of all ongoing file transfers between storages
- Finished Transfers: Here are listed all the transfer ( movement) processes which have been completed
- Video Transcode Templates: Here are listed all available templates for transcoding of video files
Hint: All queries above can be modified per customer's specific requirements. This is only the default software view.
The most common way to list and edit media content or any other data accessed by Profuz LAPIS is to use the search and to select the result or to manually choose a specific grid designated for this particular data query e.g. media, subtitles, documents and so on.
Hint: By modified queries users may list and sort only specific data per format or containers. The example below shows how a query can display only mp4 media content.
Query: [:types INHERITS "Video"] AND [:fileFormat "*mp4*"]
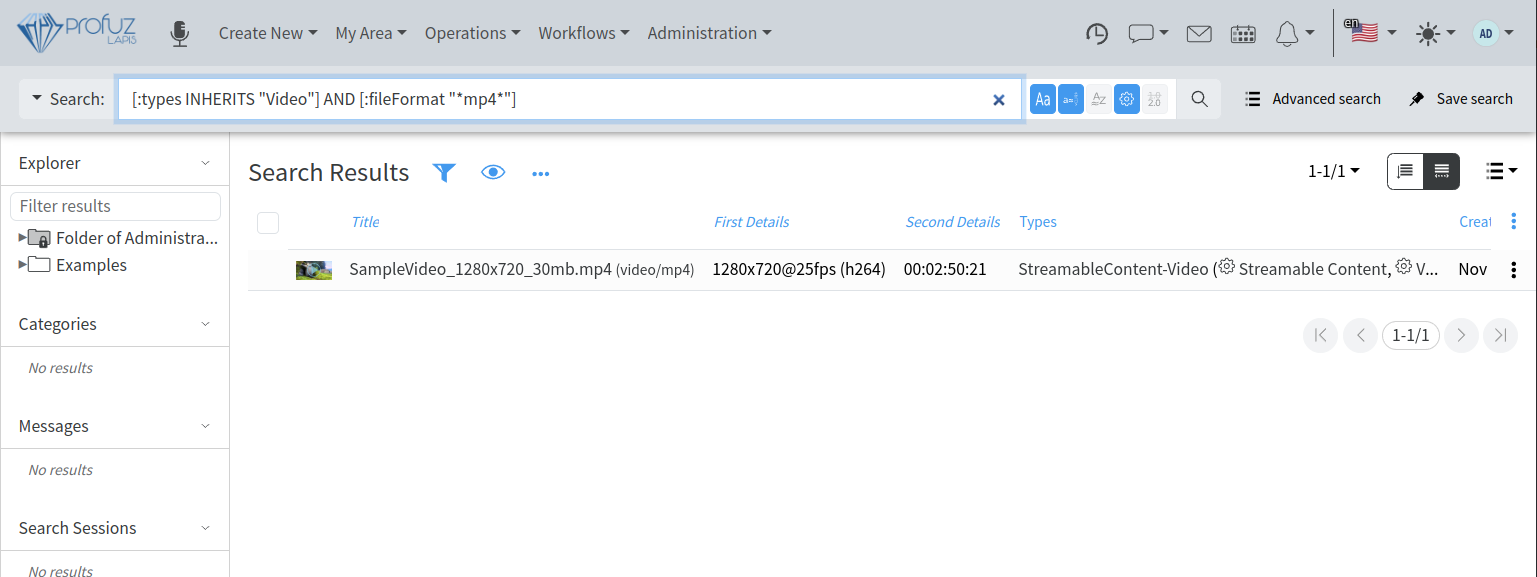
Please contact your supplier if you need to modify a query as per specific workflow requirements.
In Profuz LAPIS MAM there are 3 types of video objects:
- Video Files called “Streamable Content Video” are files or streams directly accessible from the connected storages or systems. If such file is deleted in the corresponding connected storage outside of LAPIS it will disappear from Profuz LAPIS, too.
- Virtual Video Content called “Virtual Streamable Content Video” is an object which keeps records with video metadata and links to 0 or more copies of the video files.
- Video Asset called “Asset Video” is an object which may combine several contents of different types in a single entry. Subtitles and audio contents which are present in a single asset are used as subtitles tracks and audio tracks respectively and can be selected for presentation in the player of the main video content.
The thumbnails of the 3 types of video objects overlay different icons to visually distinguish between them as shown on the screenshot below:

The first is an asset, the second is a virtual content and third is a video file.
Each video object has its own contents and transformations– such as thumbnails, proxies, transcodings, etc. In video assets, by clicking on a content, it will be displayed.
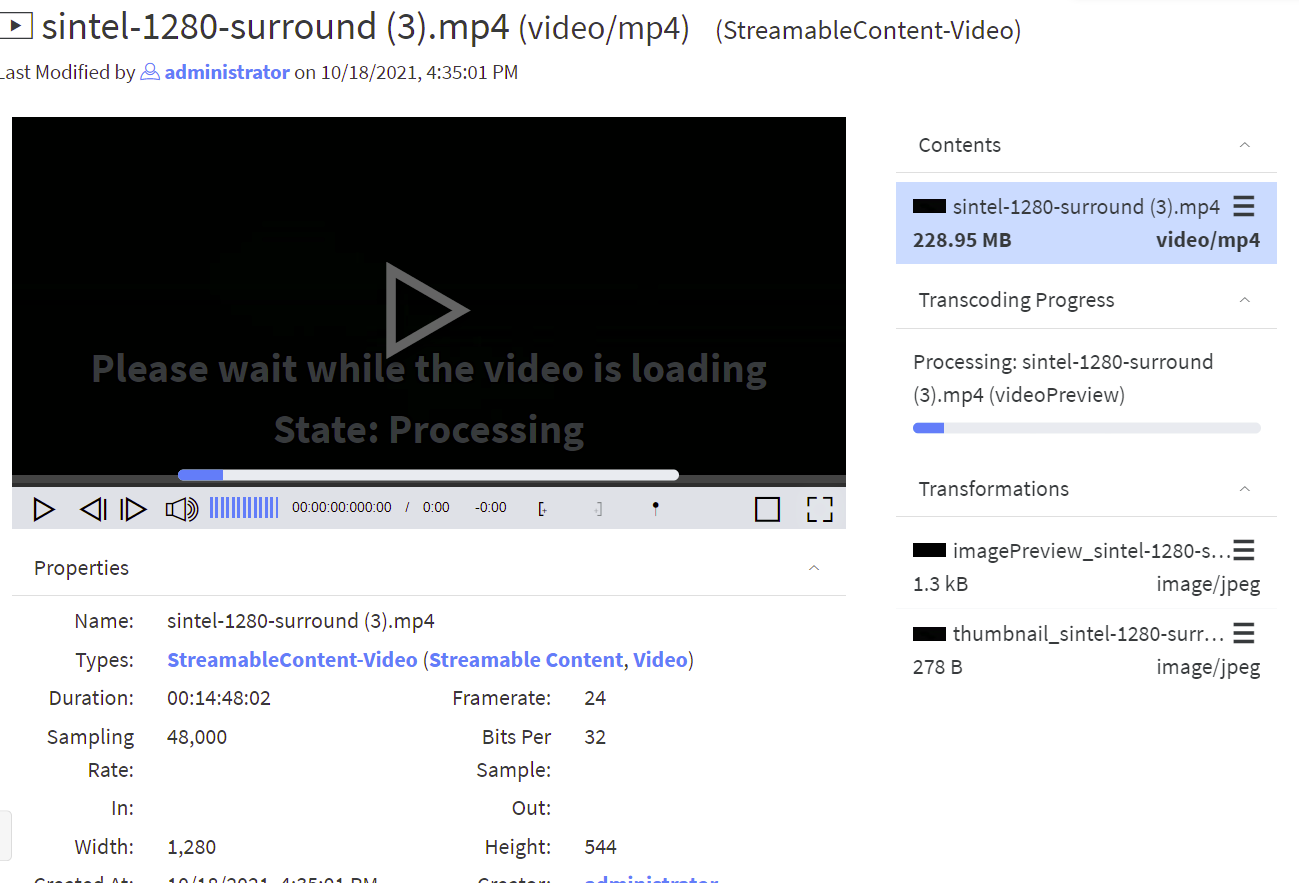
Each media asset has its own contents and transformations– such as thumbnails, proxy, transcodings, etc. By clicking on the media file, it will appear in the central section of the screen with all its metadata and with real time preview (as pictured below).
Remark 1: The preview comes from identical copies called proxies and their creation can be triggered in two different ways:
First (default): After media content is ingested or uploaded to a data folder when a user clicks “Play” in the video player.
Clicking “Play” will will provoke automatic proxy creation. A status bar will appear on the screen, which will show the progress and visualize how long the creation will take. After the process is finished the user will be able to play and edit the desired media asset.
Second: Proxy creation can be set to start automatically once media content is ingested/uploaded or appears in a connected storage.
Remark 2: An important factor about the configuration which can provoke lack of system response is the CPU load. We suggest considering carefully which way to choose depending on the capabilities of the hardware platform where Profuz LAPIS is running.

The available general commands are: Play/Pause, Stop, Fine seeking Frame by Frame, Volume adjustment, Start chunk, End chunk, Create point Marker, Picture-in-picture and Full Screen toggles. Below the preview window basic metadata fields (properties) are stored.
Remark: The screen above only illustrates the default view. It can be completely modified with different metadata fields.
Editing metadata fields is shown below and can be done by first adding metadata fields to the VIDEO Asset type of data.
Metadata storage is practically unlimited. It depends on the available system resources.
Upload content to LAPIS
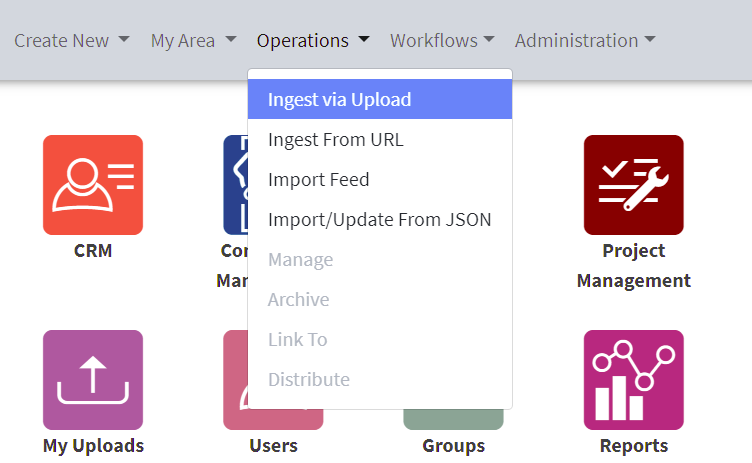
To manually upload content to LAPIS system, you can use the general operation Ingest via Upload as shown below
When you start the upload a notification and a progress bar in a separate window will appear as shown below:
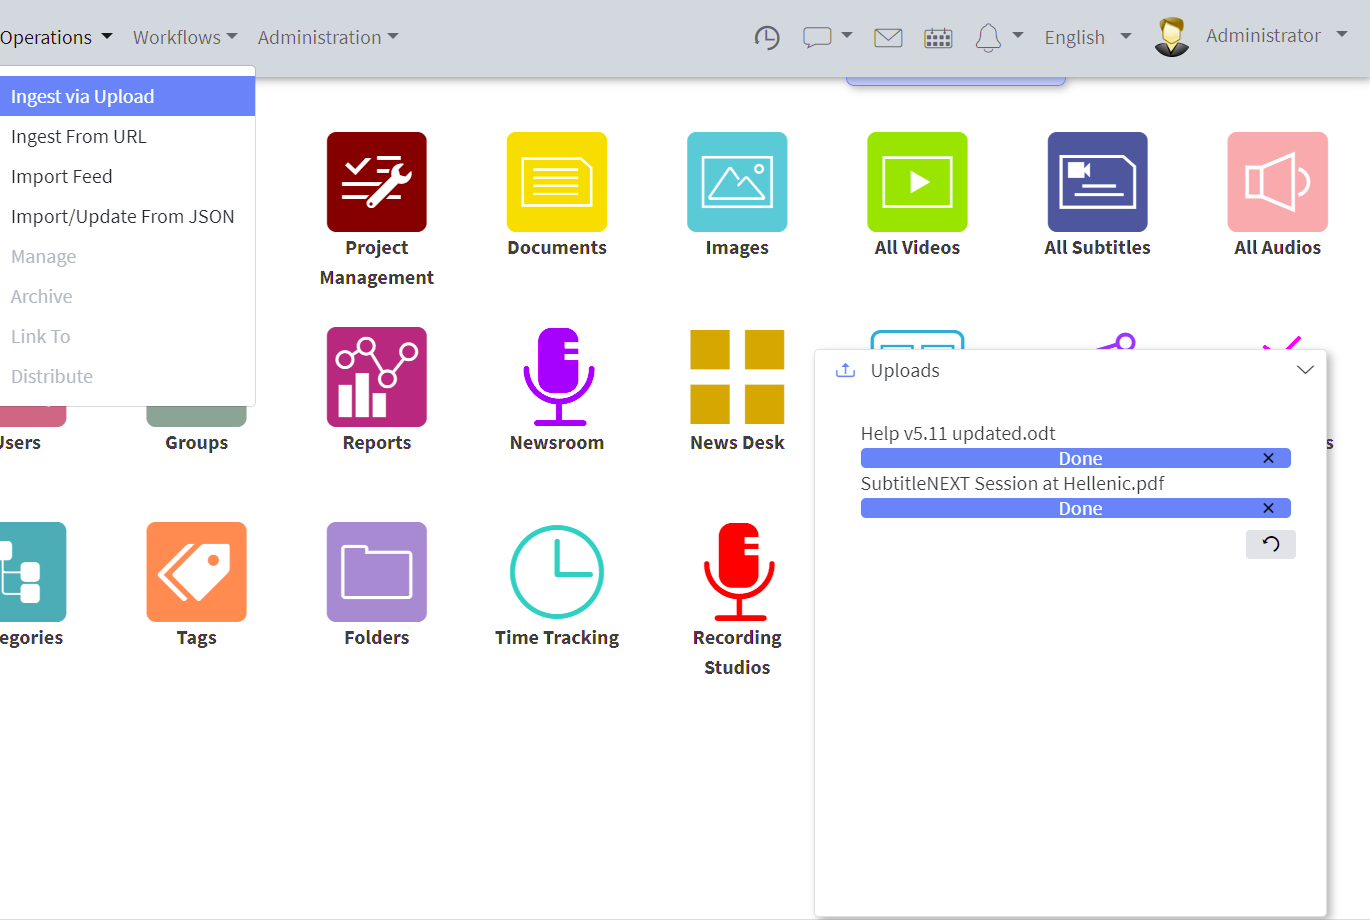
You can click on the uploaded media link to go to it. The uploaded through this operation media will have to be classified for further usage by you and your colleagues. If not classified, it will be listed into My Area -> My Uploads query container and depending on its type - in the corresponding query container on the Dashboard – All Videos, All Audios, Images, etc.
You can classify one media into multiple containers including containers from different types such as folders, categories, tags, providers, etc. LAPIS doesn’ create multiple copies of the same media, it just links it to these containers.
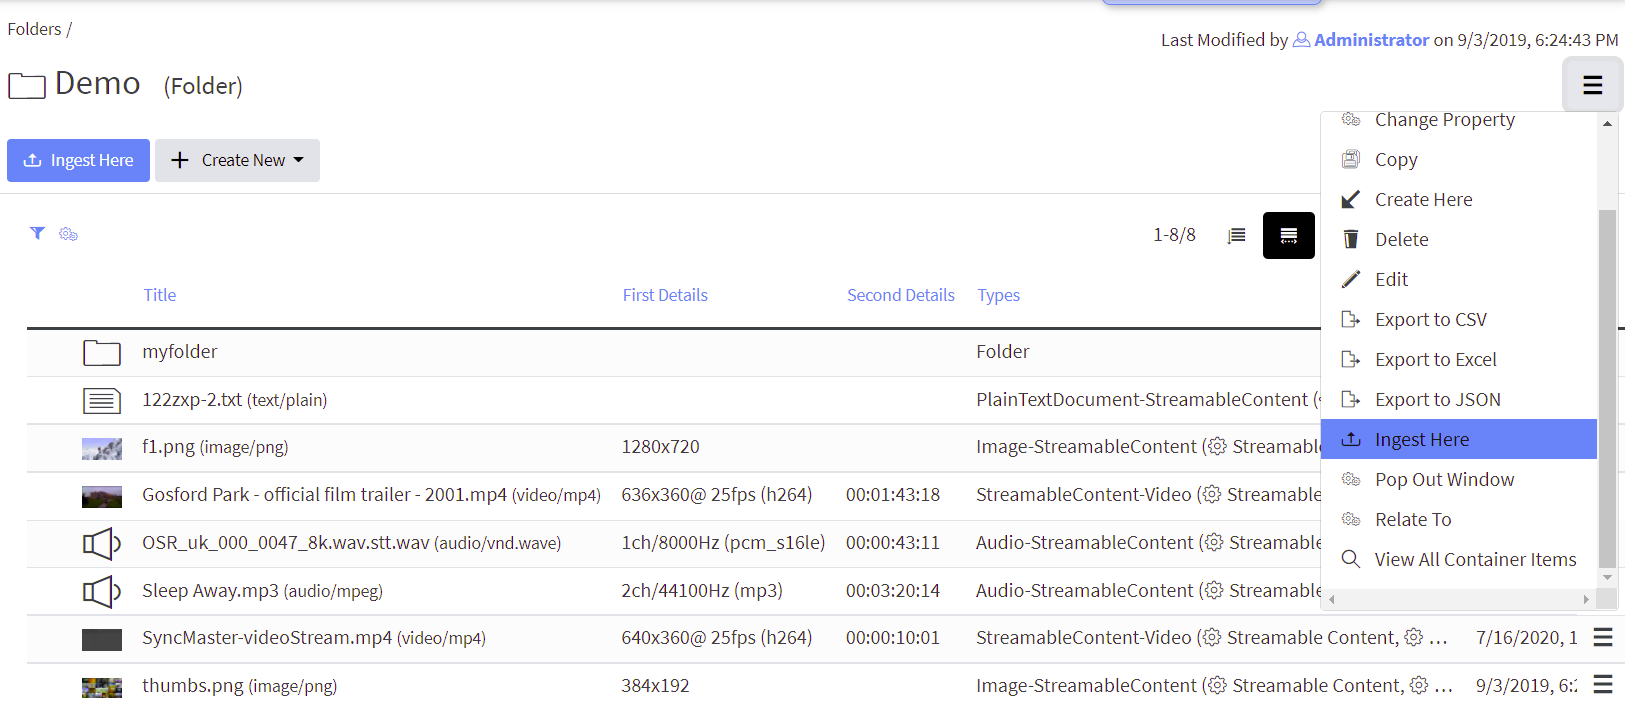
If you want to upload a content to a specific location in the system, please go to that location (folder, task, project, tag, category etc.) and use Ingest Here action from the local Actions menu as shown
You can also drag-drop a media from your PC to a Folder, Category, Tag or to the dedicated fields into the Project, Task or any other object containing such a field.
Create Asset
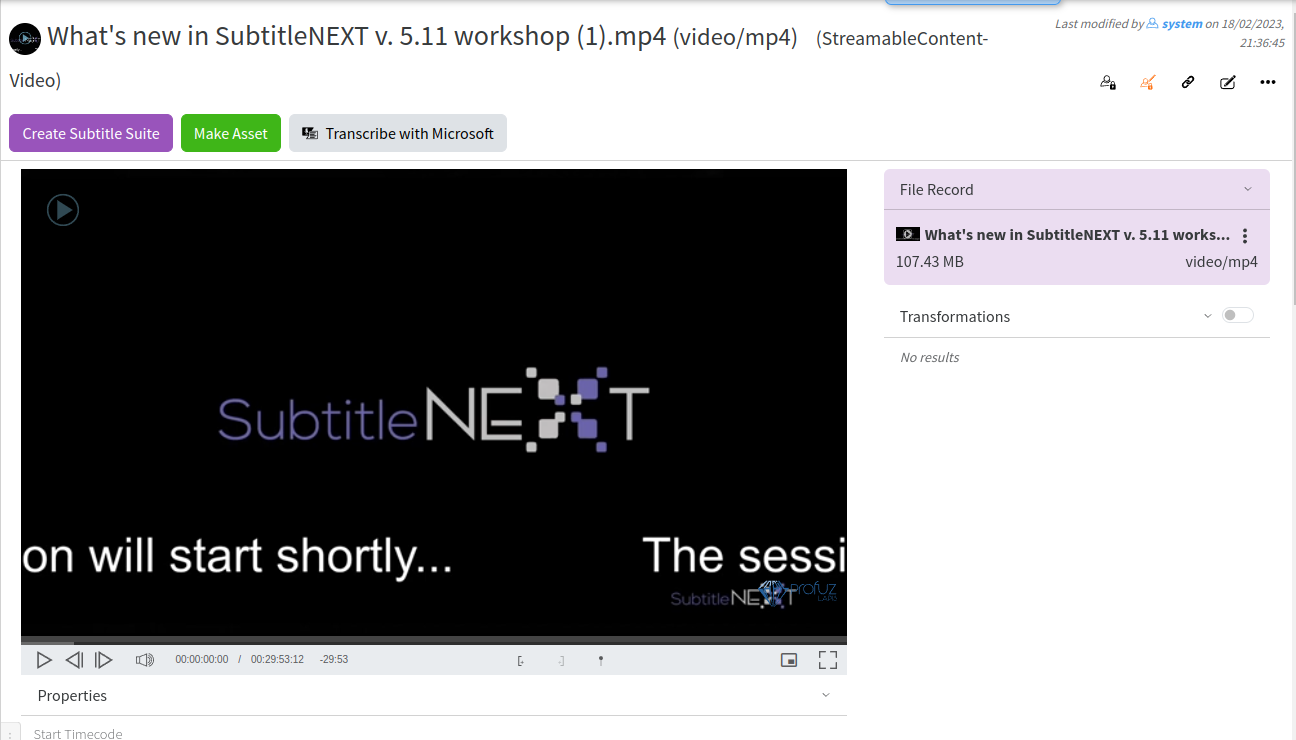
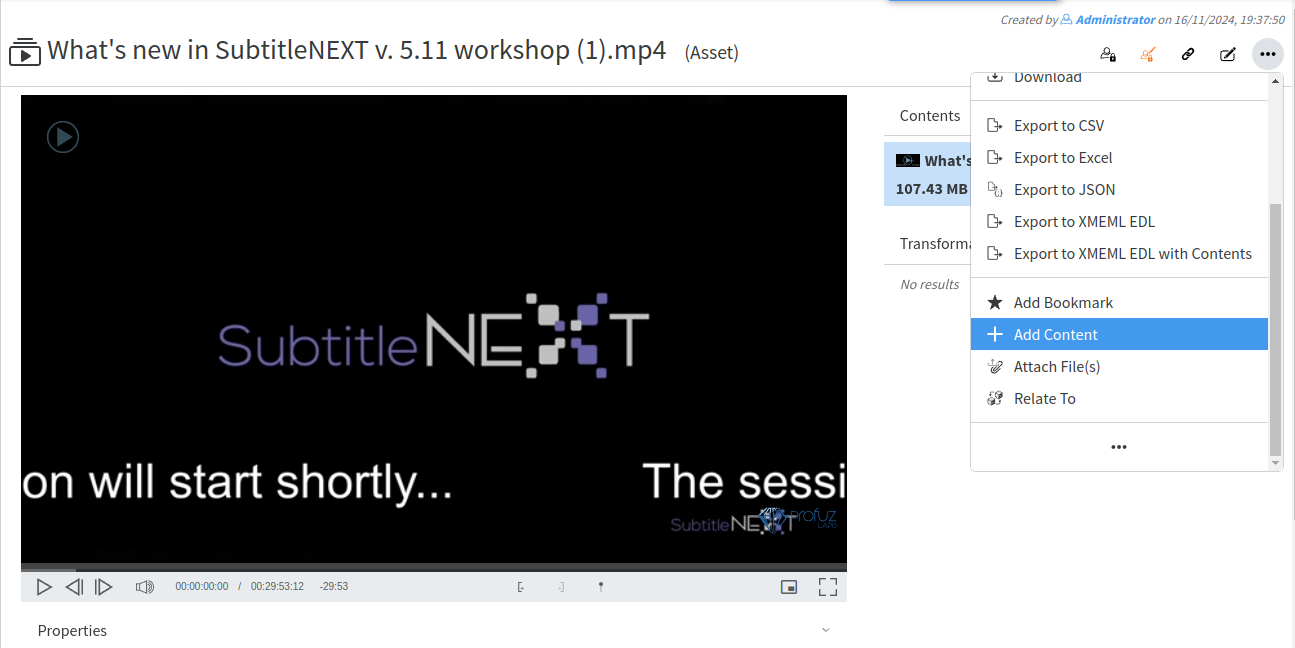
If you want to have a media asset containing multiple contents associated with it such as additional audios, subtitles, texts, multiple video resolutions or other media transformations, you have to create a video asset and add contents to it. You can do that by:
- Click “Make Asset” button on top of your media to create an asset as shown here:
- Use the “Add Content” Action as shown here:
You can associate as many contents as you wish and Update the created contents if needed.
Create and manipulate File Records (virtual contents)
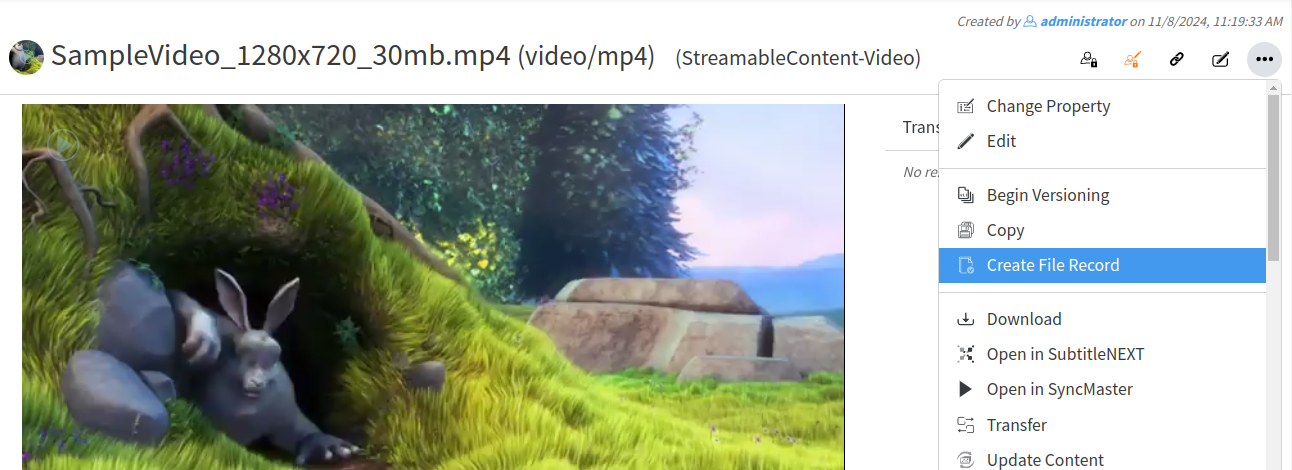
You can create a File Record from a video file by using the Create File Record operation from the video file’s local actions menu as shown:
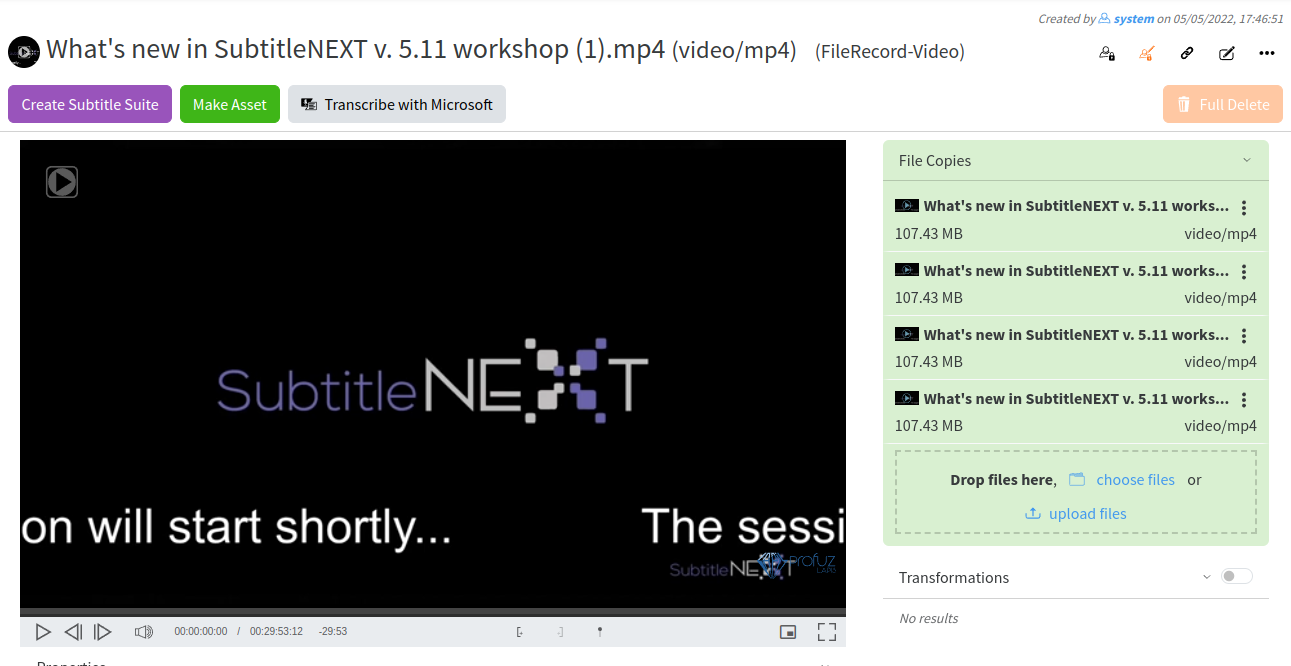
The File Record looks like this:
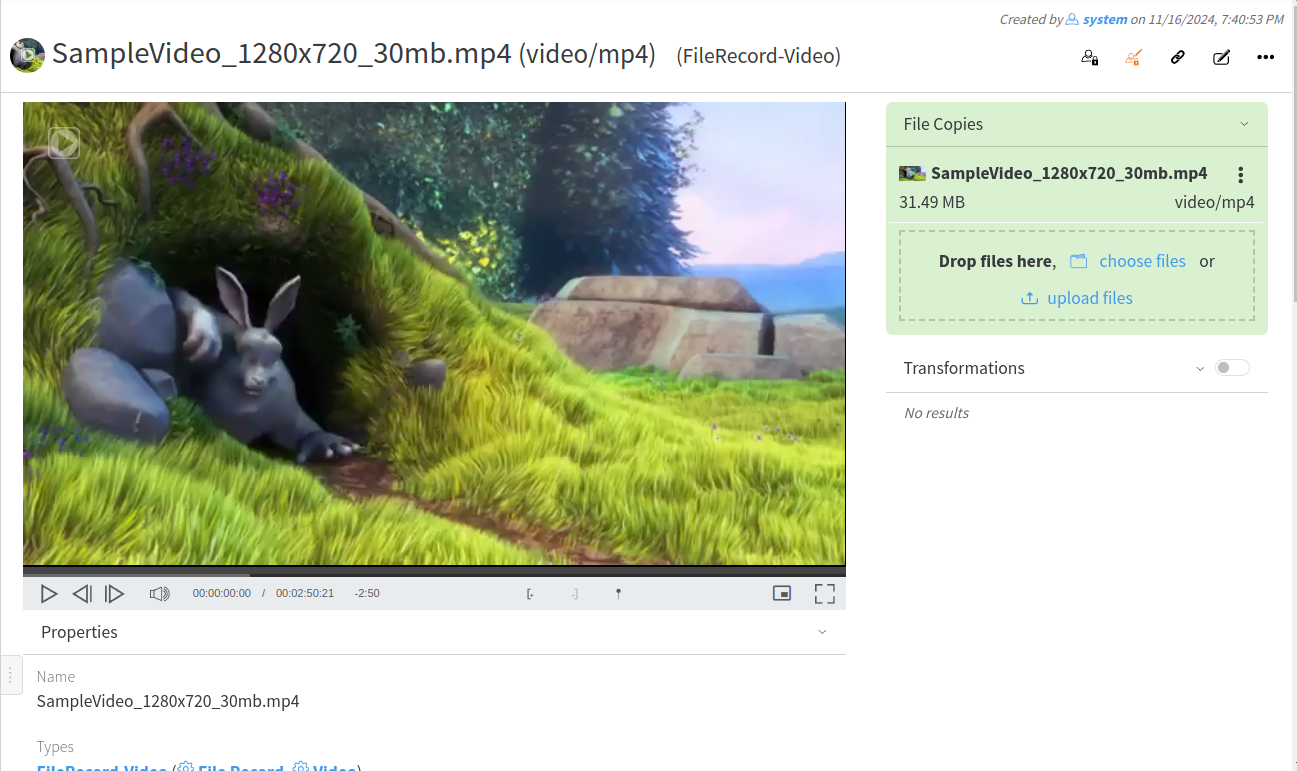
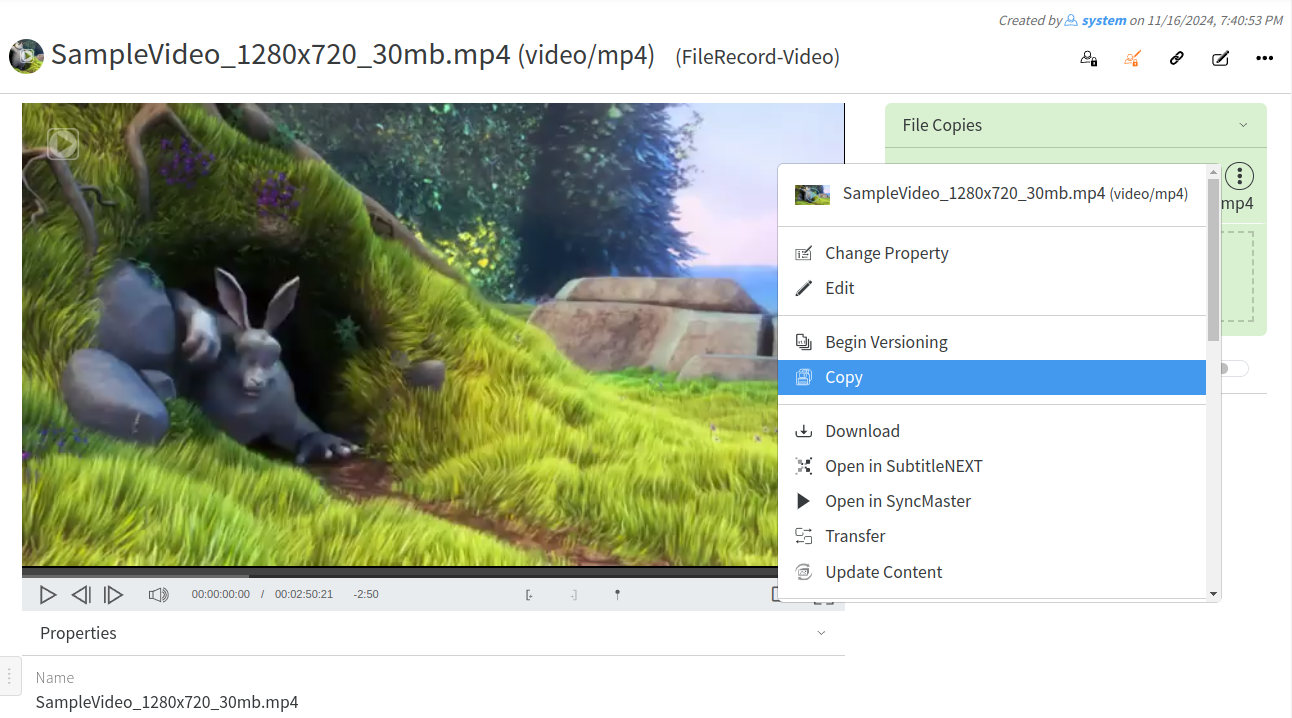
In File Copies you see the identical copies of this file. You can manipulate them separately from the local actions menu of every single file copy.
In Contents you see the files. You can also manipulate them separately from their local actions menu (transcode, archive, download, delete them).
In Transformations you see all the thumbnails, previews and conversions which have also their own local actions menu and can be manipulated separately.
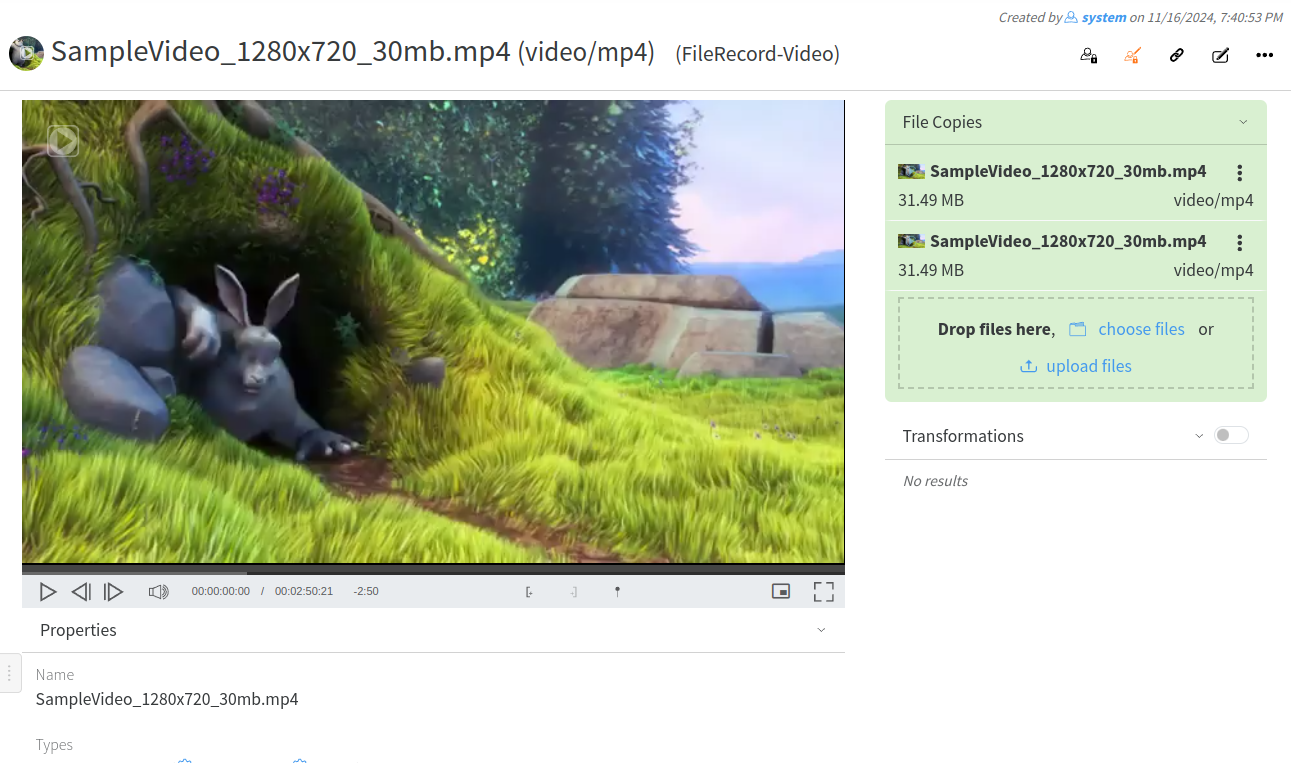
You can add a video to the File Record by copying or transferring any of its existing contents:
which results in showing both copies in the File Record:
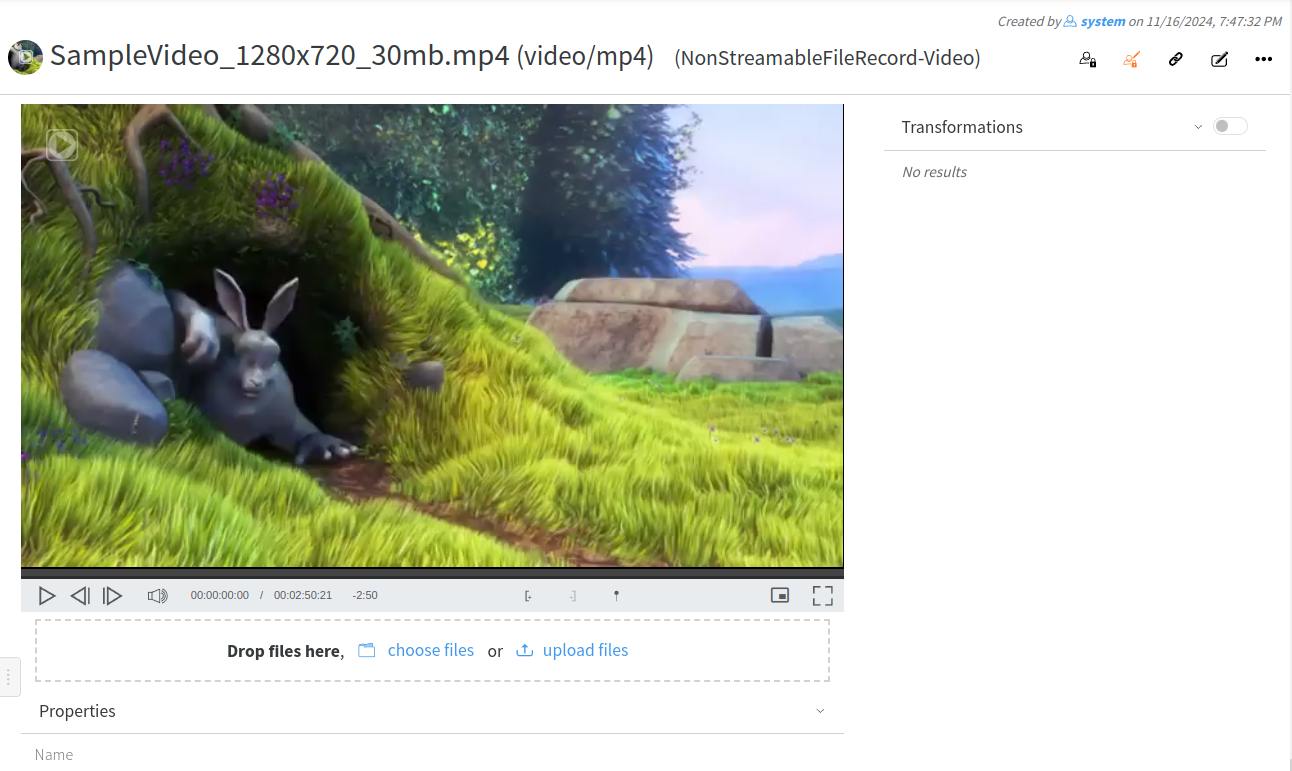
You can remove a video from a File Record by deleting it:

If all copies are deleted the File Record is transformed to Non Streamable File Record, i.e. File Record with only metadata and proxy of the video:
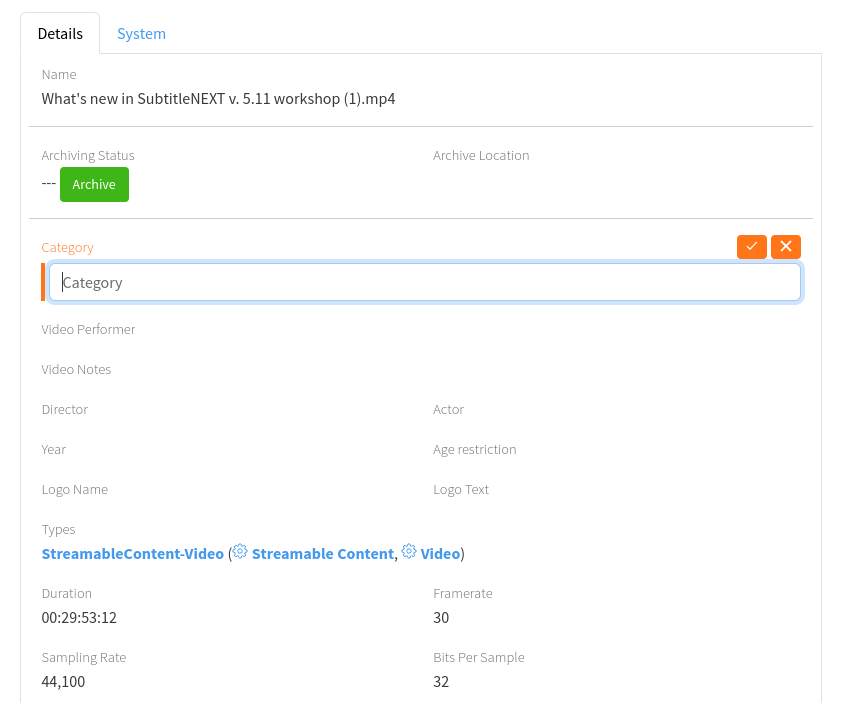
Add Metadata
When you open a file, you can view and edit its metadata fields which are defined as properties in LAPIS. If you need more properties, you can define them. Check the corresponding section to learn how to create new properties ( metadata). To edit a property click on the edit icon next to its name and enter the value you wish to appear. Click the save icon next to the property name to confirm.
Create user defined metadata fields
To Create user defined metadata field:
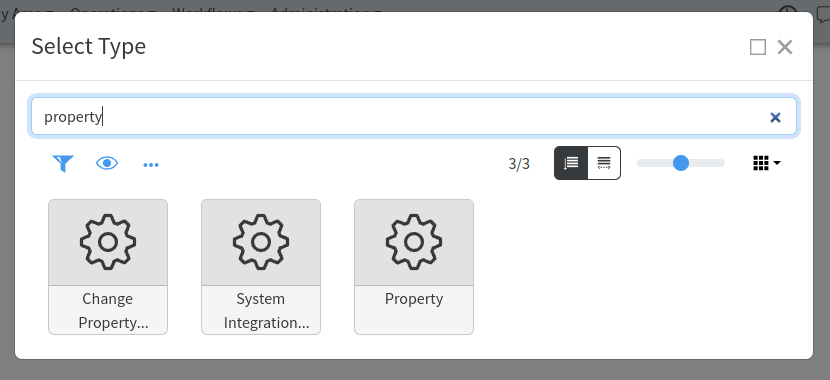
- Press the “Create New” drop down menu from Profuz LAPIS header. Then select “Other”
- In the newly appeared window type “property” as shown below:

- In the newly appeared window input the desired new custom metadata and press “Create”as shown below:

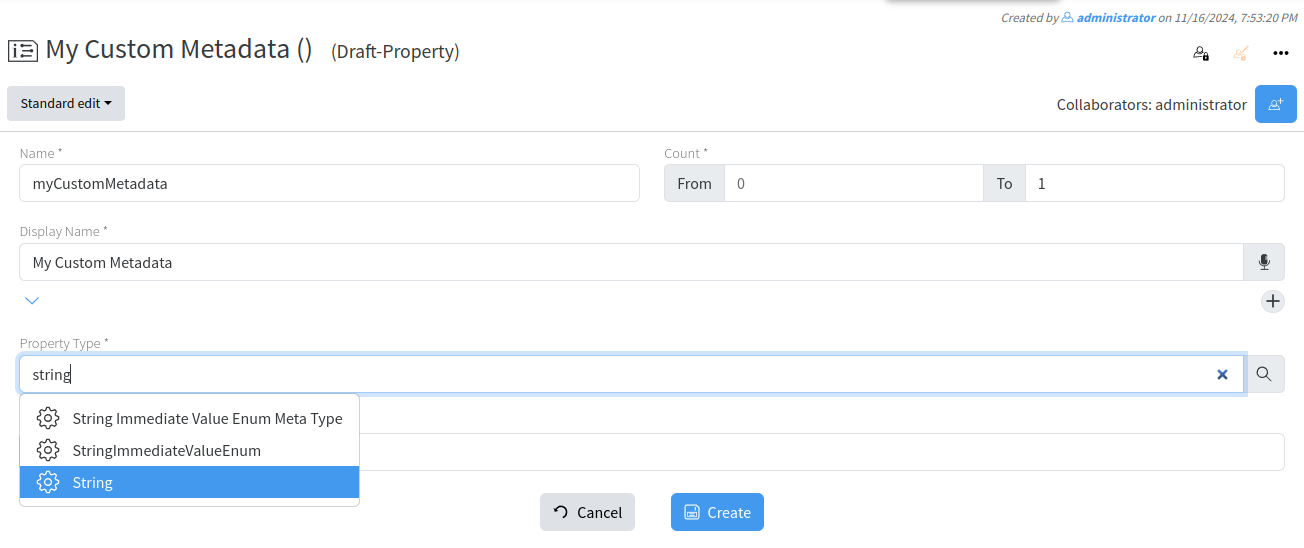
Hint: Don't forget to set Count value, best practice is 0 to 1. Means field will have1 entry/value. If you would like it to have multiple values, set "from" to 0 and leave "to" empty. From Property Type select “String” if data will be added as normal text
NOW WE ARE READY TO ASSIGN THE METADATA TO ANY VIDEO MEDIA ASSET WHICH THE CUSTOMER ADDED BY FOLLOWING THE STEPS BELOW:
- Type in search box: VIDEO
- From results listed choose Video File Meta Type

- From taskbar select Actions→EDIT or click the edit button next to the properties field
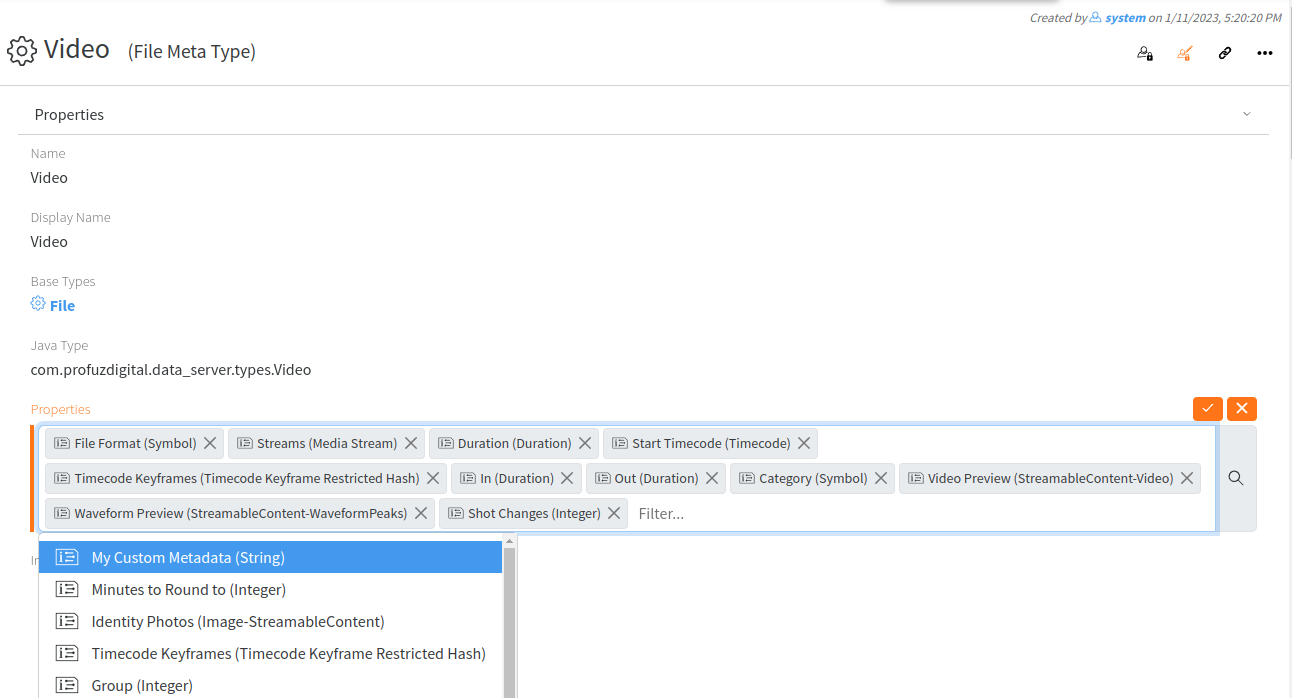
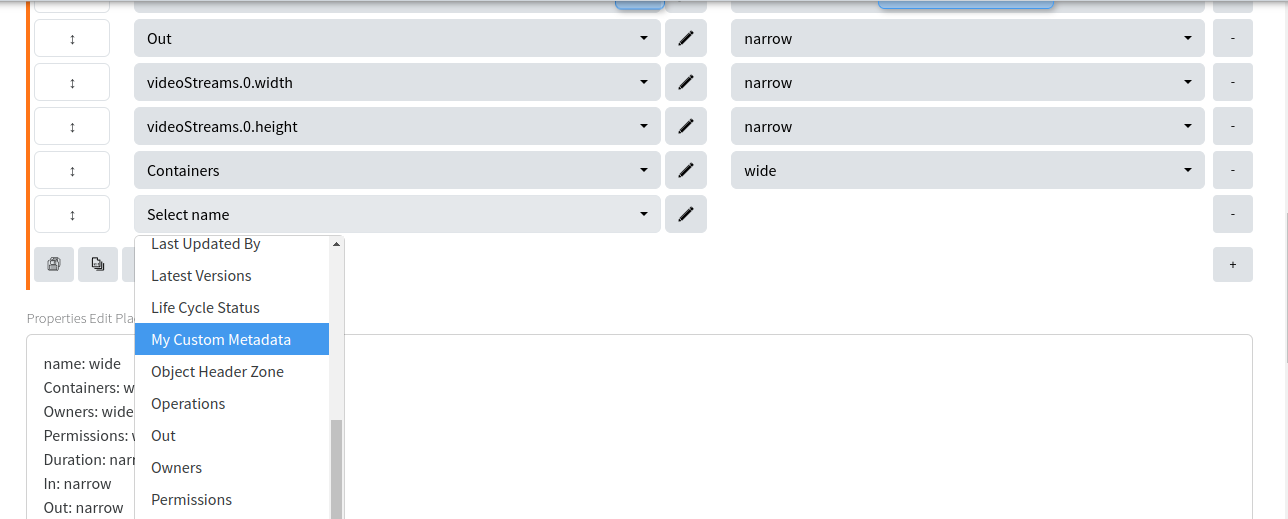
- From Properties window search and add already created custom metadata name.

-
Go to the end of “Properties View Placement” list and press PLUS icon

-
From the menu select same name attribute NARROW and press the SAVE


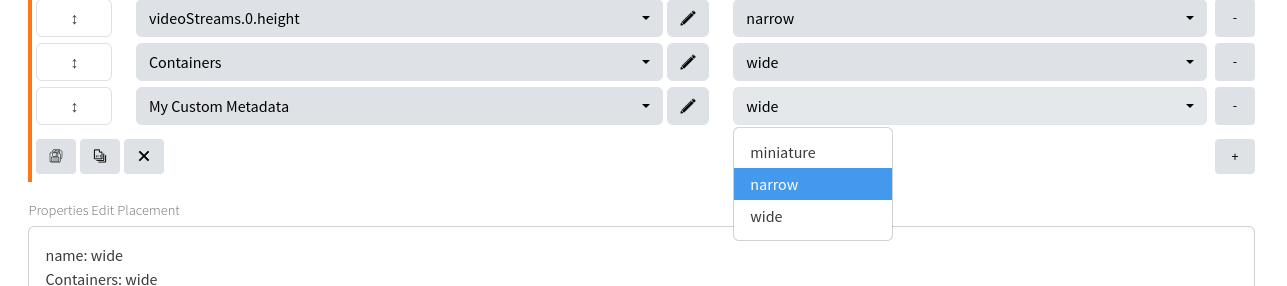
-
Go to “Properties Edit Placement“ Repeat same as point 6.


Editing metadata can be edited by selecting desired media then Actions and EDIT:
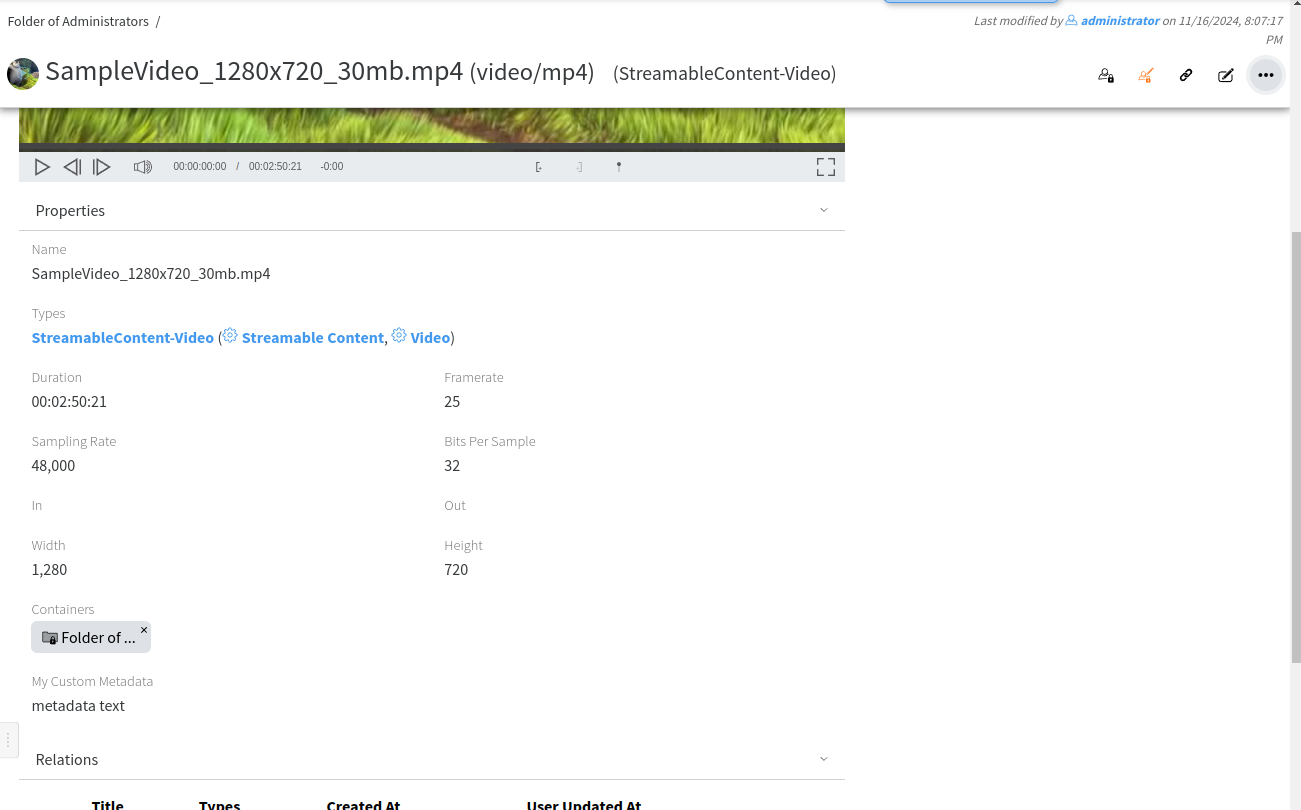
Example here illustrate how to add and modify a field called: My Custom Metadata. Attributes belonging to one media asset can be modified in the same way.
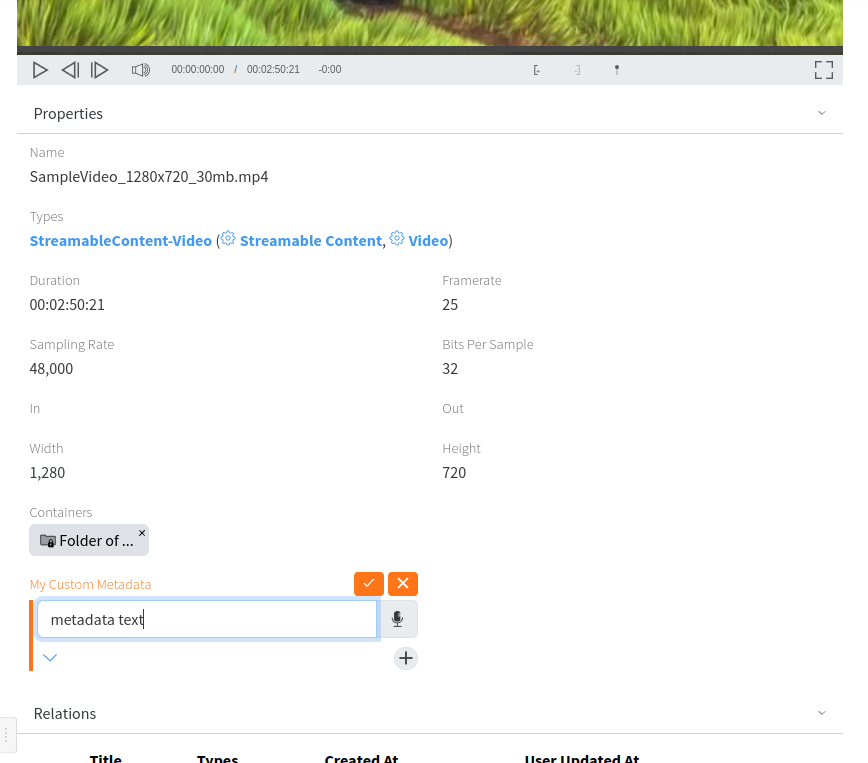
Here is our data:
Transcode a file
If you want to manually transcode a file from one resolution to another or in different format you can use the Transcode operation from the local Actions menu of the file as shown below:
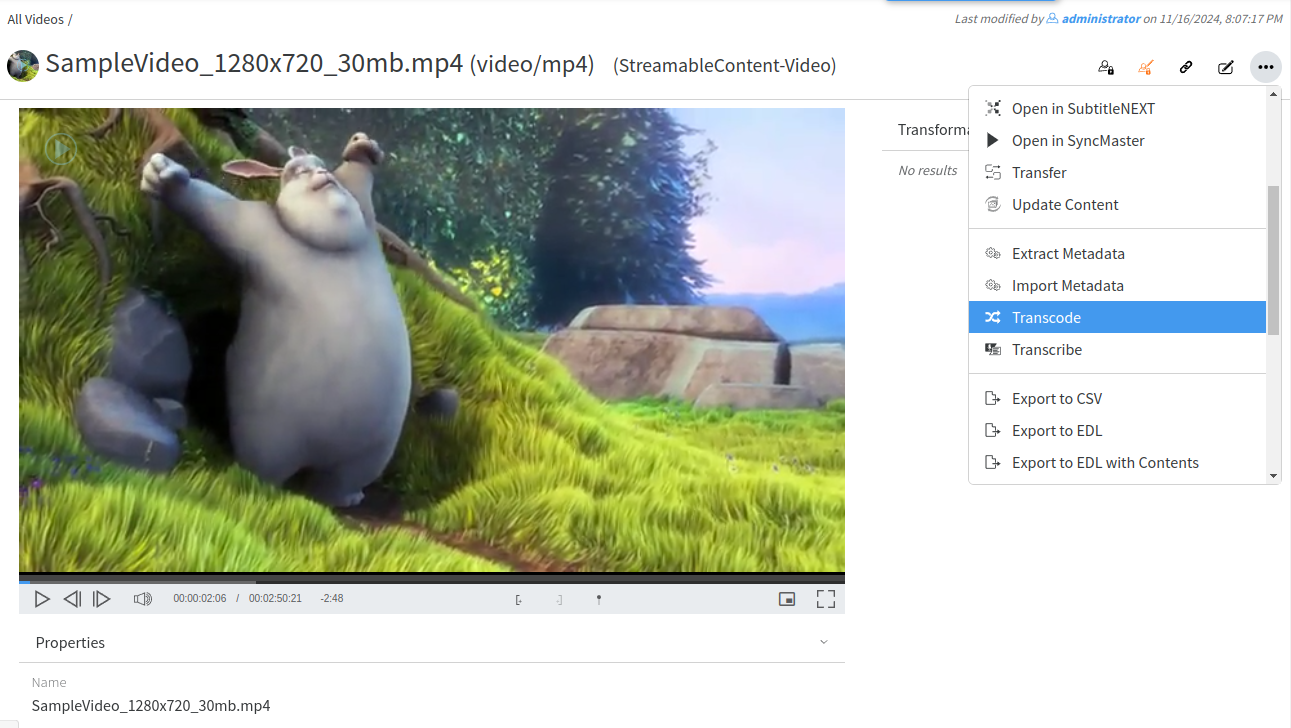
When you click the Transcode operation the following window will appear:

You can select the corresponding transcoding (transformation) template or create e new one if needed.
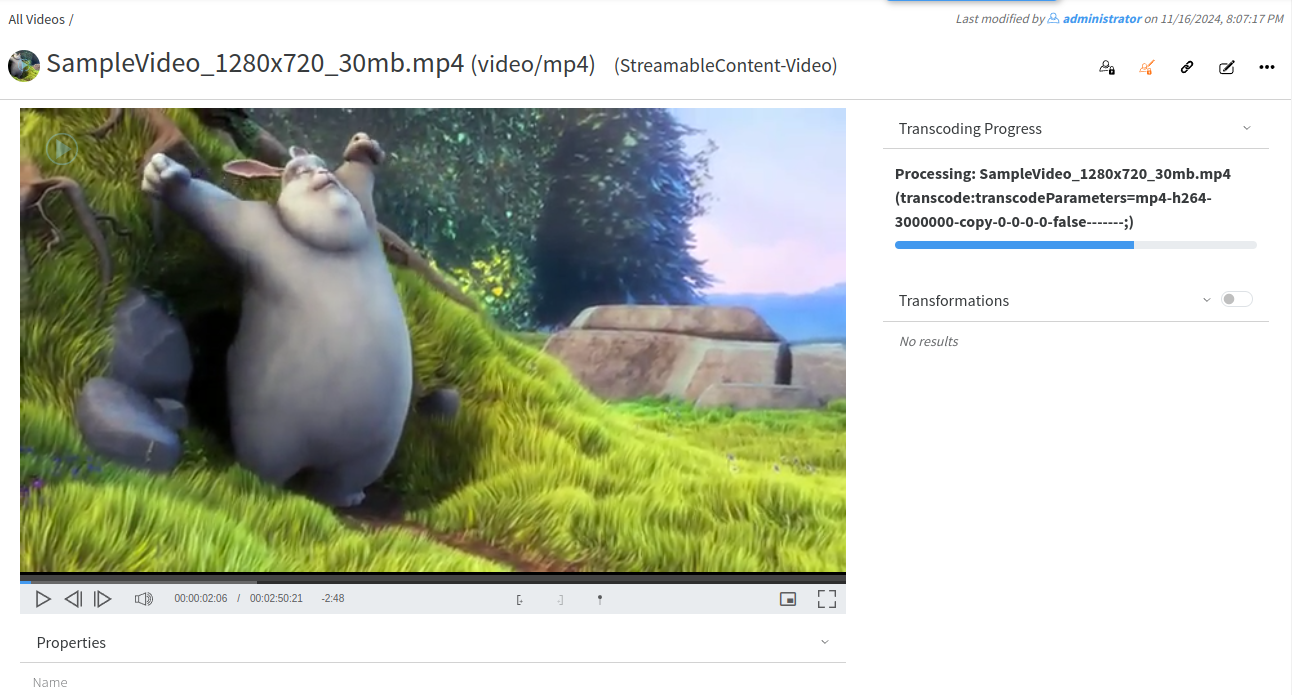
Transcoding progress is shown at the right:
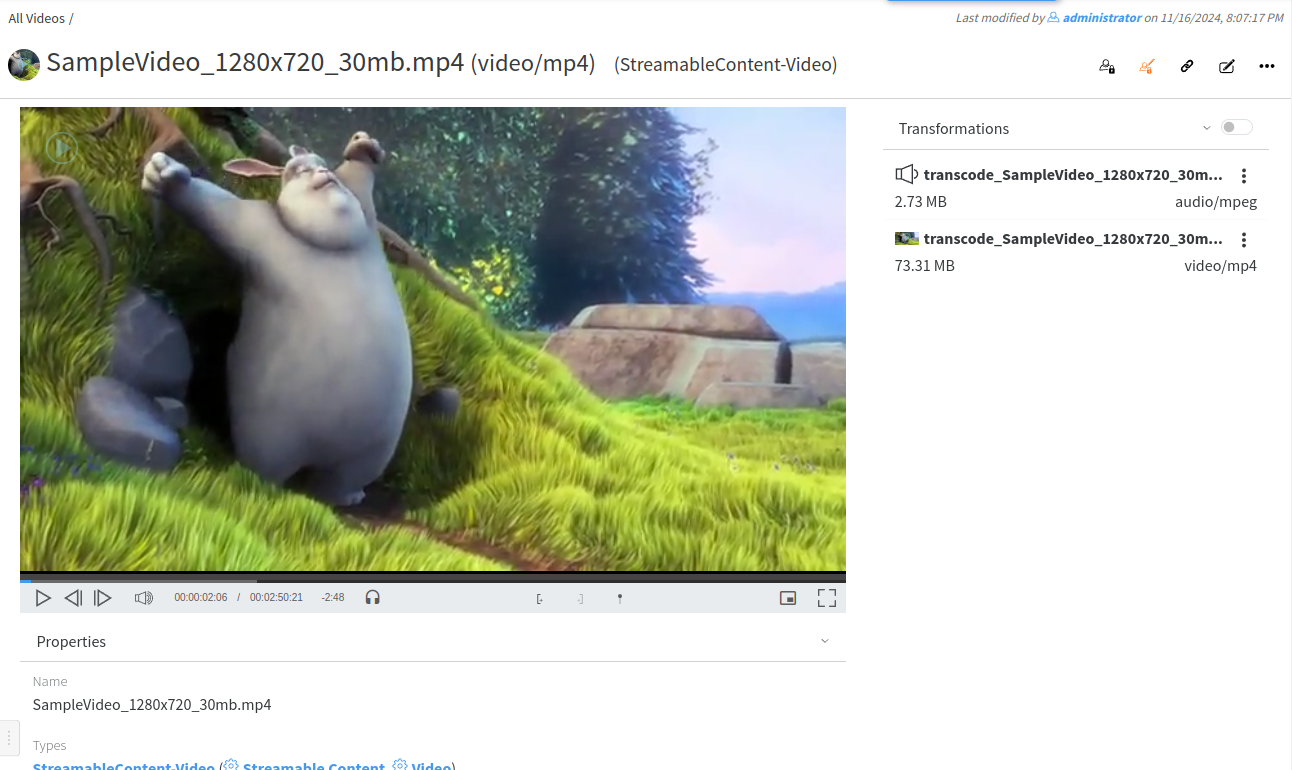
All ready transcodings are shown under Transformations:
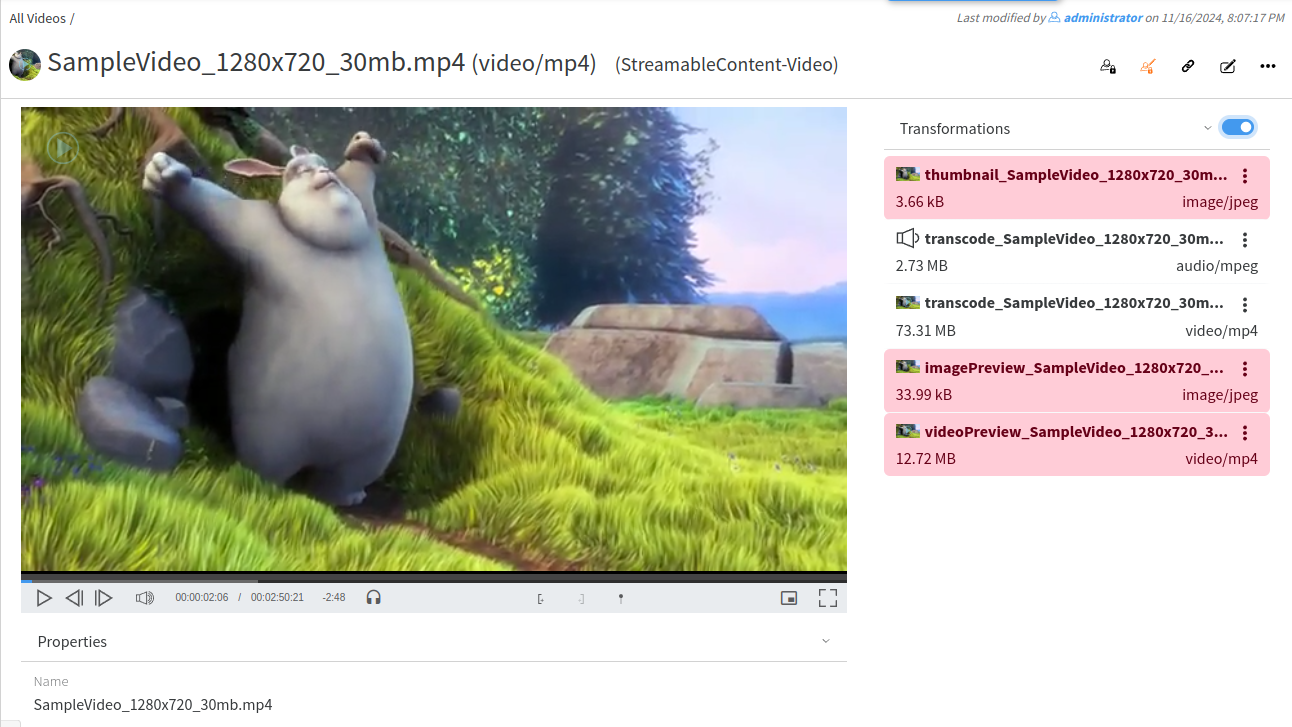
You can check "Show System Transformations" to list also the automatic transformations created by the system:

All system transformations are shown in red:
Transcoding templates creation and editing
Profuz LAPIS can trigger automatically transcoding processes according to workflow scenarios. E.g. Media content being ingested/uploaded into media mapped folders into no-native for the customer profile formats. Profuz LAPIS will recognize the incoming media profile formats and will start a transcoding process based on created transcoding presets.
1. Create a new Transcoding template from Create New → type or select Media Transcode Template then fill the encoding attributes. There are few important attribute fields such as encoder, container and resolution.
Hint: Contact support team for any syntax matters
Remark: Presets can be started automatically or manually.
For manual transcoding select media content then properties-> select from drop-down menu Transcode and desired transcoding preset.
When transcoding process is started, a progress bar will appear and will show to the user the status of the transcoding progress. Once it finished, the copy will be available for usage.
Remark: You can monitor all queued and ongoing transformations in the MAM -> Current Transcoddings, and view all finished transcoddings in MAM -> Finished Transcodings.
Example for editing Video Transcode Template
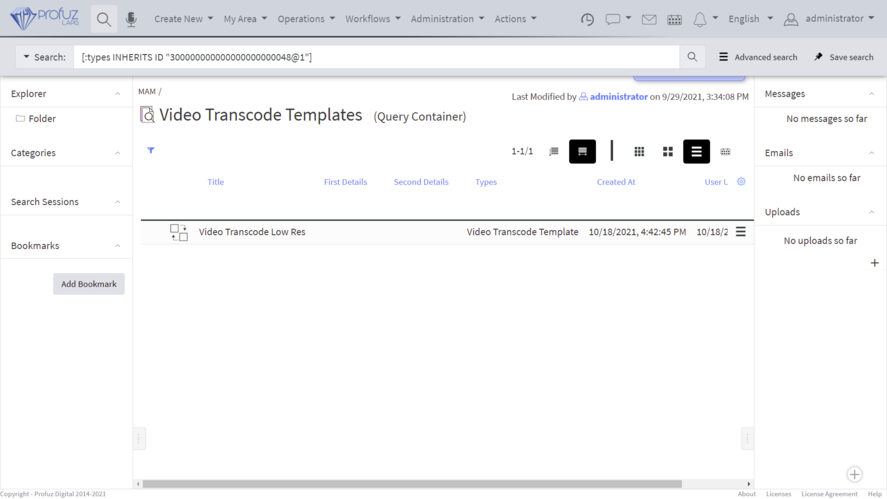
Go to MAM → Video Transcode Templates as shown below:
Select the template you want to edit and go to Actions →Edit:
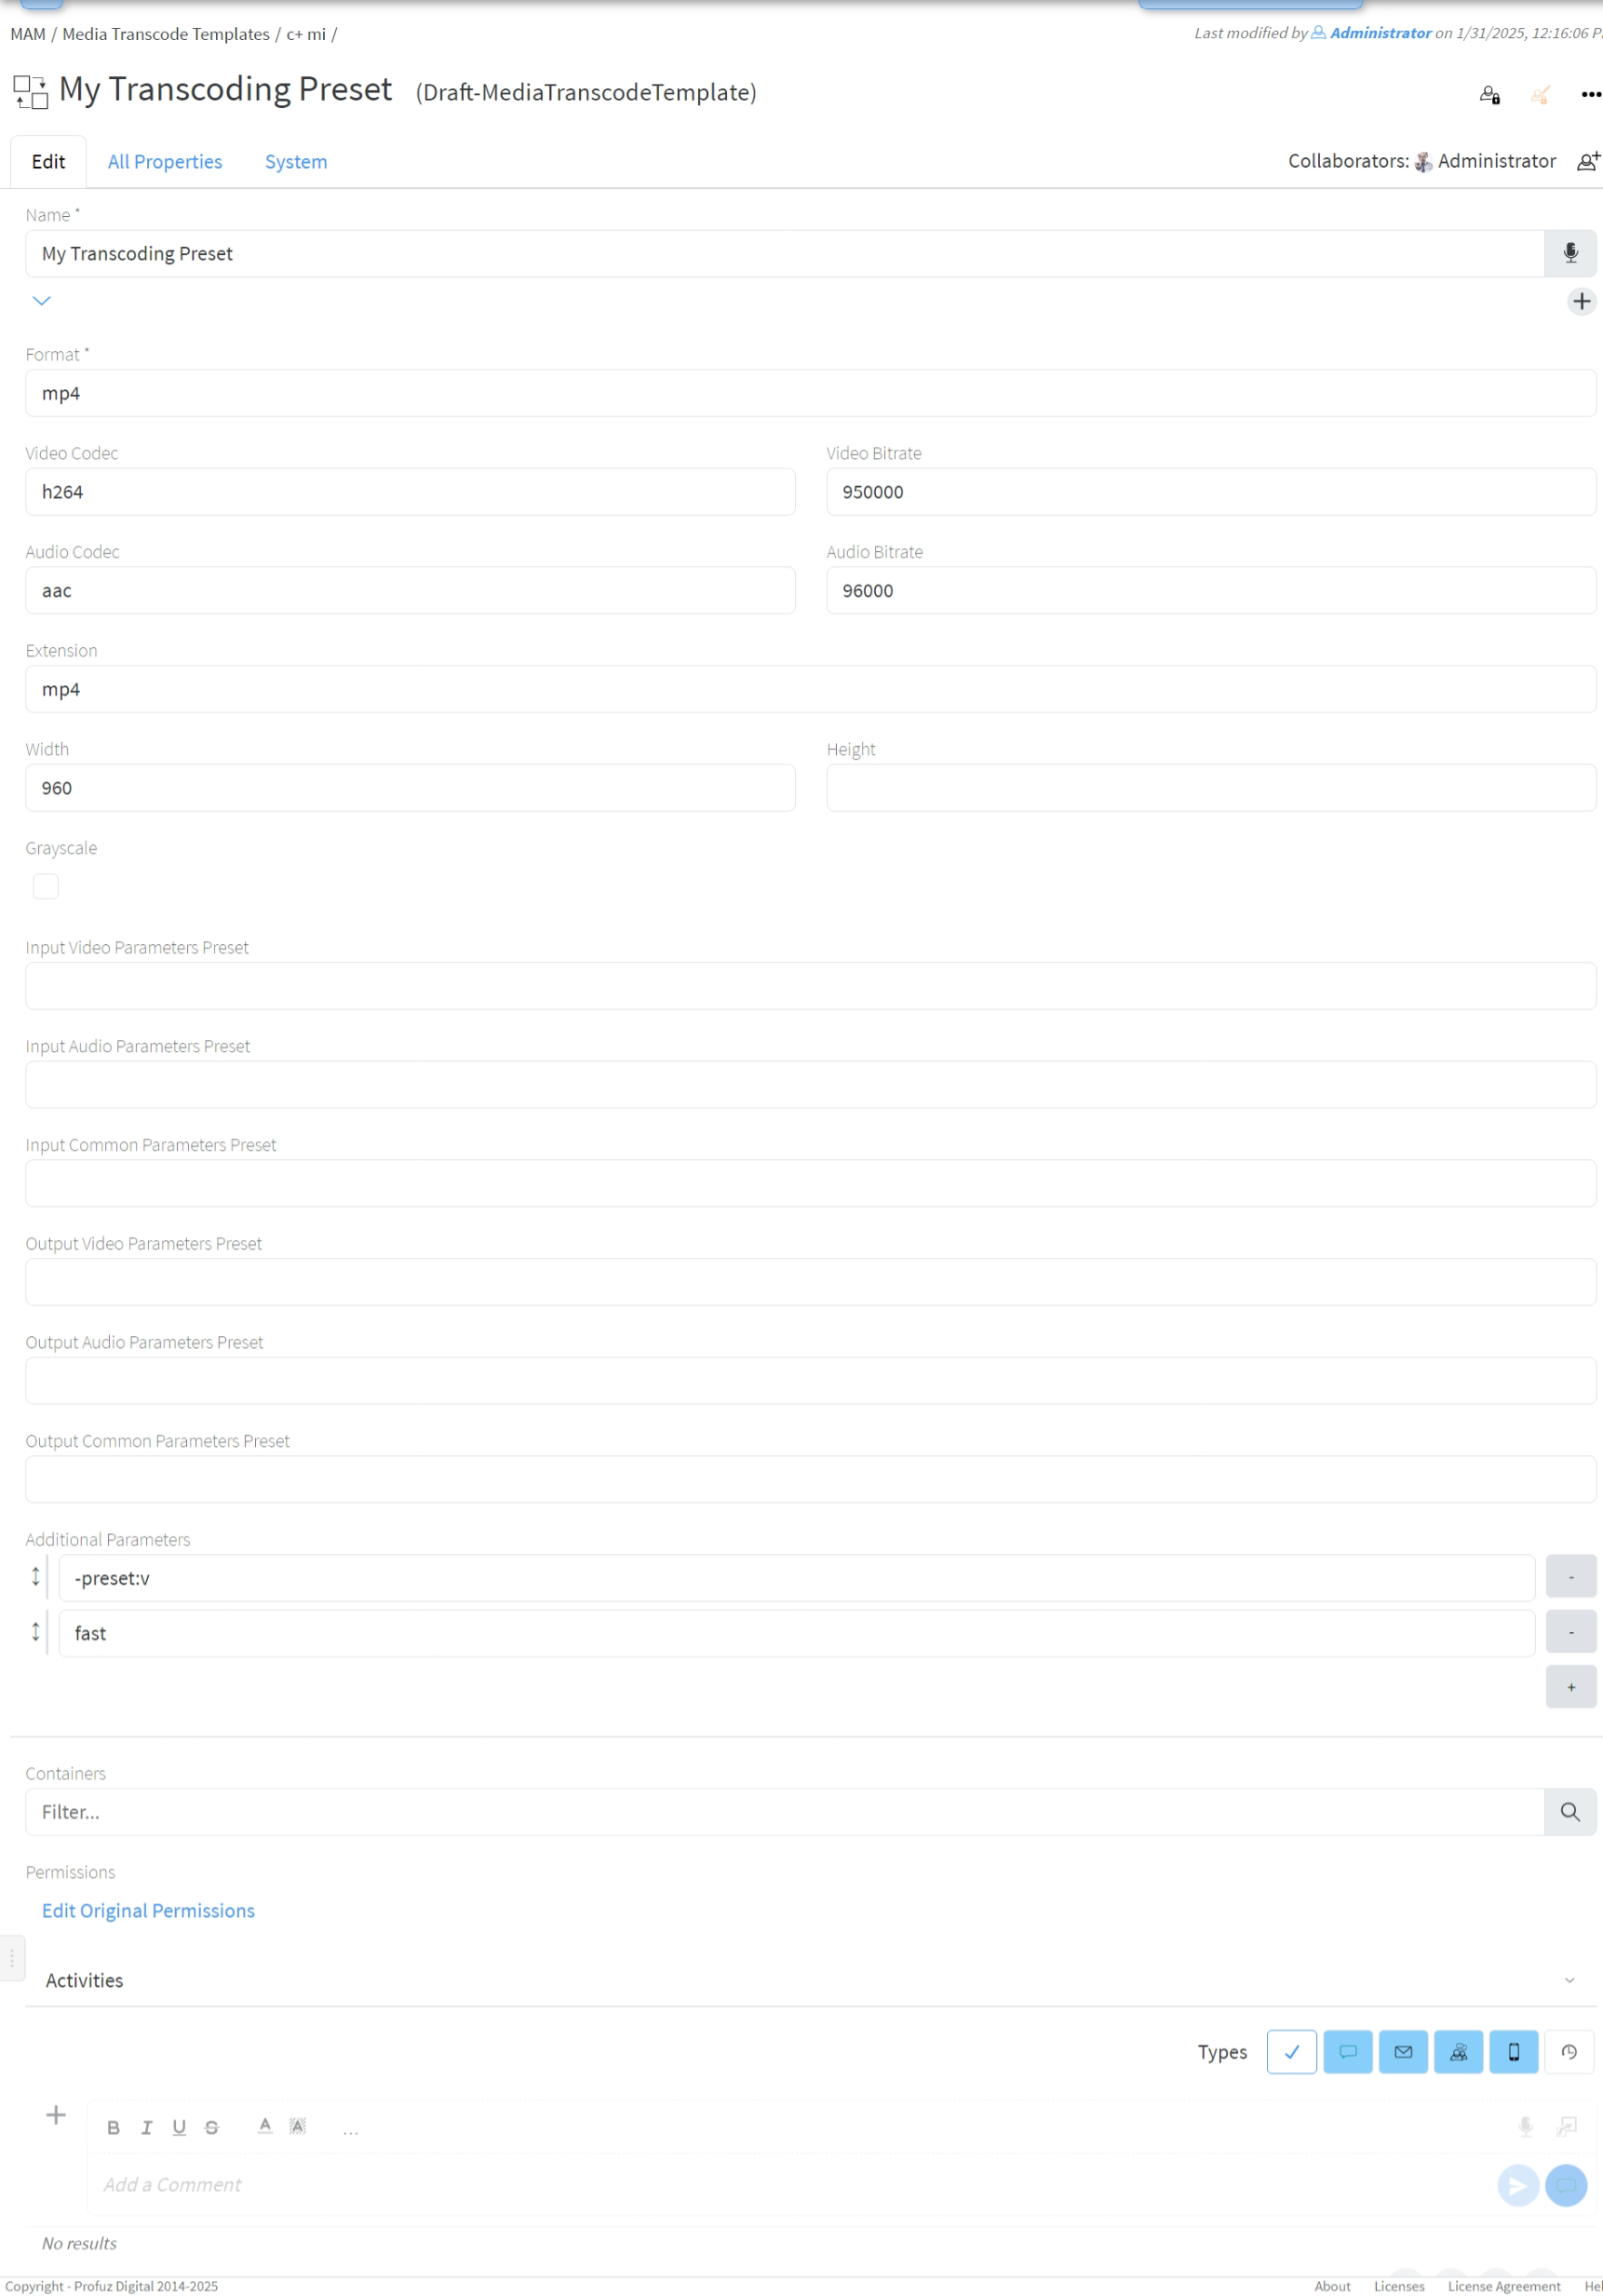
Template properties
- Format - file format. One of the specifiers for muxers as returned by
ffmpeg -formats. For example mp4, avi, flv, gif. You may find more info in ffmpeg formats documentation; - Video Codec - one of the video encoder specifiers as returned by
ffmpeg -codecs. For example h264 (for automatic selection of software or hardware encoding), libx264 (for software encoding of h264), h264_nvenc (for NVidia GPU encoder), mpeg2video. You may find more info in ffmpeg video encoders documentation; - Video Bitrate - bitrate in bits per second. For example 3000000 for 3 Mib/s;
- Audio Codec - one of the audio encoder specifiers as returned by
ffmpeg -codecs. For example aac, mp3, pcm_f16le. You may find more info in ffmpeg audio encoders documentations. - Audio Bitrate - bitrate in bits per second. For example 96000 for 96 Kib/s;
- Extension - file extension for the transcoded file;
- Width - for video formats specify the width of the video frame. Leave blank to use original width;
- Height - for video formats specify the height of the video frame. Set to -1 to calculate it based on aspect ratio;
- Grayscale - if checked a grayscale video will be produced;
- Input/Output Video/Audio/Common Parameter Preset - specify corresponding ffmpeg preset file. You may find more info in ffmpeg presets documentation;
- Additional Parameters - you may put any ffmpeg encoding or output option in this field. Each argument is put in separate line. You don't need to surround a parameter in quotes (they are needed only in command line). For all ffmpeg options execute
ffmpeg -h full. You may find more info for available parameters in ffmpeg documentation.
Organization
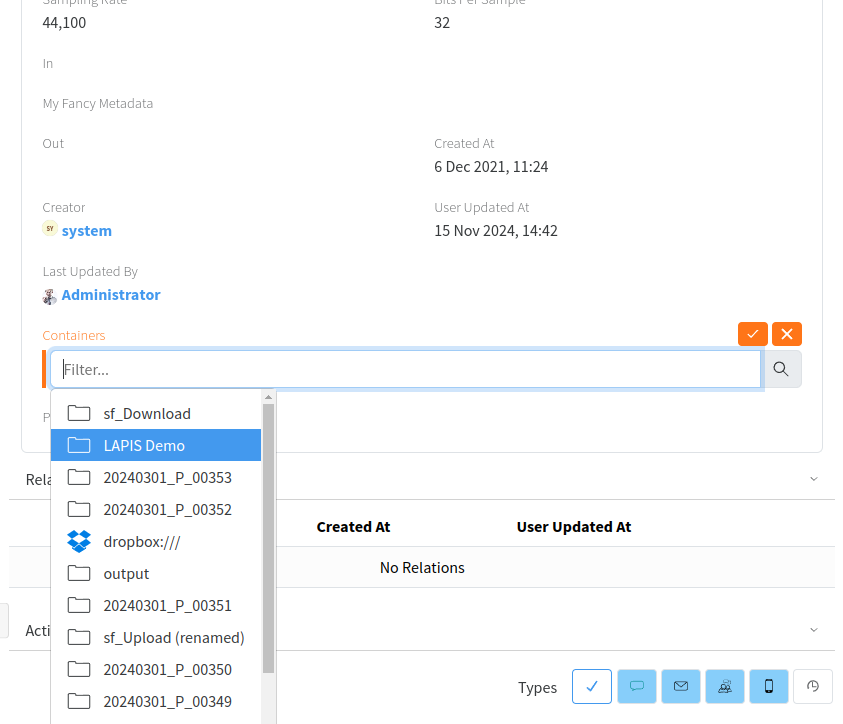
If you don’t find the appropriate container (folder, category, tag, etc) where you wish to classify your file, you can create a new one (if you have user rights for that) by clicking on the Search icon as shown here:
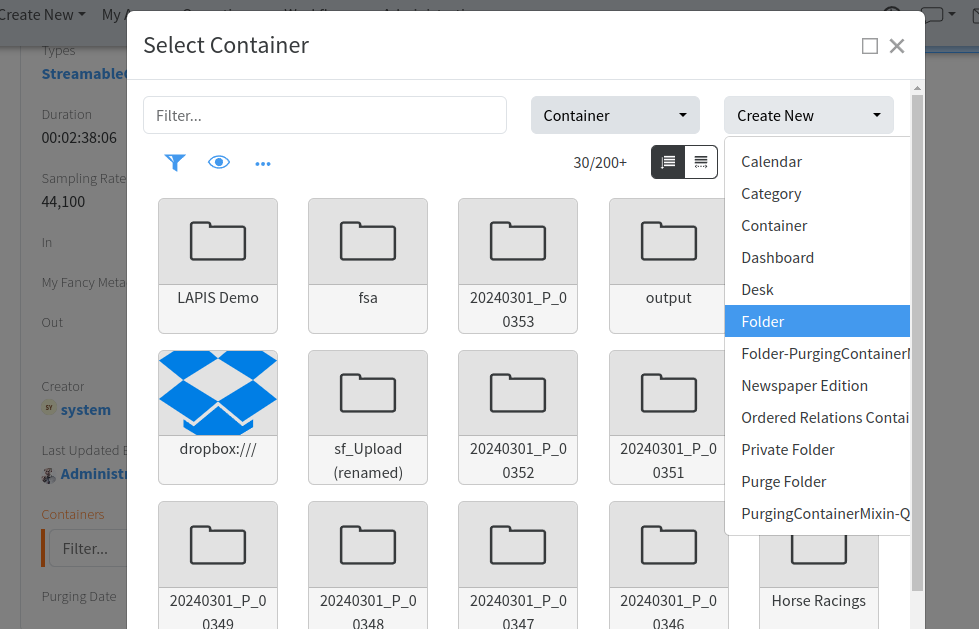
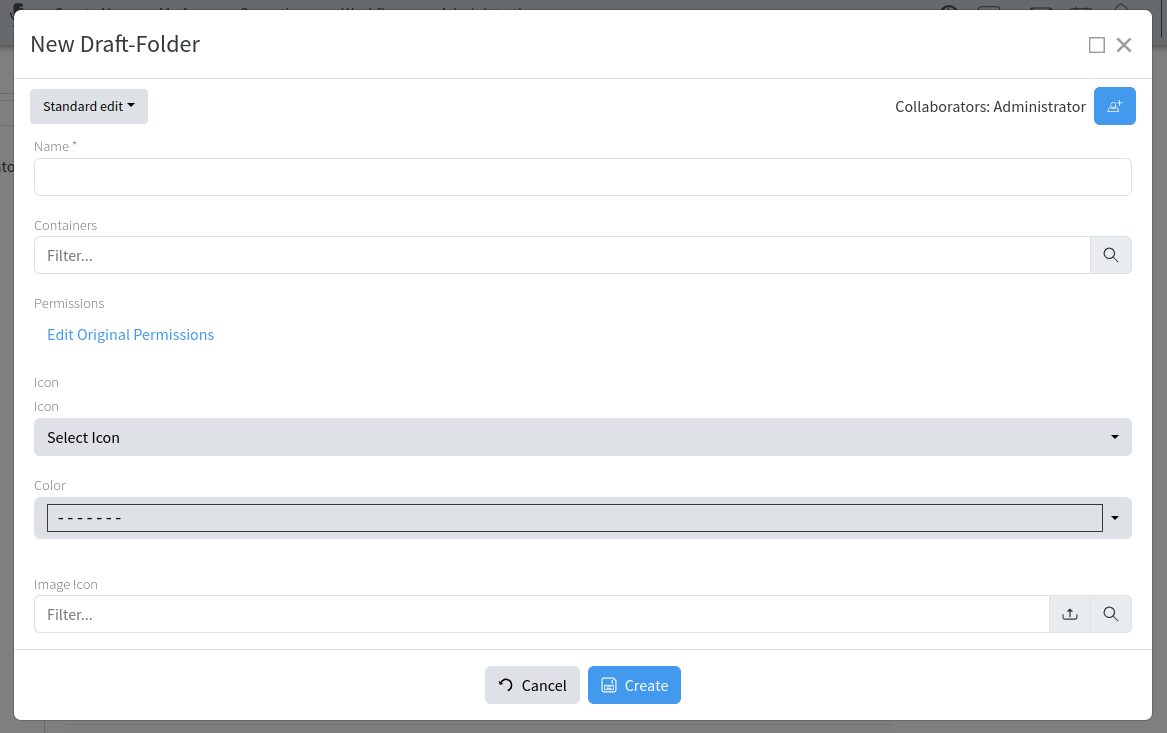
While creating a new Folder, for example, you can define several optional parameters such as - to which container it is linked, image, color and permissions as shown below:
Exporting
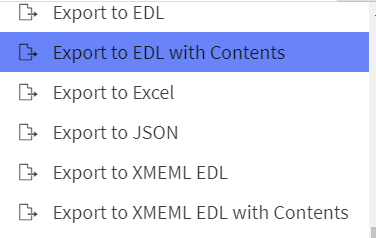
You can export а media list or media asset to the local hard drive with or without its contents using the following available options:
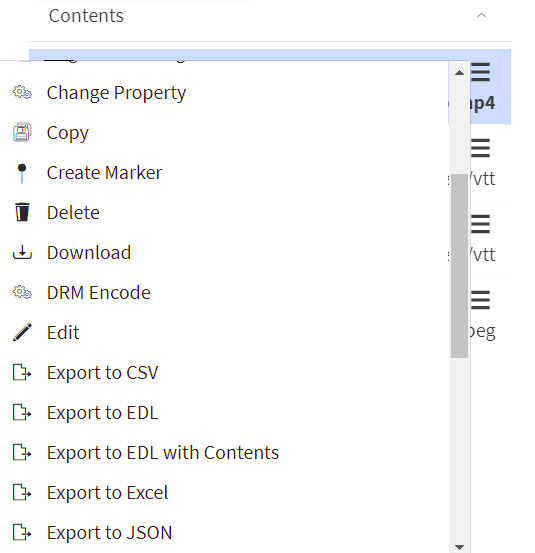
You can also export only some of the contents if necessary using the local Actions menu of the content itself as shown here:
See also Export for Video Editing software
Downloading
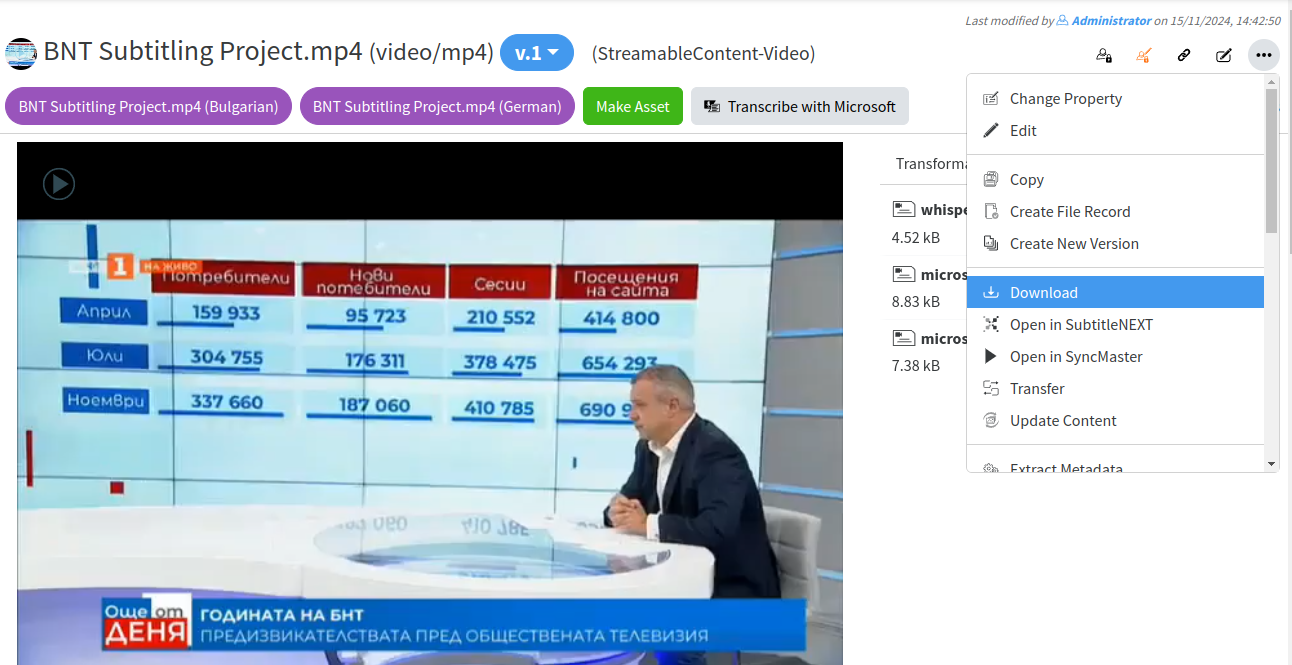
If you want to download a file or an asset with all its contents you can use the Download operation from the local menu of the file/asset as shown here:
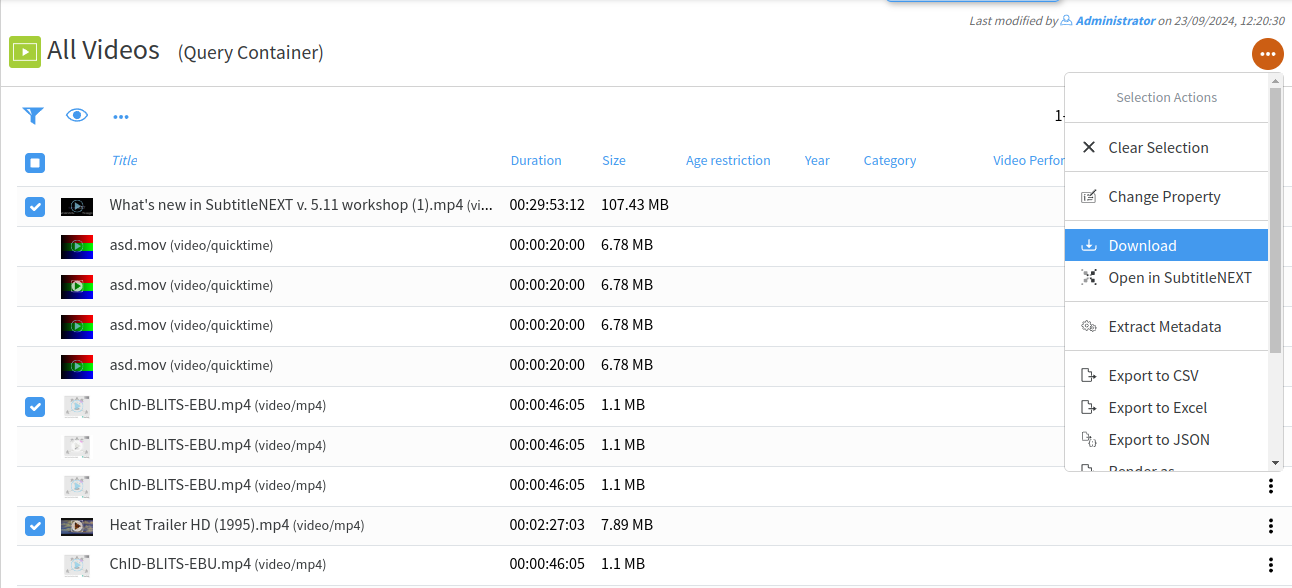
If you want to download multiple files or assets with their contents, you can do that by:
- Selecting multiple files/assets by clicking the check box in front of them
- Going to Selection Actions →Download
Moving contents
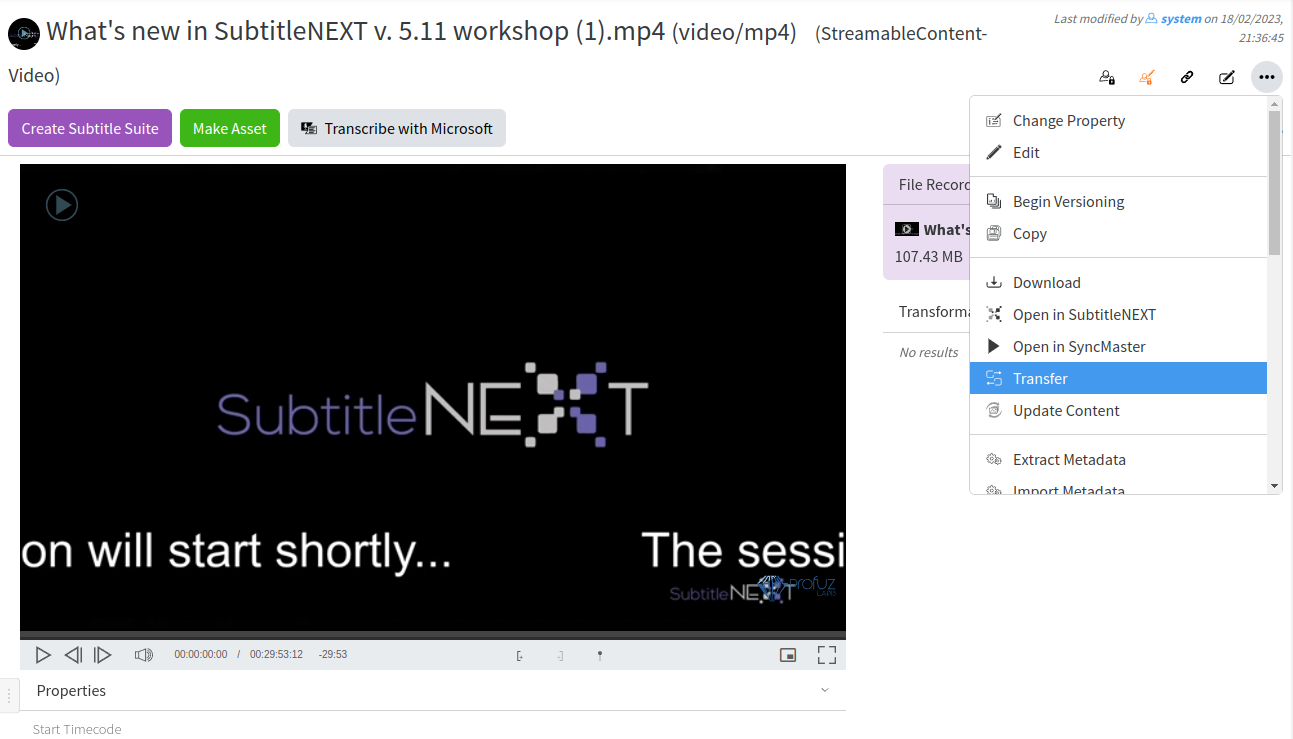
If you want to move a file from one location to another you can use the Transfer operation from the local Actions Menu of the corresponding file (s) as shown:
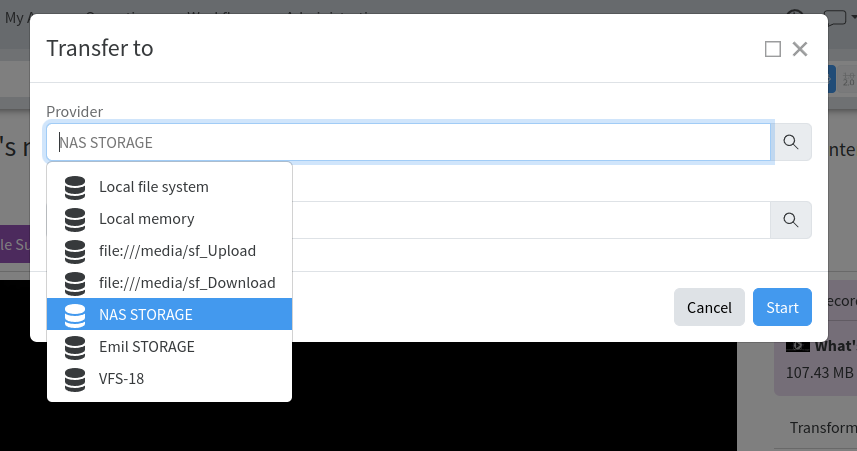
When you click on Transfer the following window will appear to choose your transfer destination:
Once the transfer starts, you will receive the following notification:

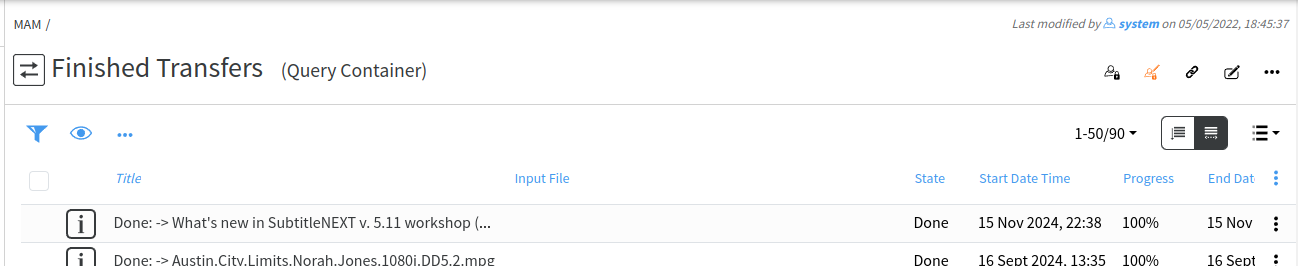
You can monitor progress in Current Transfers and see the ready transfer in Finished Transfers:
Transfers will create a File Record. A File Records contains all copies of the content in all locations:
Monitoring
To monitor all ongoing transfers with their progress, you can go to MAM → Current Transfers
To see all the transfers which have already been completed you can go to MAM →Finished Transfers as shown on the screenshot above
A list with finished or ongoing transfers will look like this:
Filtering
You can filter the list by writing in the columns where the filter sign appears:

This is valid for all the lists with results.
You can also change the columns which you want to see in the list by selecting the preferred ones. You can do that by selecting Change Columns from the table menu:
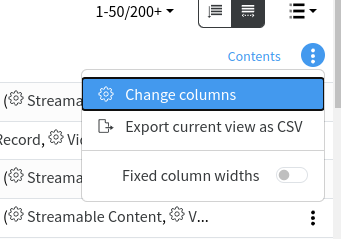
For example, here in the finished transfers list the following columns are available for selection:
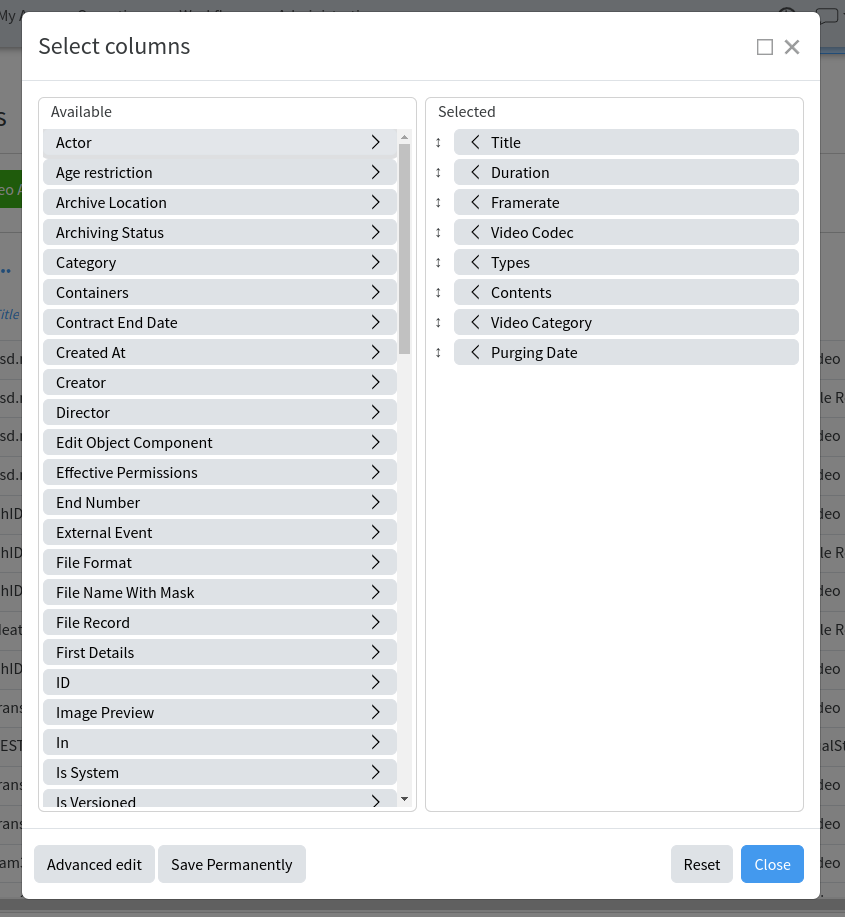
You can also rearrange the columns order by dragging the columns headers in the chosen order.
Reports
You can also export the list to some formats or documents as shown here:
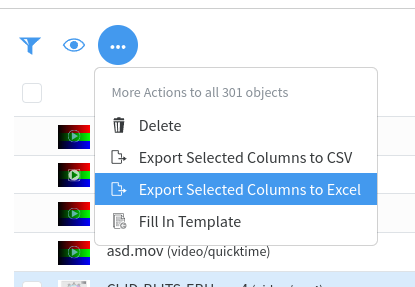
All these options are available for all Query Containers.